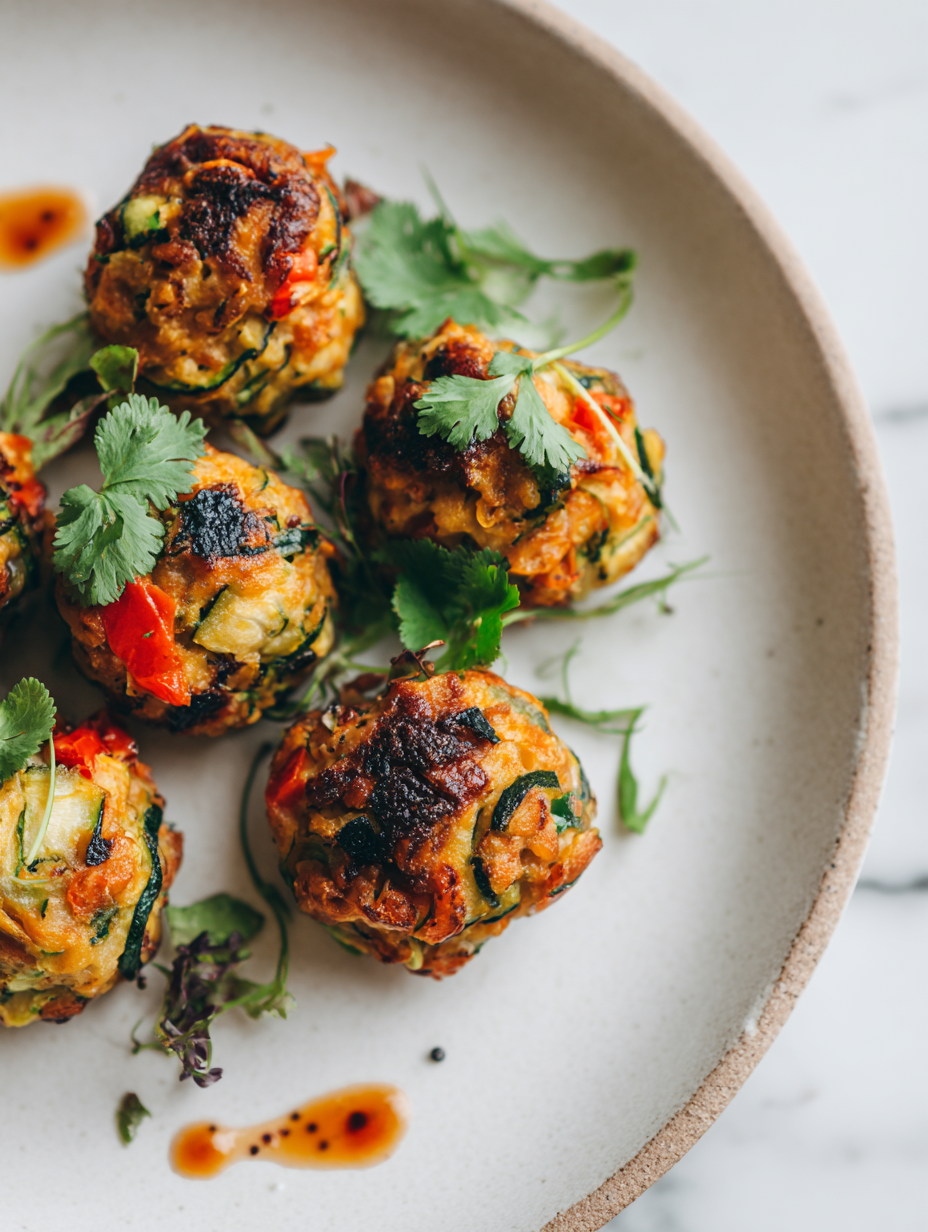
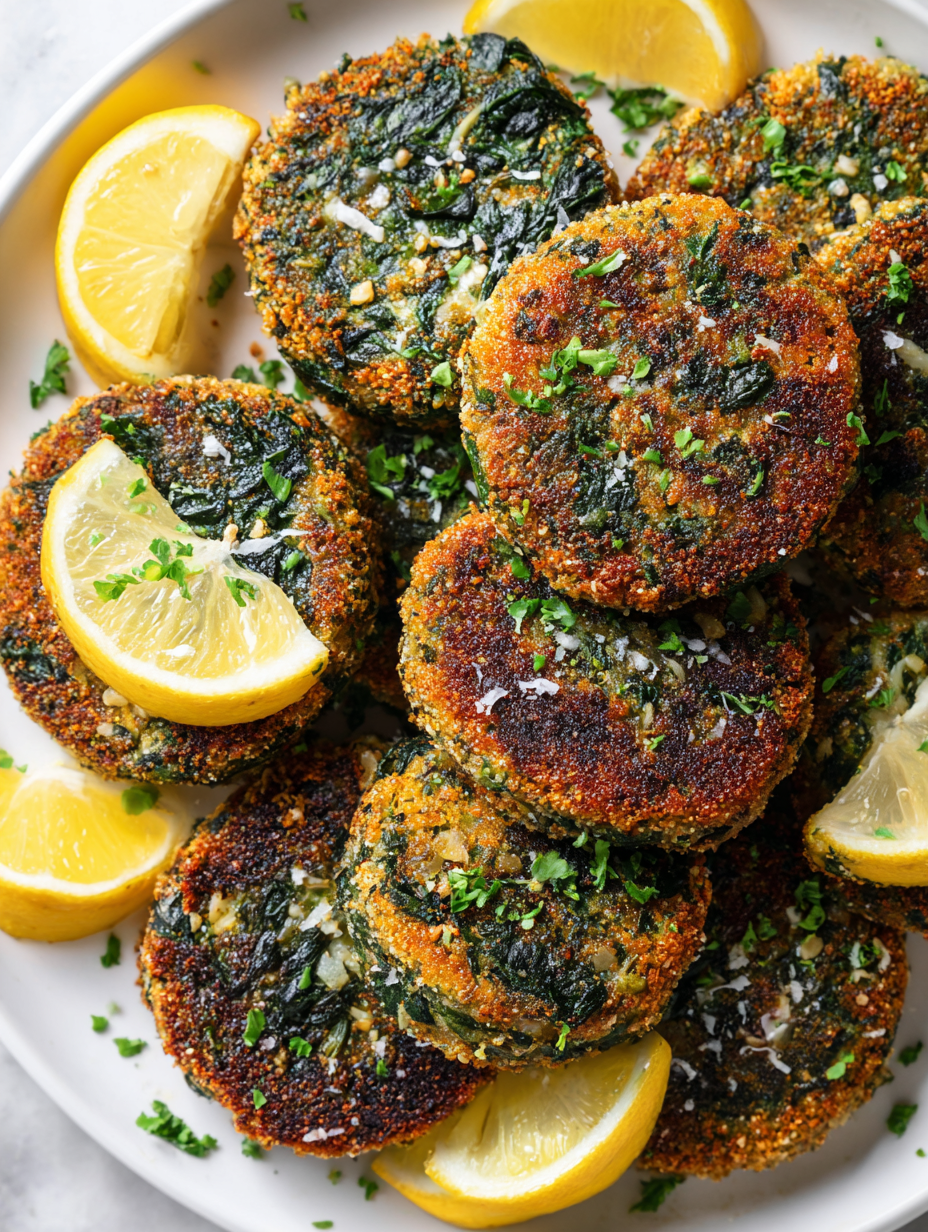
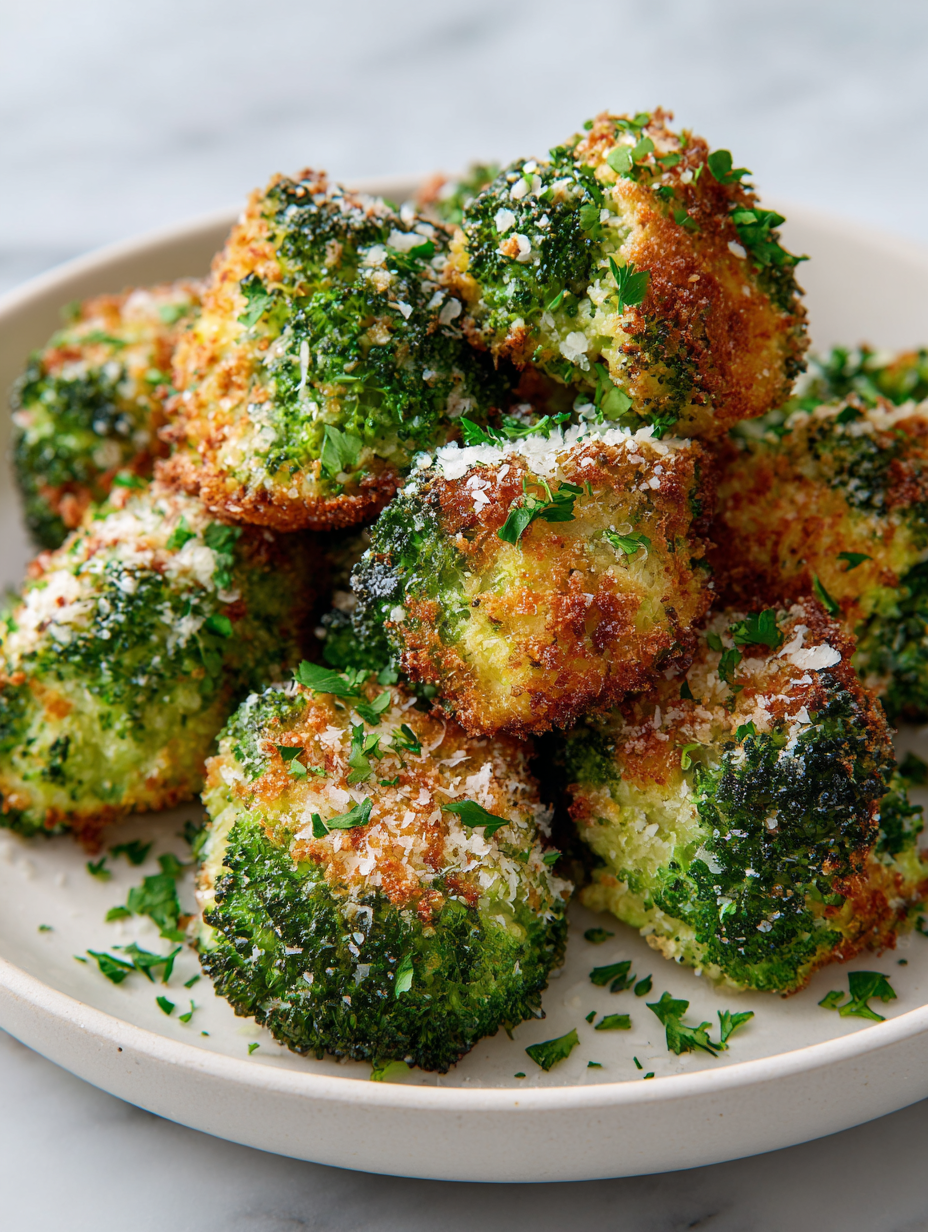
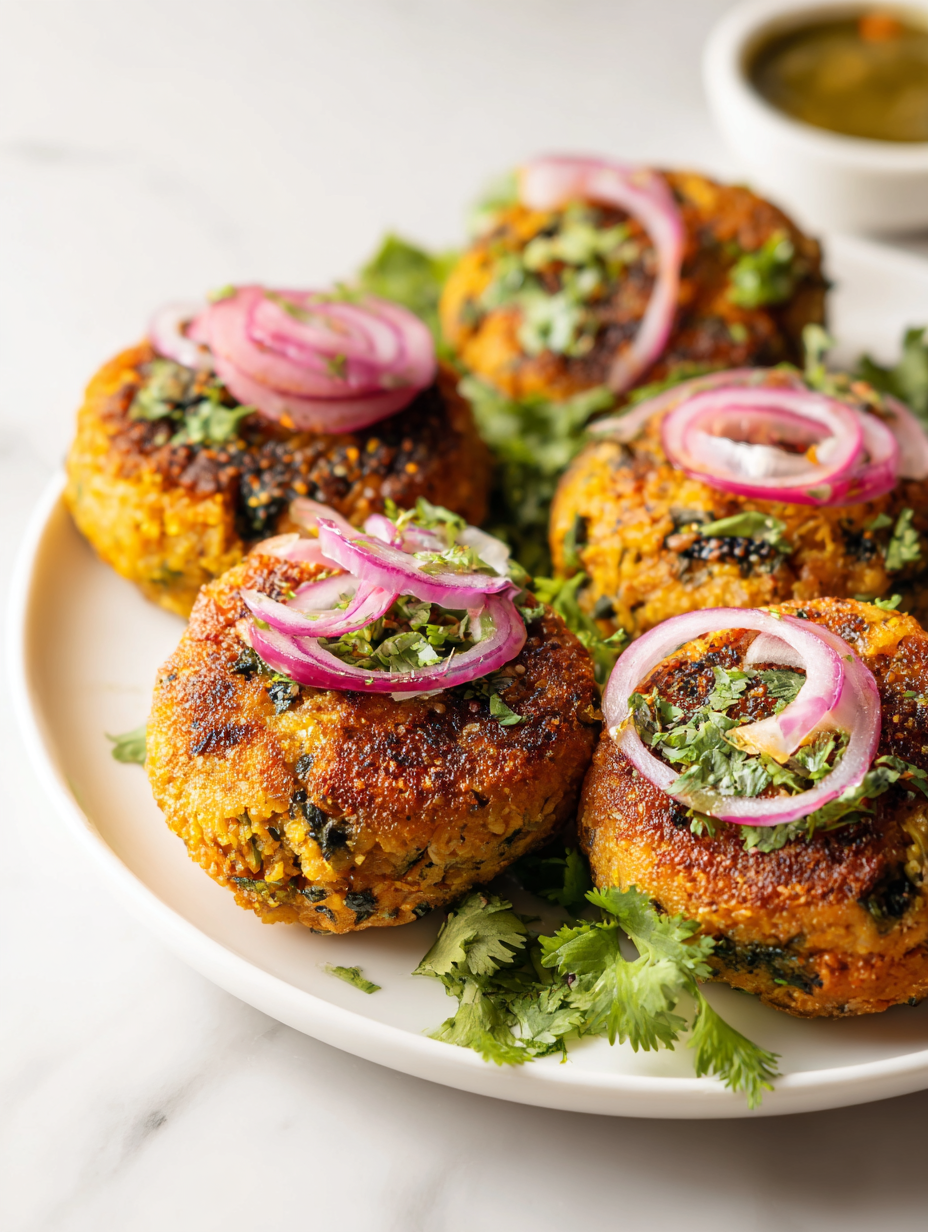
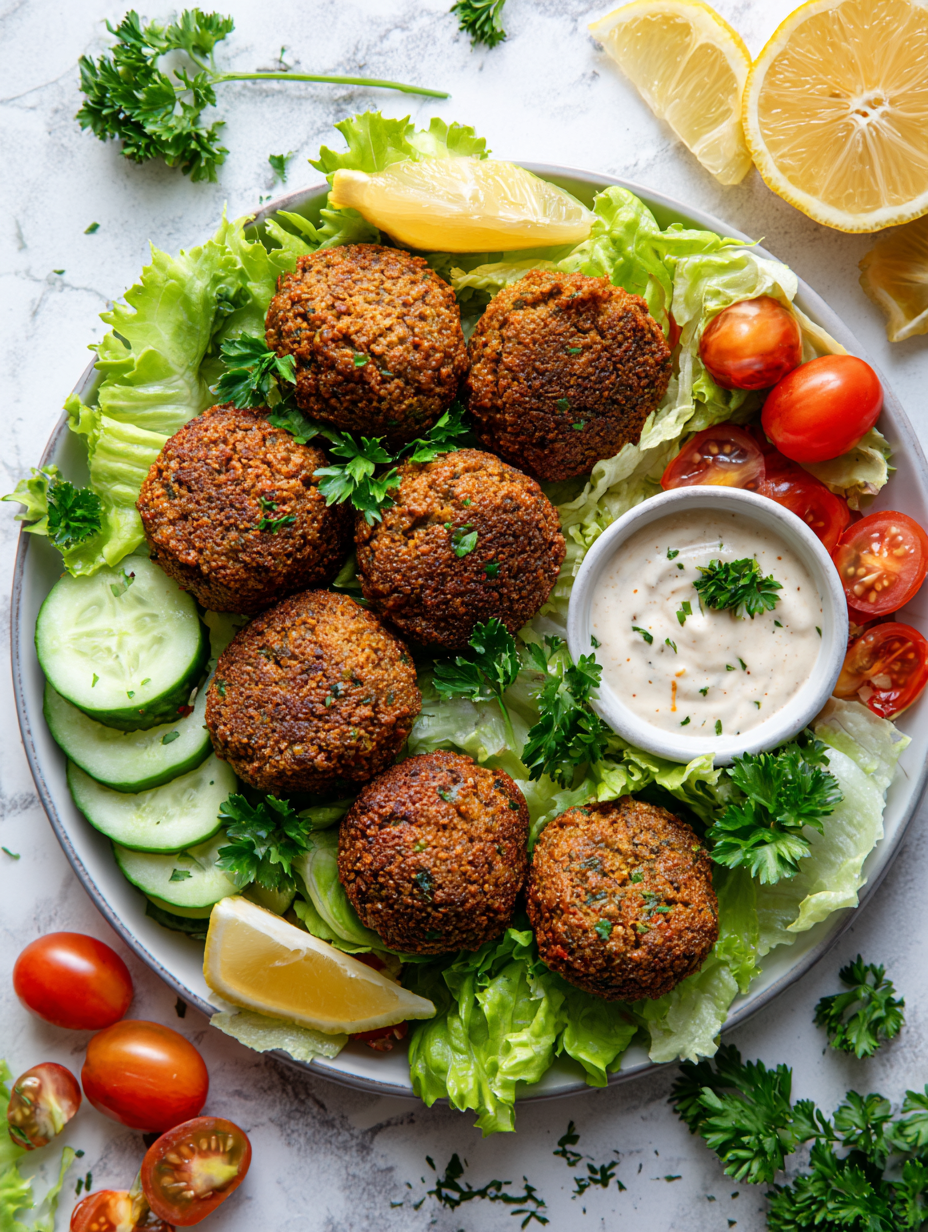
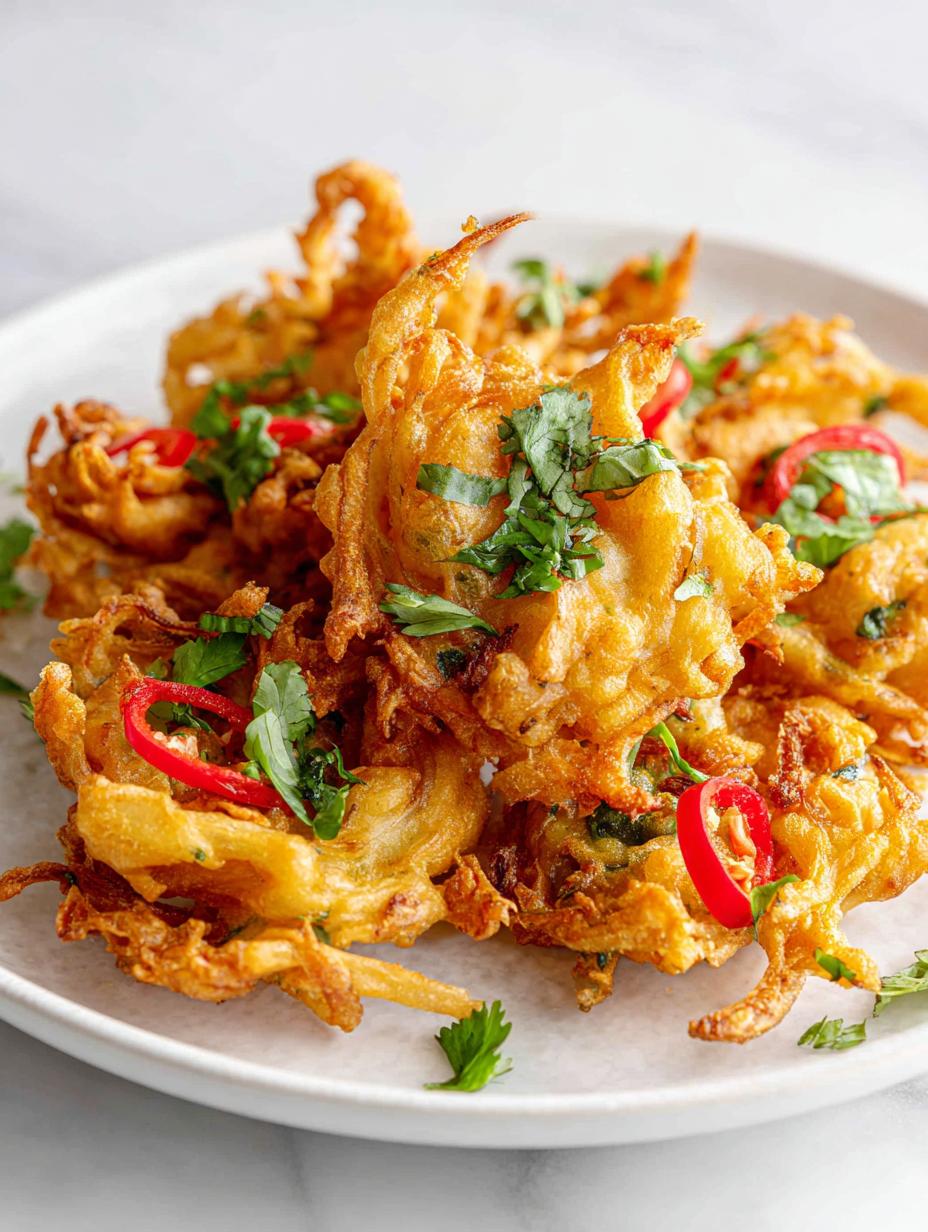
Blog

  • Morning Magic: Pumpkin Spice Overnight Oats for Unexpected Comfort

    Morning Magic: Pumpkin Spice Overnight Oats for Unexpected Comfort

    Few breakfasts turn a busy morning into a cozy retreat faster than a jar of Pumpkin Spice Overnight Oats. This recipe isn’t just about convenience; it’s a small act of indulgence prepared the night before, waiting for you to discover at dawn. The aroma of cinnamon, nutmeg, and pumpkin waking up in the fridge feels like a silent celebration of fall.

    I started making these oats because I needed something that balanced convenience with the urge for seasonal flavors. The first spoonful was a surprise—the pumpkin gave it a creamy richness, contrasted by the crunch of toasted pecans. It’s a special treat that transforms a simple morning routine into a moment of joy.

    Pumpkin Spice Overnight Oats

    Pumpkin Spice Overnight Oats is a no-cook breakfast dish where rolled oats are soaked overnight in a mixture of pumpkin puree, milk, and warming spices. The final dish has a creamy texture with a hint of spice, topped with crunchy nuts or seeds for added contrast.
    Prep Time 10 minutes
    Total Time 10 minutes
    Servings: 2
    Course: Main Course
    Cuisine: American
    Calories: 250

    Ingredients
      

    • 1 cup rolled oats preferably old-fashioned
    • 1/2 cup pumpkin puree canned or homemade
    • 1/2 cup milk dairy or plant-based
    • 1 tablespoon maple syrup or honey, for sweetness
    • 1/2 teaspoon cinnamon ground
    • 1/4 teaspoon nutmeg ground
    • 1/4 teaspoon cloves ground (optional)
    • 1/4 teaspoon salt
    • 1/4 cup toasted pecans chopped, for topping

    Equipment

    • Mixing bowl
    • Jar or airtight container

    Method
     

    1. Combine the rolled oats, pumpkin puree, milk, maple syrup, cinnamon, nutmeg, cloves, and salt in a mixing bowl. Whisk everything together until the mixture is smooth and the oats are evenly coated.
    2. Pour the oat mixture into a jar or airtight container, spreading it out evenly.
    3. Seal the container and place it in the refrigerator overnight, allowing the oats to absorb the flavors and soften.
    4. The next morning, remove the oats from the fridge and give them a gentle stir to loosen the mixture and distribute the spices.
    5. Spoon the oats into serving bowls, revealing their creamy, pudding-like consistency dotted with specks of pumpkin and spices.
    6. Top each serving with chopped toasted pecans for crunch and added flavor.

    Notes

    Feel free to add other toppings like fresh fruit, seeds, or a drizzle of honey. For extra creaminess, top with a dollop of yogurt before serving.

    This recipe is perfect for those fleeting moments when seasonal comfort feels just right. It’s adaptable too—add a splash of maple syrup or a sprinkle of pumpkin seeds to customize your morning. As the days grow colder, this bowl promises warmth, familiarity, and a touch of spice to brighten your day.

    Batching up these oats means you wake up to a bowl of flavor that’s ready in minutes. The combination of textures and seasonal scents feels like a gentle reminder to savor the small, cozy pleasures. All that’s left is to enjoy the quiet joy of a breakfast that feels like a little celebration.

  • Pumpkin Oatmeal: A Cozy Morning Revolution

    Pumpkin Oatmeal: A Cozy Morning Revolution

    Imagine waking up to the rich, spicy aroma of roasted pumpkin mingling with the comforting scent of cinnamon and oats. This recipe turns a simple bowl into a warm hug, perfect for chilly mornings when you crave something satisfying yet nourishing. It’s not just breakfast—it’s a celebration of fall’s bounty, designed to start your day with a cozy twist.

    The unusual addition of roasted pumpkin elevates this oatmeal from routine to extraordinary. It offers a velvety texture and a gentle sweetness that pairs beautifully with the earthiness of oats and the warmth of fall spices. Preparing it fills the kitchen with inviting smells, a reminder that mornings can be both hearty and heartwarming.

    Roasted Pumpkin Spiced Oatmeal

    This oatmeal is made by blending roasted pumpkin into cooked oats and adding warm spices like cinnamon. The dish has a creamy, velvety texture with a hint of natural sweetness from the pumpkin, topped with a sprinkle of cinnamon for aroma. It offers a hearty and comforting breakfast experience with vibrant fall flavors.
    Prep Time 10 minutes
    Cook Time 20 minutes
    Total Time 30 minutes
    Servings: 2
    Course: Main Course
    Cuisine: Comfort Food
    Calories: 250

    Ingredients
      

    • 1 cup pumpkin puree roasted or canned
    • 1 cup old-fashioned rolled oats
    • 2 cups water or milk for cooking oats
    • 1 tsp cinnamon ground
    • 2 tbsp maple syrup or honey, for sweetness
    • salt a pinch
    • 1 tbsp olive oil or neutral oil for roasting

    Equipment

    • Baking sheet
    • Saucepan
    • Wooden spoon
    • Measuring Cups and Spoons

    Method
     

    1. Preheat your oven to 400°F (200°C). Spread the pumpkin flesh evenly on a baking sheet and roast for about 20 minutes until it becomes fragrant and slightly caramelized. Allow it to cool slightly, then mash until smooth.
    2. In a saucepan, bring water or milk to a gentle boil. Stir in the oats, a pinch of salt, and cook over medium heat, stirring occasionally, until the oats are tender and creamy, about 5-7 minutes.
    3. Add the mashed roasted pumpkin and cinnamon to the cooked oats, stirring well to combine everything evenly.
    4. Stir in the maple syrup, adjusting the amount to your preferred level of sweetness. Let the mixture simmer for another minute to meld the flavors.
    5. Pour the oatmeal into bowls and drizzle with additional maple syrup if desired. Sprinkle a pinch of cinnamon on top for extra warmth and aroma.
    6. Serve the warm oatmeal immediately, enjoying its velvety texture and cozy fall flavors.

    In a world obsessed with quick fixes, this pumpkin oatmeal reminds us to slow down and savor flavors that nourish both body and soul. Its simplicity makes it a weekday hero and a weekend treat that feels indulgent but is packed with healthy ingredients. A bowl of this will always feel like a seasonal hug, no matter the weather outside.

    As the seasons shift and pumpkin becomes more than just a holiday decoration, this recipe makes staying cozy effortless. Whether you top it with nuts, seeds, or a drizzle of honey, it’s a flexible canvas that celebrates fall’s flavors. Sometimes, the simplest pleasures are the most worth savoring.

  • Peach Crisp That’s Unapologetically Cozy and Irresistible

    Peach Crisp That’s Unapologetically Cozy and Irresistible

    Few desserts evoke the summer sunshine quite like a perfectly baked peach crisp. But today, I want to take this classic to a new dimension—think a swirl of cinnamon, a sprinkle of toasted oats, and a secret hint of vanilla that amplifies each bite.

    Many recipes settle for just ripe peaches, but I love the thrill of a tart, almost tangy peach that wakes up your taste buds as they caramelize under a crunchy topping. This dish is best savored on a warm afternoon, the scent alone promising sweet bliss.

    As I layer the juicy peaches with a buttery streusel, I remember childhood afternoons helping my grandmother prep her kitchen, the air thick with baking spices. This recipe isn’t just about comfort—it’s about making new memories every time you bake it.

    Peach Crisp with Cinnamon and Toasted Oats

    This peach crisp features juicy, slightly tart peaches layered with a buttery streusel topping flavored with cinnamon, vanilla, and toasted oats. The dish is baked until bubbling and golden, resulting in a warm dessert with a crisp, crumbly texture and a fragrant aroma.
    Prep Time 20 minutes
    Cook Time 40 minutes
    Total Time 1 hour
    Servings: 6
    Course: Main Course
    Cuisine: American
    Calories: 250

    Ingredients
      

    • 6 cups ripe peaches, sliced peeled and pitted
    • 1 cup granulated sugar
    • 1 tablespoon lemon juice freshly squeezed
    • 1 teaspoon ground cinnamon
    • 1 pinch salt
    • 1 cup old-fashioned rolled oats toasted lightly
    • 1/2 cup all-purpose flour
    • 1/2 cup brown sugar
    • 1/2 cup unsalted butter cold and cubed
    • 1 teaspoon vanilla extract
    • 1 cup toasted oats for topping

    Equipment

    • 9×13-inch baking dish
    • Mixing bowls
    • Oven
    • Measuring Cups and Spoons
    • pastry cutter or fork
    • spoon for mixing

    Method
     

    1. Preheat your oven to 350°F (175°C) and lightly grease your baking dish to prevent sticking.
    2. In a large mixing bowl, toss the sliced peaches with sugar, lemon juice, cinnamon, and a pinch of salt until well coated. This will enhance the natural flavor and help the peaches release their juices during baking.
    3. Pour the peach mixture into the prepared baking dish, spreading it out evenly to create a uniform layer.
    4. In a separate bowl, combine the oats, flour, and brown sugar. Mix them together to form the base for your streusel topping.
    5. Add the cold, cubed butter to the bowl and use a pastry cutter, fork, or your fingers to cut the butter into the dry ingredients until the mixture resembles coarse crumbs with some pea-sized pieces. This creates a flaky, crunchy topping.
    6. Stir in the vanilla extract for a subtle aromatic flavor that complements the peaches and cinnamon.
    7. Sprinkle the streusel evenly over the layered peaches, gently pressing it down to ensure good coverage and a cohesive topping.
    8. Place the baking dish in the preheated oven and bake for about 40 minutes, or until the topping is golden brown and the filling bubbles around the edges.
    9. Remove the peach crisp from the oven and let it cool slightly for about 10 minutes; the juices will thicken a bit and the aroma will be irresistible.
    10. Serve the warm peach crisp with a scoop of vanilla ice cream or a dollop of whipped cream, if desired, to add extra richness.

    Notes

    For extra flavor, toast the oats lightly before adding them to the topping. Make sure the butter is cold for a flakier streusel. This dessert pairs beautifully with cold dairy or a drizzle of honey.

    This peach crisp is a celebration of seasonal bounty, perfect for those fleeting summer days when peaches are at their peak. It also lends itself beautifully to casual gatherings, where the aroma alone can draw everyone to the table.

    Whether served warm with a scoop of vanilla ice cream or on its own, it’s a reminder of how simple ingredients can come together for a truly heartfelt dessert. No matter the occasion, this dish brings a touch of nostalgic joy and sweet satisfaction.

  • Warm & Zesty: The Unconventional Butternut Squash Soup with a Ginger Twist

    Warm & Zesty: The Unconventional Butternut Squash Soup with a Ginger Twist

    Imagine a bowl that combines the velvety sweetness of butternut squash with a surprising zing of fresh ginger. This soup isn’t your usual autumn fare; it’s an energizing twist that awakens your palate with every sip. Perfect for those chilly evenings when you crave something cozy but vibrant.

    I stumbled upon this recipe during a foggy weekend, craving something both comforting and invigorating. The ginger adds a lively punch, turning a simple squash soup into a flavorful adventure. It’s a reminder that even familiar dishes can surprise us with a little spice and a lot of heart.

    Butternut Squash and Ginger Soup

    This soup features pureed butternut squash blended with fresh ginger, creating a smooth, velvety consistency with a hint of spice. The cooking involves roasting the squash and simmering it with aromatics before blending into a vibrant, hearty soup. The final dish has a bright orange hue with a thick, creamy texture that’s perfect for cozy evenings.
    Prep Time 10 minutes
    Cook Time 30 minutes
    Total Time 40 minutes
    Servings: 4
    Course: Main Course
    Cuisine: American
    Calories: 150

    Ingredients
      

    • 1 lb butternut squash peeled, seeded, and cubed
    • 1 inch fresh ginger peeled and minced
    • 1 medium onion chopped
    • 2 cloves garlic minced
    • 4 cups vegetable broth
    • 2 tbsp olive oil
    • to taste salt and pepper

    Equipment

    • Baking sheet
    • Large pot
    • Immersion blender or regular blender
    • Chef’s knife
    • Cutting board
    • Measuring Cups and Spoons

    Method
     

    1. Preheat the oven to 400°F (200°C). Spread the cubed butternut squash on a baking sheet, drizzle with a tablespoon of olive oil, and toss to coat evenly. Roast for about 25-30 minutes until the edges are lightly caramelized and the flesh is tender.
    2. While the squash roasts, heat a tablespoon of olive oil in a large pot over medium heat. Add the chopped onion and sauté until it becomes translucent and fragrant, about 5 minutes.
    3. Add the minced garlic and fresh ginger to the pot, cooking for another minute until they become aromatic and slightly softened.
    4. Once the roasted squash is cool enough to handle, transfer it to the pot. Pour in the vegetable broth and bring the mixture to a gentle boil.
    5. Reduce the heat to low and let the soup simmer uncovered for about 10 minutes, allowing the flavors to meld.
    6. Use an immersion blender to carefully blend the soup directly in the pot until it’s completely smooth and velvety. Alternatively, transfer in batches to a regular blender and puree until smooth, then return to the pot.
    7. Taste the soup and season with salt and pepper as needed, then give it a gentle stir to combine everything evenly.
    8. Serve the hot butternut squash and ginger soup in bowls, garnished with a swirl of cream or fresh herbs if desired, and enjoy its vibrant, creamy texture.

    This soup isn’t just a seasonal favorite; it’s a favorite for the times you want something nourishing and lively. The ginger’s kick lingers, making each spoonful memorable. Perfect paired with crusty bread or a green salad, it’s a dish that satisfies on every level.

    In the midst of busy days or peaceful evenings, this soup offers a moment of warmth and zest. It’s a reminder that simple ingredients, combined thoughtfully, can create something truly special. Enjoy every spoonful knowing it’s both humble and full of life.

  • Chilling Secrets: How Kool Aid Slushies Transform Summertime Nostalgia

    Chilling Secrets: How Kool Aid Slushies Transform Summertime Nostalgia

    Few treats scream summer quite like a vivid, icy Kool Aid slushie. Its bright colors and sweet aroma ignite memories of childhood weekends and carefree afternoons. But lately, I’ve been experimenting with ways to elevate this classic to a semi-gourmet status, surprising even my most skeptical friends.

    Imagine a slushie that not only cools but also tingles with unexpected accents—perhaps a splash of lime or a hint of mint. It’s all about turning simple powder into an adventure on a spoon. This recipe is my secret weapon to beat the heat with a splash of playful creativity, no matter how chaotic the day gets.

    Kool Aid Icy Slushie

    A colorful frozen drink made by mixing sweetened Kool Aid with ice and blending until smooth. The result is a vibrant, refreshing slushie with a semi-frozen, icy texture and bright appearance, perfect for hot days and playful treats.
    Prep Time 10 minutes
    Total Time 10 minutes
    Servings: 4
    Course: Main Course
    Cuisine: American
    Calories: 120

    Ingredients
      

    • 1 packet Kool Aid powder flavor of your choice
    • 1 cup sugar granulated sugar
    • 2 cups cold water for dissolving Kool Aid and sugar
    • 3 cups ice cubes adjust for desired consistency

    Equipment

    • Blender
    • Measuring Cups and Spoons
    • Large Mixing Bowl

    Method
     

    1. Pour the Kool Aid powder, sugar, and cold water into a large mixing bowl and stir until the powder and sugar are completely dissolved, creating a vibrant, flavorful liquid.
    2. Transfer the Kool Aid mixture into the blender jar, readying it for the icy blend.
    3. Add the ice cubes to the blender, filling it up for a frosty, slushie texture.
    4. Secure the lid on the blender and blend on high until the mixture is smooth and slightly thickened, with a frosty, icy appearance.
    5. Stop the blender and check the consistency—if it’s too thick, add a little more water and blend briefly; if it’s too thin, add more ice and blend again.
    6. Once achieved, pour the colorful slushie into glasses or cups, topping with additional ice if desired for extra chill.
    7. Serve immediately with a straw or spoon, enjoying the icy texture and bright flavor of your Kool Aid slushie.

    This Kool Aid slushie isn’t just about nostalgia; it’s a reminder how simple ingredients can spark joy. With a handful of pantry staples and a little patience, you can whip up something refreshingly unconventional in minutes. Perfect for hot days, lazy weekends, or whenever you need a quick burst of color and flavor.

    It’s these little innovations that keep the summer spirit alive, one icy sip at a time. As the flavors melt and mingle in your glass, you remember that sometimes, the most straightforward pleasures are the most rewarding. Cheers to turning everyday ingredients into a splash of fun and relaxation.

  • Chill Out with Unusual Iced Tea Slushie

    Chill Out with Unusual Iced Tea Slushie

    Imagine transforming your ordinary iced tea into a vibrant, slushy wonder that sparks childhood memories. This recipe takes a simple tea and infuses it with a splash of unexpected ingredients like fresh herbs or citrus zest, creating a refreshing twist perfect for scorching days. It’s more than just a cold drink; it’s an experience of flavor and texture that awakens your senses.

    Crafting this iced tea slushie in unconventional ways means messiness is part of the fun. You’ll love how the ice-cold blend dances on your palate, offering a chilled burst with every sip. Plus, it’s an excellent conversation starter—especially when you serve it with a funky straw or layered in a pretty glass. This recipe invites you to play with flavors and make a cool treat uniquely yours.

    Herbed Citrus Iced Tea Slushie

    This icy beverage combines brewed black tea infused with fresh herbs and citrus zest, blended into a smooth, slushy consistency. The result is a vibrant, refreshing drink with a bright flavor profile and a cool, textured appearance, perfect for hot days or as a lively party treat.
    Prep Time 10 minutes
    Cook Time 10 minutes
    Total Time 20 minutes
    Servings: 4
    Course: Main Course
    Cuisine: Beverages
    Calories: 100

    Ingredients
      

    • 4 cups water for brewing tea
    • 4 bags black tea or equivalent loose leaf
    • 1/4 cup honey or to taste
    • 1 lemon lemon zested and juiced
    • 1 orange orange zested and juiced
    • 1/4 cup fresh mint leaves or other herbs like basil
    • 2 cups ice crushed or cubed

    Equipment

    • Saucepan
    • Blender
    • Measuring Cups and Spoons
    • Fine-mesh strainer

    Method
     

    1. Bring water to a boil in a saucepan, then remove from heat and steep the tea bags for 5 minutes, filling your kitchen with a fragrant aroma.
    2. Remove the tea bags and stir in honey while the tea is still warm, ensuring it dissolves completely for a balanced sweetness.
    3. Pour the brewed tea into a pitcher, then add the citrus zest and freshly squeezed juice from the lemon and orange for a bright, zesty flavor.
    4. Chop or gently bruise the mint leaves and add them to the tea mixture, allowing their fresh aroma to infuse into the drink.
    5. Fill a blender with the citrus-infused tea and ice, then blend until the mixture is smooth, frosty, and slightly thickened, with a vibrant color and icy texture.
    6. Taste and adjust sweetness if needed by adding a bit more honey through the blender and blending briefly to incorporate.
    7. Pour the slushy mixture into chilled glasses, garnishing with a mint sprig or citrus slice for a colorful, inviting presentation.
    8. Serve immediately with a funky straw or layered in a clear glass to showcase its vibrant hue and icy texture, perfect for a hot day.

    Notes

    For an extra flavor twist, experiment with other herbs or add a splash of sparkling water before serving.

    As summer hits its peak, this iced tea slushie becomes your go-to for instant refreshment. It’s easy to customize with your favorite tea flavors or add a splash of fruit juice for extra zing. No matter how you tweak it, this chilly delight keeps your day cool and lively.

    Enjoy the simple pleasure of a homemade slushie that’s both visually appealing and packed with flavor. It’s perfect for lazy afternoons, casual gatherings, or as an Instagram-worthy snack. Keep experimenting, and let this recipe inspire your next cooling creation.

  • Spooky Sweet Halloween Deviled Egg Eyeballs for Ghoulish Giggles

    Spooky Sweet Halloween Deviled Egg Eyeballs for Ghoulish Giggles

    As the autumn leaves fall and the air turns crisp, my kitchen becomes a playground for creepy culinary crafts. Halloween is my favorite time to transform simple ingredients into spooky surprises that spark delight and a little shiver. These deviled eggs, turned into eyeballs, are perfect for adding a creepy twist to any feast.

    What I love most is how easily you can turn a classic snack into a haunting masterpiece with just a few tweaks. Bright red, gooey centers and eerie white shells make them look like tiny, creepy eyeballs staring back at your guests. It’s chaos in the best way, turning ordinary eggs into conversation starters for the spooky season.

    WHY I LOVE THIS RECIPE?

    • I get a giggle every time I see those tiny eyeballs staring back at me from the platter.
    • The chaos of bright reds and whites makes my Halloween spread so visually fun and festive.
    • It’s a nostalgic twist, reminiscent of childhood costume parties and sweet treats.
    • Despite the spooky look, it’s surprisingly simple and quick to assemble.
    • I feel a pride in creating something both creepy and delicious that everyone loves.

    AVOID MY DISASTER (You’re Welcome)

    • FORGOT the food coloring? The eggs looked plain. Just add a few drops of red dye to the yolk mixture.
    • DUMPED the filling. It collapsed. Keep the shells upright by placing them on a damp paper towel.
    • OVER-TORCHED the eggs. The whites turned rubbery. Keep a close eye during boiling.
    • MISSED the ooze factor? Use a thinner yolk mixture and a pipette for the bloody effect.

    QUICK FIXES THAT SAVE YOUR DAY

    • When shells crack, apply a bit of tape and gently patch with extra filling.
    • Splash in a splash of ketchup to deepen the blood-red effect.
    • SHIELD cracked eggshells with a light coating of edible glue or melted chocolate for strength.
    • When yolk mixture is too thick, stir in a tiny bit of mayo for smoother ooze.
    • If the eggs smell sulfuric, rinse briefly in cold water and pat dry.

    These eerie egg eyeballs are a quirky addition to any Halloween table. They combine a touch of chaos, a splash of spooky spirit, and a dash of nostalgia. Perfect for parties, family dinners, or just a fun kitchen experiment to celebrate the season.

    As fall deepens and the nights grow longer, it’s the little creative touches that make this time of year special. These eyeballs are not just food—they’re part of the fun, the mischief, and the magic of Halloween. Now, let the spooky snack celebrations begin!

    Spooky Eyeball Deviled Eggs

    This dish features hard-boiled eggs with their yolks mixed into a creamy filling, which is then piped back into the egg whites. The eggs are decorated to resemble creepy eyeballs, with blood-red centers and white shells, creating a strikingly spooky appetizer. The final presentation showcases eerie, realistic-looking eyeballs perfect for Halloween parties.
    Prep Time 15 minutes
    Cook Time 10 minutes
    Total Time 25 minutes
    Servings: 12
    Course: Main Course
    Cuisine: Dessert
    Calories: 70

    Ingredients
      

    • 6 pieces large eggs fresh, for easy peeling
    • 2 tablespoons mayonnaise for creaminess
    • 1 teaspoon yellow mustard adds tang and color
    • 1 tablespoon ketchup for blood-red centers
    • a few drops red food coloring optional, enhances blood effect
    • 1/4 teaspoon paprika for color contrast
    • pinch salt enhances flavor

    Equipment

    • Saucepan
    • Mixing bowl
    • Piping bag or plastic zip-top bag
    • Small knife
    • Spoon

    Method
     

    1. Place the eggs in a saucepan and cover with cold water, then bring to a gentle boil. Once boiling, reduce heat and simmer for 10 minutes to fully cook. Transfer eggs to cold water to stop the cooking and make peeling easier.
    2. Peel the eggs carefully once cooled and slice each egg in half lengthwise, revealing the firm whites and yolks inside. Gently remove the yolks and set the whites aside.
    3. In a mixing bowl, mash the yolks with a fork until crumbly, then fold in mayonnaise, mustard, a pinch of salt, and paprika. Mix until smooth and creamy. Add a few drops of red food coloring to the yolk mixture and stir well to create a vivid red center.
    4. Transfer the yolk mixture into a piping bag or a plastic zip-top bag with the tip cut off. Carefully pipe a small dollop of the red yolk filling into the center of each egg white half, mimicking a bloodshot eyeball.
    5. Use a small knife or spoon to create tiny white ‘sclera’ edges around the yolk-filled center, giving the eyeball a more realistic appearance. You can also add a tiny dot of ketchup on top of the yolk to resemble a bloodshot ‘pupil’.
    6. Arrange the filled eggs on a serving platter. For extra creepiness, you can lightly dust the whites with some additional paprika or red powder to mimic veiny details and add to the spooky effect.
    7. Chill the eggs in the refrigerator for at least 15 minutes before serving, allowing the flavors to meld and the decorations to set. Serve cold as a fun and spooky appetizer that’s sure to delight guests.

    Notes

    Using red food coloring enhances the bloody effect, but it’s optional. Keep the eggs refrigerated until ready to serve to maintain their spooky appearance and freshness.

    Creating these Halloween deviled egg eyeballs turns an ordinary appetizer into a memorable centerpiece. They bring out the childlike wonder in everyone, mixed with a bit of chaos and glee. Plus, they are a reminder that with just a little imagination, everyday ingredients can become something delightfully horrifying.

    As you carve pumpkins and dress up your porch, take a moment to enjoy the process of making something spooky and silly in the kitchen. These eyeballs are a small, fun tradition that fit right into the vibrant, playful spirit of Halloween. Happy haunting and splattering in the kitchen!

  • The Secret Ingredient That Elevates Your Tomato Sauce

    The Secret Ingredient That Elevates Your Tomato Sauce

    Imagine a tomato sauce that tastes like summer in a jar, but with a twist no one expects. I recently started experimenting with adding a pinch of roasted garlic and a splash of aged balsamic vinegar, transforming the sauce into something truly memorable. This was born out of a desire to make my Monday night pasta feel like a festive occasion.

    Cooking this sauce reminded me of childhood weekends, stirring simmering pots filled with ripe tomatoes and fragrant herbs. It’s a chemistry experiment of simple ingredients turning into a rich, vibrant sauce that can elevate any dish. This method isn’t just about taste; it’s about creating a story in every spoonful.

    Roasted Garlic and Balsamic Tomato Sauce

    This tomato sauce is made by simmering ripe tomatoes with roasted garlic and a splash of aged balsamic vinegar, creating a rich and vibrant condiment. The sauce develops a thick, velvety texture with deep, caramelized flavors that enhance pasta dishes or serve as a flavorful base for other recipes.
    Prep Time 10 minutes
    Cook Time 30 minutes
    Total Time 40 minutes
    Servings: 4
    Course: Main Course
    Cuisine: Italian
    Calories: 150

    Ingredients
      

    • 4 cloves garlic cloves whole, unpeeled for roasting
    • 2 pounds ripe tomatoes halved
    • 2 tablespoons olive oil for roasting and cooking
    • 1 tablespoon balsamic vinegar aged, for depth of flavor
    • to taste salt and pepper for seasoning
    • 1 small onion diced, optional for added richness

    Equipment

    • Oven
    • Saucepan

    Method
     

    1. Preheat your oven to 400°F (200°C). Place the whole garlic cloves on a small baking sheet, drizzle with a teaspoon of olive oil, and roast until golden and fragrant, about 20 minutes.
    2. While the garlic roasts, chop the ripe tomatoes into halves or quarters, and set aside.
    3. Heat a tablespoon of olive oil in a saucepan over medium heat. Add diced onion if using, and cook until translucent and fragrant, about 3-4 minutes.
    4. Add the chopped tomatoes to the saucepan and stir well. Let them cook down for 10-15 minutes, breaking them apart with a spoon until they release their juices and start to thicken.
    5. Remove the roasted garlic from the oven once fragrant and slightly caramelized. Squeeze the soft roasted garlic out of its skins into the sauce, stirring to combine.
    6. Mix in the aged balsamic vinegar for a touch of sweetness and depth. Season with salt and pepper to taste, and simmer the sauce for another 5-10 minutes to meld flavors.
    7. Once the sauce has thickened to your desired consistency, taste and adjust seasoning if needed. It should be vibrant, fragrant, and slightly glossy.
    8. Serve hot over cooked pasta or use as a flavorful base for other dishes, enjoying the rich, caramelized flavors in every spoonful.
    Stir up a batch of this tomato sauce when the season tomatoes are at their peak, and your kitchen will fill with an irresistible aroma. It’s perfect for weeknights or lazy weekends when you want something hearty but effortless.

    Every time I make this sauce, I feel a small victory—like I’ve unlocked a secret. Whether drizzled over pasta, spooned onto grilled veggies, or used as a base for a quick stew, it always brings a sense of comfort and pride.

  • The Art of the Unexpected: Crafting Vodka Slushies with a Twist

    The Art of the Unexpected: Crafting Vodka Slushies with a Twist

    Most people think of vodka slushies as simple summer treats, but I see them as a canvas for culinary surprise. Imagine incorporating unexpected ingredients like fresh basil or a splash of elderflower liqueur, transforming a basic cold drink into a flavor adventure. It’s all about breaking the rules and daring to experiment while keeping that icy chill.

    During a sweltering heatwave, I challenged myself to elevate this familiar favorite. Through trial, error, and plenty of tasting, I created a slushie that balances sharp citrus with herbal notes and a whisper of sweetness. This recipe isn’t just a refresher—it’s a playful twist that sparks curiosity and delight.

    Herbal Citrus Vodka Slushie

    This vodka slushie combines sharp citrus juice with fresh herbal notes, blended into a smooth, icy beverage. The mixture develops a thick, slushy texture with a vibrant appearance, perfect for hot days or creative cocktail moments.
    Prep Time 10 minutes
    Total Time 10 minutes
    Servings: 4
    Course: Main Course
    Cuisine: refreshing
    Calories: 150

    Ingredients
      

    • 1 cup fresh lemon juice preferably freshly squeezed
    • 1 cup fresh orange juice
    • 1/2 cup elderflower liqueur optional for floral flavor
    • 1 cup vodka
    • 1 cup fresh basil leaves roughly chopped
    • 1 1/2 cups ice cubes
    • 2 tbsp honey or simple syrup

    Equipment

    • Blender
    • Measuring Cups and Spoons

    Method
     

    1. Measure and pour the fresh lemon and orange juices into the blender.
    2. Add the elderflower liqueur and vodka to the citrus mixture in the blender.
    3. Roughly chop the fresh basil leaves and add them to the blender to infuse herbal flavor.
    4. Sprinkle in the honey and blend on low speed to start combining and dissolving the sweetness.
    5. Gradually add the ice cubes and blend on high until the mixture turns thick, slushy, and smooth in texture. You should see a vibrant, frosty mixture.
    6. Taste the slushie and, if desired, add a little more honey or elderflower liqueur for extra flavor, then briefly blend again.
    7. Pour the icy herbal citrus slushie into chilled glasses, garnishing with a small basil leaf or citrus twist if desired.
    8. Serve immediately with a straw or spoon, enjoying the refreshing and flavor-packed chilled beverage.

    Notes

    For a non-alcoholic version, omit the vodka and elderflower liqueur, replacing with extra citrus juice or sparkling water.

    As summer wanes and the evenings cool down, this vodka slushie with a unique flavor edge reminds me of the joy in small, unexpected pleasures. It’s perfect for gatherings, where the surprise element can turn a casual sip into a conversation starter. I hope you find your own unexpected twist that makes this treat truly yours.

    In a world full of predictable cool-downs, this recipe invites a bit of chaos and creativity. Mix, sip, and savor the moment—your taste buds will thank you. Cheers to the art of the unexpected in every chilled glass!

  • Chill Out with This Unexpectedly Sophisticated Chocolate Slushie

    Chill Out with This Unexpectedly Sophisticated Chocolate Slushie

    Imagine swapping your usual summer icy drinks for something that whispers elegance and fun simultaneously. This chocolate slushie isn’t just frozen cocoa; it’s a nostalgic swirl of childhood and adult indulgence. The secret? A hint of espresso or sea salt that elevates a simple blend into a moment of cool bliss.

    Creating this treat is almost like a mini outdoor adventure without leaving the kitchen. It’s perfect when the heat makes you crave icy, creamy textures but you still want a bit of a gourmet touch. Plus, it’s incredibly quick, requiring just a handful of pantry staples and a blender. Think of it as your new go-to for spontaneous dessert cravings or summer gatherings.

    Chocolate Espresso Slushie

    This chocolate espresso slushie is a frozen beverage combining rich cocoa, a hint of espresso or sea salt, and a creamy texture achieved through blending with ice and milk. The final treat is smooth, velvety, and visually appealing with a cool, frosty appearance that’s perfect for hot days or indulgent moments.
    Prep Time 5 minutes
    Total Time 5 minutes
    Servings: 2
    Course: Main Course
    Cuisine: International
    Calories: 150

    Ingredients
      

    • 1 cup milk preferably whole or dairy alternative
    • 1/4 cup unsweetened cocoa powder
    • 2 tablespoons granulated sugar
    • 1 shot espresso or strong brewed coffee cooled
    • 2 cups ice cubes
    • a pinch sea salt or additional espresso optional for flavor enhancement

    Equipment

    • Blender
    • Measuring Cups and Spoons

    Method
     

    1. Pour the milk into your blender, creating a smooth base for the drink.
    2. Add the unsweetened cocoa powder and granulated sugar directly to the milk.
    3. Blend on high for about 15-20 seconds until the mixture is well combined and slightly frothy.
    4. Pour in the cooled espresso or strong brewed coffee into the blender, and add a pinch of sea salt if using.
    5. Add the ice cubes to the blender, ensuring they are evenly distributed.
    6. Blend again on high for 30-40 seconds until the mixture is thick, slushy, and smooth with a frosty appearance.
    7. Turn off the blender and check the consistency; it should be thick and cold with tiny ice crystals visible.
    8. Pour the frozen chocolate espresso slushie into glasses and serve immediately for the best texture.
    9. Garnish with chocolate shavings or a sprinkle of cocoa powder if desired, then enjoy!
    This chocolate slushie is a reminder that simple ingredients can transform into something surprisingly luxurious. It’s the kind of recipe that looks as pretty as it tastes, making your summer days feel special with minimal effort.

    Whether you’re cooling down after a long day or impressing friends with a homemade treat, this slushie hits all the right notes. The blend of rich cocoa and the unexpected salty note offers a delightful surprise every time. Dive into this icy indulgence whenever you need a quick break and enjoy every cold, chocolatey sip.