Blog

  • Spooktacular Jack-o’-Lantern Stuffed Bell Peppers for Your Halloween Table

    Spooktacular Jack-o’-Lantern Stuffed Bell Peppers for Your Halloween Table

    Halloween is the perfect time to embrace the spooky and creative side of cooking. This year, I decided to turn ordinary bell peppers into tiny Jack-o’-Lanterns bursting with flavors and fun. The process of carving and filling these little pumpkins brings back childhood memories of jack-o’-lantern lanterns and sweet treats.

    These stuffed bell peppers are more than just festive—they’re a surprisingly easy way to impress guests while celebrating the season. Each pepper’s cheerful face hides a savory filling of seasoned rice, melty cheese, and hints of smoky paprika. Perfect for a spooky party or a cozy night in, they add a playful touch to your Halloween feast.

    Halloween Stuffed Mini Bell Peppers

    These mini bell peppers are hollowed out and carved into tiny Jack-o’-Lanterns, then filled with a savory mixture of seasoned rice, cheese, and spices. They are baked until tender and cheesy, with the carved faces giving a playful, festive appearance. The final dish features colorful, crispy-edged peppers with a cheesy, flavorful filling inside.
    Prep Time 20 minutes
    Cook Time 20 minutes
    Total Time 40 minutes
    Servings: 4
    Course: Main Course
    Cuisine: American
    Calories: 150

    Ingredients
      

    • 4 count mini bell peppers preferably orange or yellow for vibrant color
    • 1 cup cooked rice white or jasmine rice works well
    • ½ cup shredded cheese cheddar or Monterey Jack
    • 1 teaspoon smoked paprika adds depth of flavor
    • ½ teaspoon salt
    • ¼ teaspoon black pepper
    • 2 tablespoons olive oil
    • 1 clove garlic minced

    Equipment

    • Sharp knife
    • Baking sheet
    • Spoon
    • Mixing bowl
    • Chef’s knife
    • Small carving knife

    Method
     

    1. Preheat your oven to 375°F (190°C) and line a baking sheet with parchment paper.
    2. Use a sharp knife to carefully cut the tops off each mini pepper and set aside. Gently scoop out the seeds and membranes to create a hollow cavity while maintaining the pepper’s shape.
    3. Carve small faces onto each hollowed pepper using a small carving knife, creating eyes, nose, and a smiling or spooky mouth for a festive look.
    4. In a mixing bowl, combine cooked rice, shredded cheese, smoked paprika, salt, black pepper, and minced garlic. Mix well until all ingredients are evenly incorporated.
      4 count mini bell peppers
    5. Use a spoon to fill each carved mini pepper with the rice mixture, pressing gently to pack the filling without overflowing.
    6. Place the filled peppers onto the prepared baking sheet, standing upright for even baking.
    7. Drizzle a little olive oil over the stuffed peppers to encourage crispy edges during baking.
      4 count mini bell peppers
    8. Bake in the preheated oven for about 20 minutes, until the peppers are tender and slightly charred around the edges, and the cheese is bubbly and golden.
    9. Remove from the oven and let cool slightly. Carefully reattach the pepper tops if desired or serve as they are, showcasing the carved faces.
    10. Serve these festive Jack-o’-Lantern peppers warm, perfect for a spooky Halloween presentation.
    As the oven transforms these colorful peppers into bubbling Jack-o’-Lanterns, your home will fill with the warm aroma of roasted vegetables and spices. Watching the faces glow with cheese and gentle browning makes every moment of prep worthwhile.

    Enjoy these little carved creations with a side of autumnal apple cider or a brisk glass of Pinot Noir. They are a reminder that Halloween isn’t just about sweets, but about joyful, creative sharing. Happy haunting and cooking!

  • Unconventional Autumn: The Hidden Joys of Roasted Pumpkin Soup

    Unconventional Autumn: The Hidden Joys of Roasted Pumpkin Soup

    As the leaves swirl in shades of amber and crimson, I find myself craving more than just the usual pumpkin pie. This year, I decided to turn the vibrant orange gourd into a roasted soup that captures the essence of fall in every spoonful. The process involves caramelizing the pumpkin’s natural sweetness over an open flame, which adds a smoky depth that surprises the palate.

    Imagine peeling back the charred skin to reveal tender, fragrant flesh soaked in hints of nutmeg and cinnamon. The aroma alone is enough to make anyone nostalgic for cozy sweaters and chilly air. This recipe isn’t just a meal; it’s a ritual to slow down and savor the season’s bounty with a unique twist.

    Smoky Roasted Pumpkin Soup

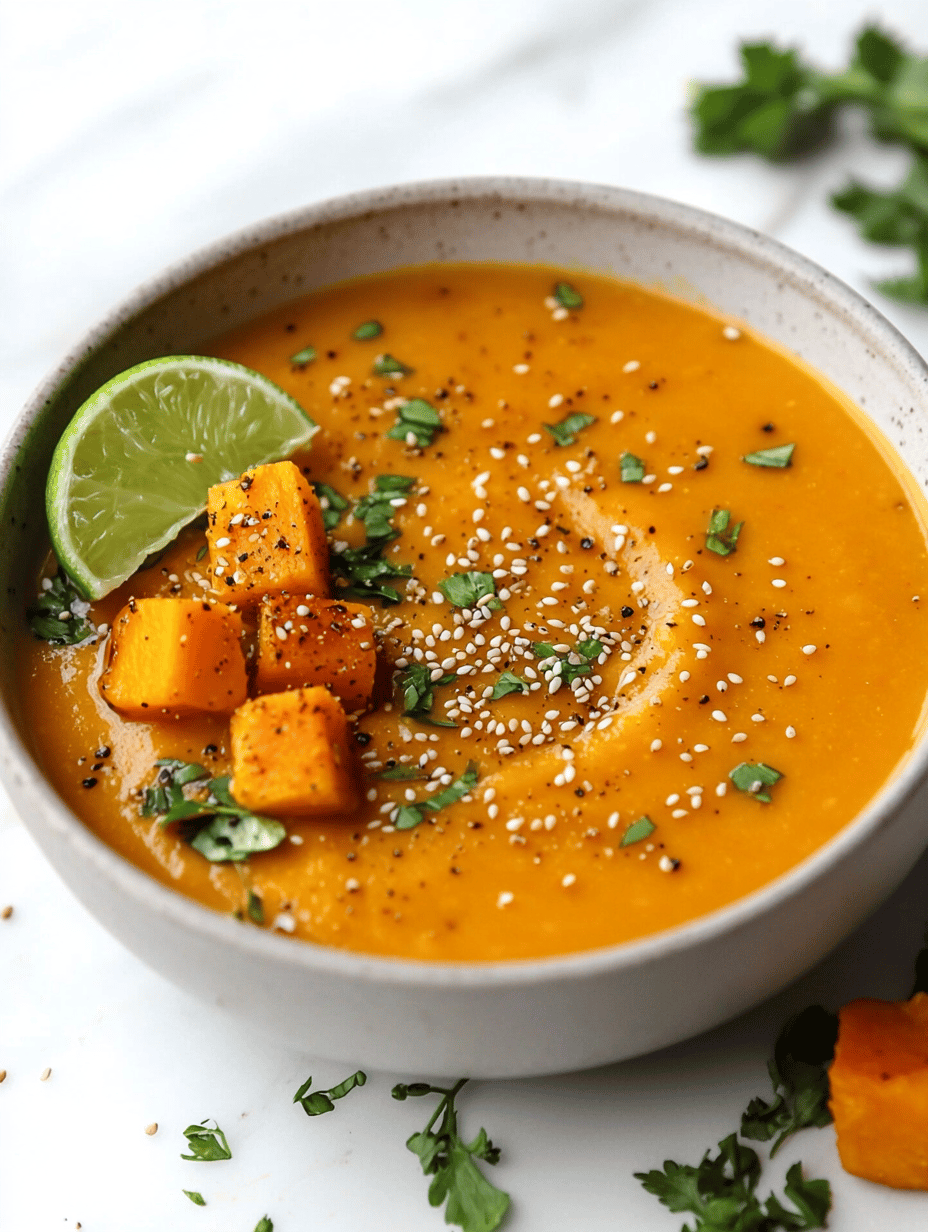
    This pumpkin soup features roasted pumpkin that is caramelized over an open flame, imparting a smoky flavor. The tender pumpkin flesh is blended into a smooth, velvety soup seasoned with warming spices like nutmeg and cinnamon, resulting in a vibrant orange dish with a luxurious texture.
    Prep Time 15 minutes
    Cook Time 45 minutes
    Total Time 1 hour
    Servings: 4
    Course: Main Course
    Cuisine: Fall
    Calories: 180

    Ingredients
      

    • 1 kg fresh pumpkin (such as sugar pumpkin or Hubbard) peeled, seeded, and cut into chunks
    • 2 tablespoons olive oil for roasting
    • 1 teaspoon ground nutmeg
    • 1 teaspoon ground cinnamon
    • 1 medium onion roughly chopped
    • 2 cloves garlic minced
    • 4 cups vegetable broth
    • to taste salt and black pepper
    • 1 tablespoon maple syrup or honey optional, for added sweetness

    Equipment

    • Open flame or gas stove
    • Blender or immersion blender
    • Knives
    • Cutting board
    • Pot or saucepan

    Method
     

    1. Set a gas stove or open flame and carefully hold each pumpkin chunk over the flame. Char the skin until it is blackened and blistered, then turn to get an even charring all around. This imparts a smoky flavor to the pumpkin flesh.
    2. Using tongs, transfer the charred pumpkin pieces to a bowl and let them cool slightly. Once cool enough to handle, peel away the burnt skin to reveal the tender, fragrant flesh beneath.
    3. In a large pot, heat a tablespoon of olive oil over medium heat. Add the chopped onion and cook until it becomes translucent and fragrant, about 5 minutes.
    4. Add the minced garlic to the onions and cook for another minute until it releases a savory aroma.
    5. Chop the peeled pumpkin flesh into smaller pieces and add them to the pot. Stir to combine with the onion and garlic, allowing the flavors to meld for a couple of minutes.
    6. Pour in the vegetable broth and bring the mixture to a gentle simmer. Let it cook uncovered for about 20 minutes, until the pumpkin is very soft and cooked through.
    7. Use an immersion blender or transfer the soup in batches to a blender. Blend until completely smooth and velvety in texture.
    8. Return the blended soup to the stove and season with salt, pepper, ground nutmeg, cinnamon, and, if desired, a touch of maple syrup or honey to balance the smoky richness.
    9. Heat the soup gently, stirring occasionally, until it’s steaming hot and flavors are well combined. Taste and adjust seasoning as needed.
    10. Serve the soup hot, garnished with a drizzle of cream or a sprinkle of fresh herbs if desired, and enjoy its smoky, sweet, and spicy notes.

    Notes

    For an extra smoky flavor, consider adding a few drops of smoked paprika before blending. The soup can be stored refrigerated for up to 3 days and reheated gently on the stove.
    This roasted pumpkin soup is more than just a warm bowl on a crisp day — it’s a reminder of the simple pleasures that come with seasonal cooking. The smoky caramel flavors blend beautifully with creamy undertones, making every spoonful a moment of comfort.

    Even as the season shifts, this soup stands the test of time, perfect for any brisk afternoon or quiet evening. It’s a dish that invites both reflection and celebration, wrapping you in cozy familiarity while offering a new perspective on autumn’s favorite ingredient.

  • Chilling Out with a Boozy Milkshake Slushie

    Chilling Out with a Boozy Milkshake Slushie

    Imagine this: it’s a hot summer day, the kind where the air hangs heavy and you crave something icy and decadent. I recently discovered a secret weapon for such moments—an unconventional milkshake slushie, infused with a splash of bourbon or rum. It’s like a grown-up snow cone, blending childhood nostalgia with adult indulgence in every sip.

    This recipe isn’t just about cooling down; it’s about transforming a simple treat into a quick, boozy escape. I love how the creamy texture mingles with the kick of alcohol, creating a layered sensation that dances on your taste buds. Perfect for lazy weekends or spontaneous gatherings with friends.

    Bourbon Milkshake Slushie

    This frozen treat combines creamy milk, ice, and a splash of bourbon or rum blended until smooth, resulting in a thick, icy texture with a boozy kick. The mixture resembles a grown-up snow cone with a luxurious, velvety consistency and a chilled, frosty appearance.
    Prep Time 10 minutes
    Total Time 10 minutes
    Servings: 2
    Course: Main Course
    Cuisine: American
    Calories: 250

    Ingredients
      

    • 2 cups vanilla ice cream preferably slightly softened
    • 1 cup milk whole or 2%
    • 0.5 cup ice cubes for extra chill
    • 2 shots bourbon or rum adjust to taste

    Equipment

    • Blender
    • Measuring Cups and Spoons

    Method
     

    1. Measure out the vanilla ice cream, milk, ice cubes, and bourbon or rum.
    2. Add the ice cream, milk, ice cubes, and alcohol into the blender.
    3. Secure the lid on the blender and blend on high speed until the mixture is smooth and frosty, about 30-45 seconds. You should see it turn into a thick, icy slurry with a creamy texture.
    4. Stop the blender and check the consistency. If it’s too thick, add a splash of milk and pulse a few times; if too thin, add a few more ice cubes and blend again.
    5. Once the mixture is thick, creamy, and frozen-looking with tiny ice crystals, pour it into chilled glasses.
    6. Garnish with a small sprig of mint or a slice of citrus if desired, and serve immediately with a straw or spoon for scooping.

    Notes

    For a richer flavor, try adding a dash of vanilla extract or top with whipped cream and a cherry for presentation.

    Next time the heat gets unbearable and you want something with a little flair, this milkshake slushie comes to mind. It’s incredibly easy to customize with your favorite spirits or toppings, making it uniquely yours each time. Plus, the process fills your kitchen with the sweet scents of vanilla, ice, and a hint of booze—pure comfort during the endless summer days.

    As the ice shatters into tiny crystals and your spoon scoops up velvety cream, you’ll feel the cool rush of relief. Sometimes, it’s the simplest pleasures that turn the day around, and this drink is no exception. Cheers to making everyday moments a little more special with just a blender and a splash of courage.

  • The Hidden Charm of Vanilla Slushies: A Nostalgic Ice-Cream Escape

    The Hidden Charm of Vanilla Slushies: A Nostalgic Ice-Cream Escape

    Today, I want to celebrate this humble yet marvelous concoction from an unexpected angle—how vanilla slushies can evoke emotional nostalgia while fitting into modern palate trends. Whether you’re cooling down after a long day or seeking a quick breezy dessert, this recipe transforms simple ingredients into a soothing experience. It’s a reminder that happiness can be found in the simplest of flavors.

    Vanilla Slushie

    This vanilla slushie is a frozen beverage made by blending vanilla-flavored ingredients with ice to create a smooth, icy texture. The mixture results in a refreshing, pale drink with a creamy appearance that evokes nostalgic comfort. It’s perfect for cooling down on warm days or enjoying as a simple dessert.
    Prep Time 5 minutes
    Total Time 5 minutes
    Servings: 2
    Course: Main Course
    Cuisine: Modern
    Calories: 250

    Ingredients
      

    • 2 cups frozen vanilla ice cream or vanilla frozen yogurt
    • 1 cup milk any type you prefer
    • 1 tablespoon vanilla extract
    • 1 cup ice cubes for blending

    Equipment

    • Blender
    • Measuring spoons

    Method
     

    1. Add the frozen vanilla ice cream, milk, vanilla extract, and ice cubes into the blender.
    2. Secure the lid and blend on high speed until the mixture is smooth, thick, and frosty, about 30-40 seconds. You should see a creamy, slushy consistency emerge.
    3. Pause the blender briefly to check the texture; if it’s too thick, you can add a splash more milk and blend again for a few seconds.
    4. Once blended to your desired smooth and icy texture, turn off the blender.
    5. Pour the vanilla slushie into glasses, spooning any remaining mixture for those who love extra creamy bits.
    6. Serve immediately with a straw or a garnish if desired, and enjoy the refreshing, smooth texture of this simple vanilla treat.
    This vanilla slushie is a gentle reminder that sometimes, the most uncomplicated desserts anchor us in the present while whispering tales of the past. It’s perfect for hot afternoons or last-minute gatherings, offering a refreshing respite with minimal fuss. Embrace this chilly delight and keep a batch ready—you’ll find yourself reaching for it more often than you’d expect.

  • The Secret Ingredient that Makes My Turkey Chili Irresistible

    The Secret Ingredient that Makes My Turkey Chili Irresistible

    Cooking for a family that loves bold flavors but has little patience for long waits has led me to find a secret ingredient that transforms my turkey chili. Every fall, I hunt for that perfect balance of smoky, spicy, and wholesome, and this recipe is my personal secret weapon. It’s not just about the taste; it’s about the aroma that fills the house and the comforting warmth it provides.

    Using turkey as a base often feels like a light option, but I like to kick it up a notch with unexpected ingredients. This chili simmers quickly, yet it tastes like it’s been slow-cooked all day. It’s a crowd-pleaser with a twist, perfect for when you need a hearty, satisfying meal in a flash.

    Quick Turkey Chili with a Secret Ingredient

    This turkey chili is prepared using simmering and sautéing methods, featuring ground turkey as the main ingredient, enhanced by smoky and spicy seasonings. The final dish has a hearty, thick texture with a rich, flavorful broth and tender chunks of turkey and vegetables.
    Prep Time 10 minutes
    Cook Time 20 minutes
    Total Time 30 minutes
    Servings: 4
    Course: Main Course
    Cuisine: American
    Calories: 250

    Ingredients
      

    • 1 lb ground turkey lean preferred
    • 1 can diced tomatoes 14.5 oz can
    • 1 cup black beans drained and rinsed
    • 1 cup corn kernels fresh or frozen
    • 1 small onion diced
    • 2 cloves garlic minced
    • 2 tbsp chili powder
    • 1 tsp smoked paprika
    • 1/2 tsp cumin
    • 1/4 tsp cayenne pepper optional, for heat
    • 1 tbsp secret ingredient a small amount of smoky chipotle in adobo, blended
    • 2 tbsp olive oil
    • to taste salt and pepper

    Equipment

    • Large pot or Dutch oven
    • Wooden spoon or spatula

    Method
     

    1. Heat olive oil in a large pot over medium heat. Add the diced onion and sauté until translucent and fragrant, about 3-4 minutes.
    2. Add the minced garlic and cook for another minute until it becomes aromatic.
    3. Increase the heat and add the ground turkey, breaking it apart with a spoon, cooking until browned and cooked through, about 5-6 minutes.
    4. Stir in chili powder, smoked paprika, cumin, cayenne pepper, and the secret smoky ingredient, mixing well to coat the meat and vegetables evenly.
    5. Add the diced tomatoes with their juice, stirring to combine everything and scraping up any browned bits from the bottom of the pot.
    6. Bring the mixture to a gentle simmer, then add the drained black beans and corn kernels. Stir to incorporate all ingredients evenly.
    7. Reduce the heat to low and let the chili simmer uncovered for 10-15 minutes, allowing the flavors to meld and the chili to thicken slightly.
    8. Taste and season with salt and pepper as needed to balance the smoky and spicy flavors.
    9. Once thickened and flavorful, ladle the hot chili into bowls and serve immediately, topped with your favorite garnishes if desired.
    This turkey chili is my go-to for busy weeknights and cold weekends alike. It captures the spirit of autumn with its rich spices and tender meat, filling the house with a cozy, inviting smell. I love how adaptable it is—topping it with fresh cilantro or a dollop of sour cream elevates every bowl.

    No matter how often I make it, this chili always feels like a warm embrace after a long day. It’s perfect for sharing, whether at family dinners or casual gatherings. And the best part? It comes together fast enough that you actually get to enjoy your evening.

  • Autumn’s Unexpected Treasure: The Cozy Chicken Casserole

    Autumn’s Unexpected Treasure: The Cozy Chicken Casserole

    As the air turns crisp and leaves crunch underfoot, I find myself craving comfort food that’s both hearty and a little unexpected. This Easy Fall Chicken Casserole is not just a typical meal—it’s an ode to those crispy, sweet, and savory flavors that define the season. Imagine tender chicken tossed with roasted squash, kissed by cinnamon, and baked until bubbling—fall on a plate.

    What sets this dish apart is its ability to transform simple pantry ingredients into something magical. It’s perfect for busy weekdays when the oven does the heavy lifting while your house fills with the warm aroma of cinnamon and roasted vegetables. Every bite feels like wrapping yourself in a cozy flannel blanket.

    Easy Fall Chicken Casserole

    This dish features tender shredded chicken combined with roasted squash and a cinnamon-spiced sauce, baked until bubbling and golden. The casserole has a hearty, comforting texture with a slightly caramelized top, showcasing seasonal flavors and cozy aromas.
    Prep Time 15 minutes
    Cook Time 40 minutes
    Total Time 55 minutes
    Servings: 4
    Course: Main Course
    Cuisine: American
    Calories: 350

    Ingredients
      

    • 2 cups cooked chicken, shredded using rotisserie or cooked at home
    • 3 cups butternut squash or pumpkin, cubed roasted until tender
    • 1 teaspoon ground cinnamon
    • 1 cup cream of mushroom soup or substitute cream of chicken
    • 1 cup shredded cheese cheddar or Monterey Jack
    • 2 tablespoons olive oil for roasting and mixing
    • to taste salt and pepper

    Equipment

    • Baking dish
    • Knife
    • Cutting board
    • Mixing bowl
    • Measuring spoons
    • Fork or spoon

    Method
     

    1. Preheat your oven to 400°F (200°C). Toss the cubed squash with a tablespoon of olive oil, salt, and pepper, then spread it out on a baking sheet. Roast for about 25-30 minutes until tender and slightly caramelized, filling your kitchen with a sweet, roasted aroma.
    2. While the squash roasts, in a mixing bowl, combine the shredded chicken with the cream of mushroom soup, cinnamon, and a pinch of salt and pepper. Stir until everything is evenly coated and set aside.
    3. Once the squash is ready and slightly cooled, gently fold the roasted cubes into the chicken mixture. This will create a colorful, textured filling ready for baking.
    4. Transfer the mixture into a baking dish, spreading it out evenly. Sprinkle the shredded cheese over the top for a melty, golden crust.
    5. Bake the casserole in the preheated oven for 20-25 minutes, until bubbling around the edges and the cheese is melted and golden brown.
    6. Remove the casserole from the oven and let it rest for a few minutes. The sauce will thicken slightly, and the top will develop a beautiful, toasted appearance.
    7. Serve hot, garnished with a sprinkle of fresh herbs if desired. Enjoy the cozy flavors and satisfying textures of this seasonal casserole.

    This casserole is my go-to during the early autumn rush—bringing the family together without fuss. It’s a reminder that some of the best meals are born from improvisation and seasonal bounty.

    Making this dish makes me appreciate the slower days of fall, when comfort sounds just right. Plus, it’s a handheld celebration of everything I love about this fleeting season—warmth, spice, and that undeniable feeling of home.

  • Chill Out: The Unexpected Elegance of Coffee Slushie

    Chill Out: The Unexpected Elegance of Coffee Slushie

    Picture this: its a scorching summer day, and the usual coffee shop lines seem like a distant nightmare. Instead, you find yourself swirling a vibrant, iced coffee treat that feels both nostalgic and refreshingly new. The coffee slushie isnt just a drink; its a moment frozen in time, offering a perfect escape from the heat.

    This recipe is all about reinventing your coffee routine with a frosty twist. It combines the bold aroma of brewed coffee with the icy crunch of a slushie, creating a sensation that cools the soul and awakens the senses. Its surprisingly simple, yet it transforms a mundane coffee break into a mini celebration of flavor and texture.

    Iced Coffee Slushie

    This iced coffee slushie combines freshly brewed coffee with ice and sweetener to create a frozen, granular texture reminiscent of a slushie. The mixture is blended until smooth, resulting in a cold, refreshing beverage with a vibrant appearance and a satisfying icy crunch.
    Prep Time 10 minutes
    Total Time 10 minutes
    Servings: 2
    Course: Main Course
    Cuisine: Coffee-based
    Calories: 50

    Ingredients
      

    • 1 cup freshly brewed coffee cooled to room temperature
    • 1.5 cups ice cubes preferably crushed or small cubes
    • 2 tbsp simple syrup or sugar adjust to taste

    Equipment

    • Coffee Maker
    • Blender
    • Measuring Cups
    • Reusable Straw

    Method
     

    1. Pour the cooled brewed coffee into a blender, ensuring it’s at room temperature to prevent shock to the blades.
    2. Add the ice cubes and sweetener to the blender, creating a colorful mixture with the ice slightly protruding above the liquid.
    3. Secure the lid and blend on high speed for about 20-30 seconds until the mixture is thick, granular, and ice is finely crushed, resembling a slushie texture.
    4. Pause briefly to check the consistency—it should be cold, creamy, and slightly sticky but still scoopable.
    5. Pour the frozen coffee slushie into glasses, allowing the icy mixture to mound slightly for visual appeal.
    6. Insert a straw and serve immediately to enjoy the refreshing, crunchy texture of this chilled coffee treat.

    Notes

    For extra flavor, add a dash of cinnamon or cocoa powder on top before serving.

    Making a coffee slushie at home means you can tailor the sweetness and strength exactly to your mood. Its a fun experiment that turns everyday ingredients into something extraordinary. Plus, its perfect for impromptu gatherings or solo treats when you want a quick burst of refreshment.

    As the seasons shift and heat lingers longer, this frozen coffee delight feels like the small luxury we all need. Whether its a lazy Sunday or a hectic weekday, a truly chill coffee experience awaits in every icy sip.

  • Revamp Your Comfort with a Zesty Twist on Chicken Noodle Soup

    Revamp Your Comfort with a Zesty Twist on Chicken Noodle Soup

    In the quiet of suburbia, I discovered a secret ingredient that transforms classic chicken noodle soup into an explosion of flavors. It’s not what you’d expect—think bright notes of lemon zest mingling with tender chicken and silky noodles. This approach reels in nostalgic warmth but with a lively, unexpected flair.

    As the air turns cooler, I crave something cozy yet invigorating, a bowl that sparks both comfort and excitement. To me, this isn’t just about the soup; it’s about crafting a dish that warms your hands, lifts your spirits, and awakens your taste buds with every spoonful. Dive into this twist on a familiar favorite and see how a tiny change can bring a wave of fresh joy.

    WHY I LOVE THIS RECIPE?

    • I get to relive childhood memories with a bright, citrusy boost.
    • The vibrant aroma of lemon and fresh herbs makes the kitchen feel alive.
    • Every spoonful combines nostalgia with audacious flavor.
    • Toast to a simple yet exciting dinner that delights guests and family alike.
    • It’s a testament to how a small tweak can redefine comfort food.

    AVOID MY DISASTER (You’re Welcome)

    • FORGOT to taste before adding salt? Ended up overly salty—rinse the noodles and start fresh.
    • DUMPED the whole batch in a boil-over chaos—mopped the stove and lowered the heat.
    • OVER-TORCHED the chicken? Smell of burnt meat—rescue with fresh herbs and a new batch of broth.
    • DRIED out the noodles? Keep an eye and add a splash of broth if they shrivel.

    QUICK FIXES THAT SAVE YOUR DAY

    • When broth is weak, splash in a dash of soy sauce for umami punch.
    • Patch a burnt pot with water and a scrub brush—no one will know.
    • Splash lemon juice if the final taste is dull or flat.
    • When noodles stick, stir gently and add a touch more broth.
    • Shield the soup from overcooking by removing from heat early—let flavors settle.

    The seasons come and go, but a well-crafted bowl of chicken noodle soup remains a steadfast comfort. Adding a touch of citrus and fresh herbs keeps it lively, perfect for those days when you need a little brightness. This version keeps the cozy essence alive while nodding to modern, vibrant flavors.

    Let the smell of simmering broth and zesty lemon fill your home. It’s a reminder that even the simplest dishes can surprise and delight when made with intention and a little daring. The next bowl you serve will carry not just warmth but a dash of unexpected joy.

    Lemon Herb Chicken Noodle Soup

    This chicken noodle soup features tender cooked chicken, silky noodles, and bright notes of lemon zest. It is prepared by simmering broth with aromatics, adding cooked chicken and noodles, and finishing with fresh herbs and lemon for a vibrant flavor. The final dish is a clear, comforting soup with a lively hue and an inviting aroma.
    Prep Time 15 minutes
    Cook Time 25 minutes
    Total Time 40 minutes
    Servings: 4
    Course: Main Course
    Cuisine: American
    Calories: 350

    Ingredients
      

    • 2 cups chicken breasts boneless, skinless
    • 8 cups chicken broth
    • 2 cups egg noodles or any small pasta
    • 1 lemon zest from one lemon, finely grated
    • 2 tablespoons olive oil
    • 3 cloves garlic minced
    • 1 medium onion finely chopped
    • 1 stalk celery sliced
    • 1 carrot carrot diced
    • 2 tablespoons fresh herbs such as parsley and thyme, chopped
    • to taste salt and pepper

    Equipment

    • Large pot
    • Chef’s knife

    Method
     

    1. Season the chicken breasts with a pinch of salt and pepper, then heat olive oil in a large pot over medium heat. Place the chicken in the pot and sear until golden brown on both sides, about 4-5 minutes per side. Remove the chicken and set aside to cool slightly.
    2. In the same pot, add chopped onion, sliced celery, and diced carrot. Sauté over medium heat until vegetables are fragrant and slightly softened, about 5 minutes. Stir in minced garlic and cook for another 30 seconds until aromatic.
    3. Pour in the chicken broth and bring the mixture to a gentle simmer. Meanwhile, shred the cooled chicken into bite-sized pieces.
    4. Add the shredded chicken to the simmering broth. Let it cook together for 10 minutes, allowing the flavors to meld and the chicken to heat through.
    5. Meanwhile, cook the egg noodles separately in boiling salted water until al dente, according to package instructions. Drain and set aside.
    6. Add the cooked noodles to the broth mixture. Stir in lemon zest and chopped fresh herbs for brightness. Continue to simmer for another 2-3 minutes, allowing the flavors to come together.
    7. Taste the soup and adjust seasoning with additional salt, pepper, or lemon juice if desired. Remove the pot from heat once the flavors are balanced.
    8. Ladle the steaming, vibrant soup into bowls, garnishing with extra fresh herbs if desired. Serve immediately while warm and fragrant.

    Notes

    For extra depth, add a splash of soy sauce or a squeeze of lemon just before serving.

    Making this soup is more than preparing a meal; it’s reimagining what comfort can taste like. The bright notes lift your spirit and challenge the idea that chicken noodle soup needs to stay dull. Every spoonful promises a little more happiness wrapped in a familiar bowl.

    Whether it’s a quick weeknight fix or a weekend comfort project, this recipe offers both ease and excitement. Keep experimenting with your favorite herbs and citrus, and turn every bowl into a small celebration of flavor. Nothing beats the simple pleasure of a soup that energizes as much as it soothes.

  • Hello world!

    Welcome to WordPress. This is your first post. Edit or delete it, then start writing!