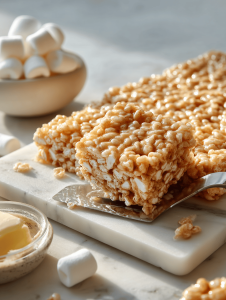
This isn’t your average Rice Krispie treat. I love turning this simple snack into something a little more monstrous—think bigger, thicker, and with a little extra chaos in every bite. It’s all about that satisfying crunch combined with a soft, marshmallowy center that brings back childhood memories.
Making these treats is almost like crafting a little edible sculpture, where the fun is in the mess and the magic of watching everything come together. They’re perfect for sharing, for a spontaneous snack, or just because you need a break from the usual. Plus, they smell incredible—sweet, buttery, with a hint of vanilla.
Why I keep coming back to this recipe
The mix of simplicity, fun, and nostalgia makes these treats irresistible. Every batch turns out a little different—sometimes gooey, sometimes crispy, always delicious. They remind me of childhood afternoons, chaos in the kitchen, and the joy of creating something that’s both messy and perfect. Plus, they’re endlessly customizable—each time a new surprise.
What’s in these monster Krispies? A breakdown
- Butter: Adds richness and helps everything stick together. Use unsalted for control.
- Marshmallows: The gooey core—preferably mini for quick melting, but large works too.
- Rice cereal: The base—choose a puffed rice variety for a light crunch.
- Vanilla extract: A little splash enhances sweetness and aroma, but skip if you want pure marshmallow flavor.
- Optional add-ins: Chocolate chips, sprinkles, or nuts—whatever makes your monster treats special.
- Salt: A pinch balances the sweetness—don’t skip it.
- Cooking spray or butter for greasing: Ensures easy removal from the pan, keeps treats from sticking.
Tools of the trade for monster Krispies
- Large saucepan: To melt butter and marshmallows evenly.
- Rubber spatula: To fold and spread the mixture without crushing the cereal.
- 9×13-inch baking dish: To hold and shape the treats as they set.
- Parchment paper or buttered foil: To prevent sticking and make cleanup easier.
- Sharp knife or pizza cutter: For clean, even cuts once cooled.
Step-by-step guide to creating monstrous, gooey Rice Krispie Treats
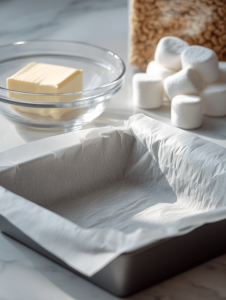
Step 1: Gather your ingredients and equipment before you start. This keeps things smooth and fun.
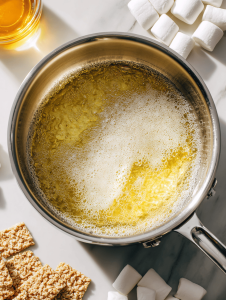
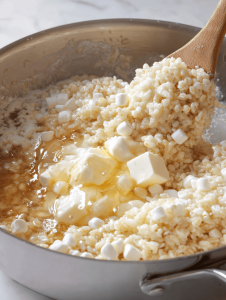
Step 2: Melt butter and marshmallows together over low heat, stirring constantly until smooth and shiny.
Step 3: Pour the melted mixture over the cereal in a large bowl. Use a spatula to gently fold—don’t crush the cereal.
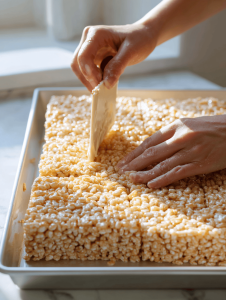
Step 4: Press the mixture into a greased pan, smoothing the top with a buttered spatula or your fingers.
Step 5: Let the treats cool and set at room temperature for about 30-40 minutes.
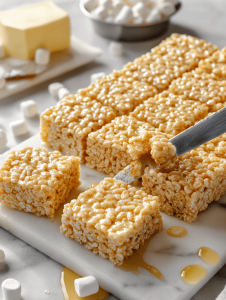
Step 6: Cut into squares and serve—preferably with a cold glass of milk or a little extra marshmallow drizzle.
Crispy, gooey, perfect—how to tell when your treats are just right
- The mixture should be shiny and slightly puffed up before you pour it into the pan.
- The surface should be even and slightly golden when pressed into the pan.
- When cooled, the treats should hold together but still yield a gentle give when pressed.
Common pitfalls and how to dodge them
- Over-torched marshmallows and butter, resulting in a bitter taste.? Use low heat to melt marshmallows—high heat burns them quickly.
- Treating the mixture too roughly, which breaks the cereal apart.? Press mixture gently but firmly into the pan—don’t crush the cereal.
- Cutting too early, causing gooey, misshapen pieces.? Let the treats cool completely before cutting.
- Dry, crumbly treats due to insufficient marshmallow.? If treats aren’t sticking together, add a touch more melted marshmallow.
Monster Rice Krispie Treats
Ingredients
Equipment
Method
- Gather your butter, marshmallows, cereal, vanilla, and optional add-ins. Prepare your baking dish by lining it with parchment paper or buttering it lightly.
- Place the butter in a large saucepan over low heat, allowing it to melt slowly with a gentle sizzle and a fragrant buttery aroma filling the air.
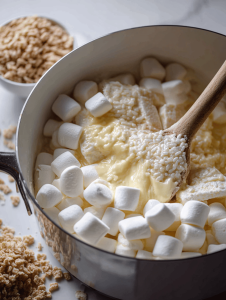
- Add the mini marshmallows to the melted butter, stirring constantly. Watch as they melt into a glossy, gooey mixture with a soft bubbling sound, until completely smooth and shiny.
- Remove the saucepan from heat and stir in the vanilla extract, mixing until evenly incorporated and fragrant.
- Pour the marshmallow mixture over the puffed rice cereal in a large bowl. Use a rubber spatula to gently fold and combine, being careful not to crush the cereal but ensuring everything gets coated in the gooey mixture.
- If desired, fold in chocolate chips, sprinkles, or nuts for extra texture and flavor.
- Transfer the mixture to your prepared baking dish. Using a buttered spatula or your fingers, press it firmly and evenly into the pan, creating a thick, compact layer with a slightly textured surface.
- Let the treats cool at room temperature for 30-40 minutes until they are set and firm, with a slight golden hue around the edges.
- Once cooled, use a sharp knife or pizza cutter to cut the treats into generous squares or rectangles, revealing the soft marshmallow center encased in a crunchy shell.
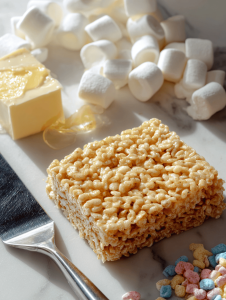
- Serve your monstrous Krispies with a cold glass of milk or enjoy on their own—these treats are best when fresh and still slightly gooey inside.
Notes

Hi, I’m Lily Hayes, the cook, writer, and heart behind Loving This Process. This blog is built on a simple idea that food is not just about the final dish, but about everything that happens while you’re making it. The thinking, the tasting, the adjusting, the learning, and the quiet moments in between. Food has been a constant presence in my life, not as something flashy or perfect, but as something deeply grounding. Cooking has always felt like a process worth savoring, even when it’s messy, slow, or imperfect.
Leave a Reply