Category: Desserts

  • Peach Crisp That’s Unapologetically Cozy and Irresistible

    Peach Crisp That’s Unapologetically Cozy and Irresistible

    Few desserts evoke the summer sunshine quite like a perfectly baked peach crisp. But today, I want to take this classic to a new dimension—think a swirl of cinnamon, a sprinkle of toasted oats, and a secret hint of vanilla that amplifies each bite.

    Many recipes settle for just ripe peaches, but I love the thrill of a tart, almost tangy peach that wakes up your taste buds as they caramelize under a crunchy topping. This dish is best savored on a warm afternoon, the scent alone promising sweet bliss.

    As I layer the juicy peaches with a buttery streusel, I remember childhood afternoons helping my grandmother prep her kitchen, the air thick with baking spices. This recipe isn’t just about comfort—it’s about making new memories every time you bake it.

    Peach Crisp with Cinnamon and Toasted Oats

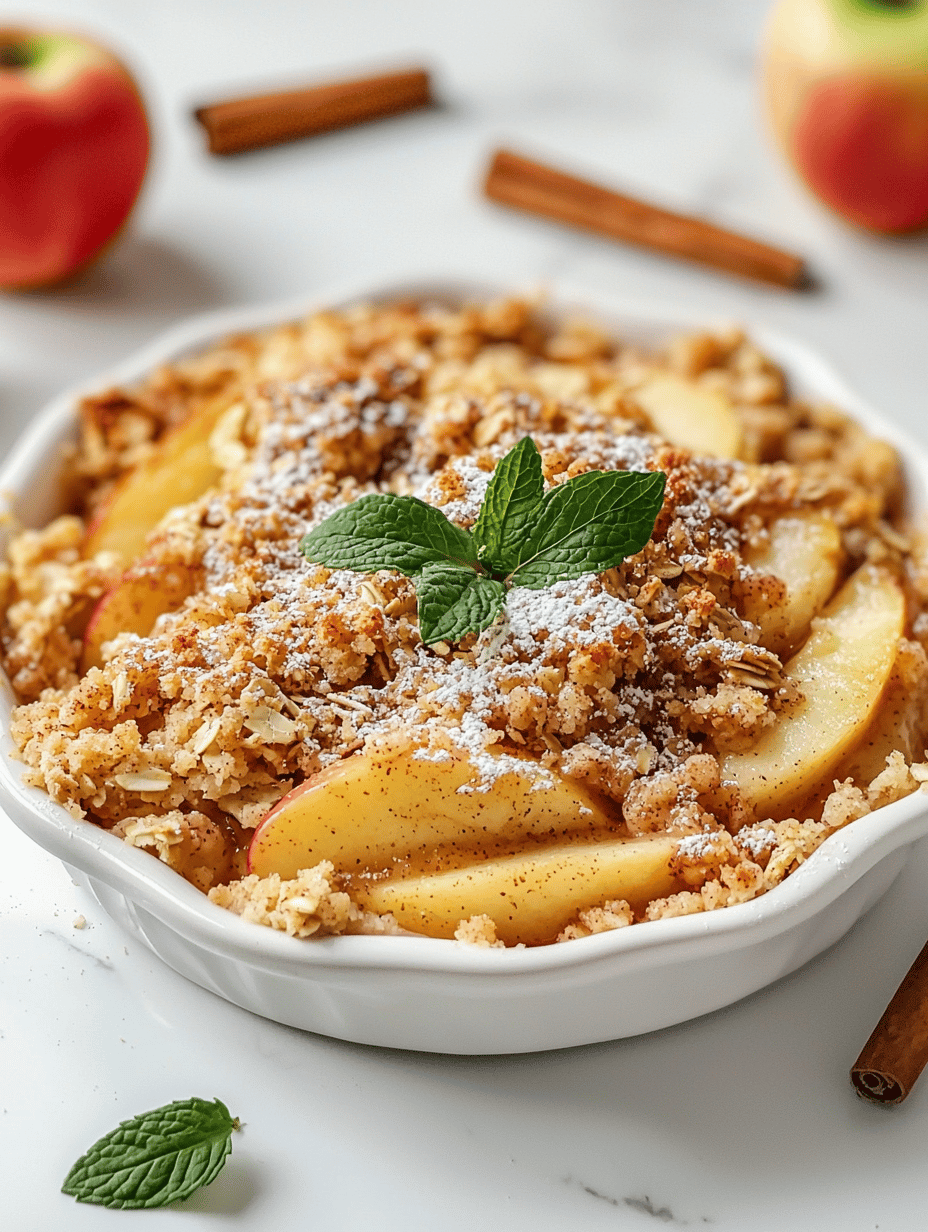
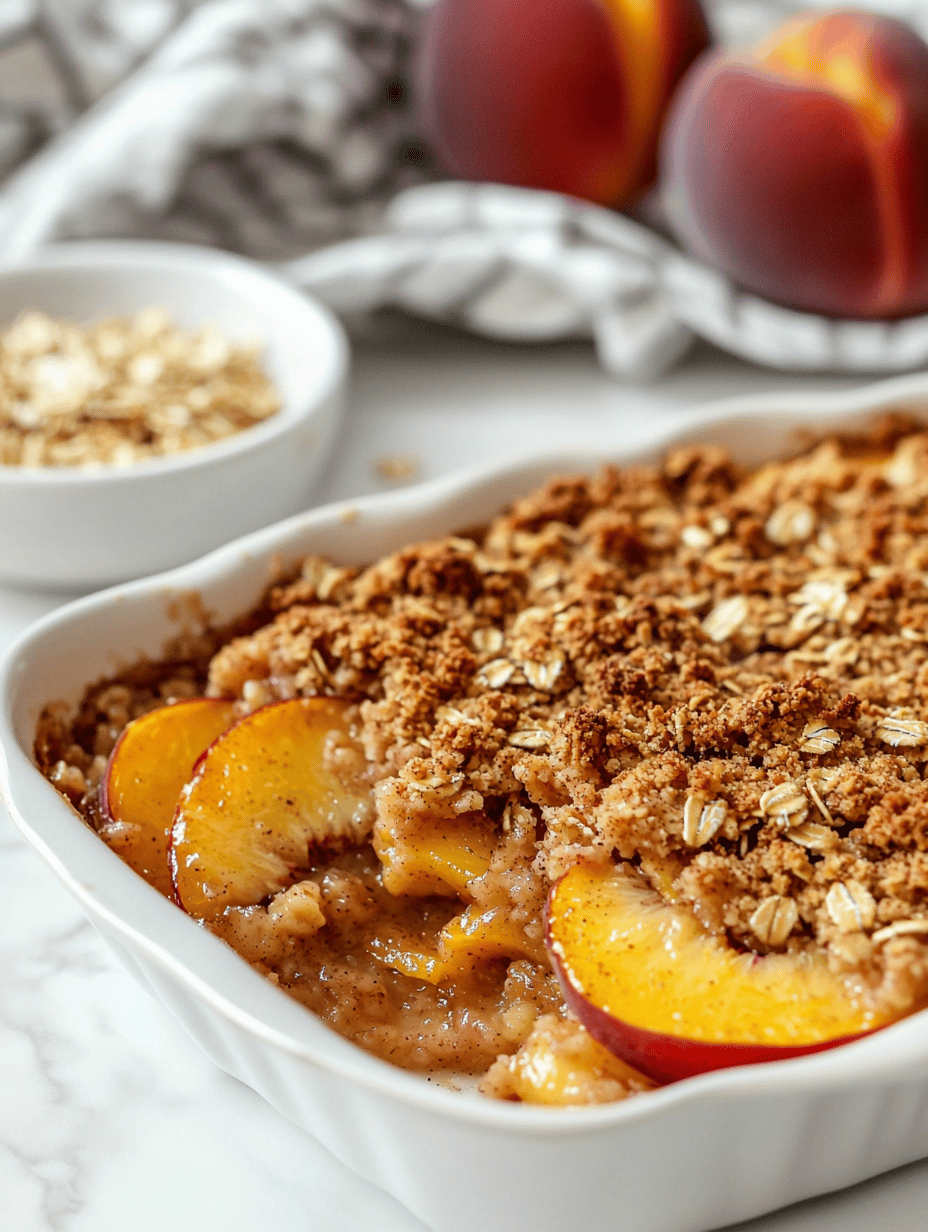
    This peach crisp features juicy, slightly tart peaches layered with a buttery streusel topping flavored with cinnamon, vanilla, and toasted oats. The dish is baked until bubbling and golden, resulting in a warm dessert with a crisp, crumbly texture and a fragrant aroma.
    Prep Time 20 minutes
    Cook Time 40 minutes
    Total Time 1 hour
    Servings: 6
    Course: Main Course
    Cuisine: American
    Calories: 250

    Ingredients
      

    • 6 cups ripe peaches, sliced peeled and pitted
    • 1 cup granulated sugar
    • 1 tablespoon lemon juice freshly squeezed
    • 1 teaspoon ground cinnamon
    • 1 pinch salt
    • 1 cup old-fashioned rolled oats toasted lightly
    • 1/2 cup all-purpose flour
    • 1/2 cup brown sugar
    • 1/2 cup unsalted butter cold and cubed
    • 1 teaspoon vanilla extract
    • 1 cup toasted oats for topping

    Equipment

    • 9×13-inch baking dish
    • Mixing bowls
    • Oven
    • Measuring Cups and Spoons
    • pastry cutter or fork
    • spoon for mixing

    Method
     

    1. Preheat your oven to 350°F (175°C) and lightly grease your baking dish to prevent sticking.
    2. In a large mixing bowl, toss the sliced peaches with sugar, lemon juice, cinnamon, and a pinch of salt until well coated. This will enhance the natural flavor and help the peaches release their juices during baking.
    3. Pour the peach mixture into the prepared baking dish, spreading it out evenly to create a uniform layer.
    4. In a separate bowl, combine the oats, flour, and brown sugar. Mix them together to form the base for your streusel topping.
    5. Add the cold, cubed butter to the bowl and use a pastry cutter, fork, or your fingers to cut the butter into the dry ingredients until the mixture resembles coarse crumbs with some pea-sized pieces. This creates a flaky, crunchy topping.
    6. Stir in the vanilla extract for a subtle aromatic flavor that complements the peaches and cinnamon.
    7. Sprinkle the streusel evenly over the layered peaches, gently pressing it down to ensure good coverage and a cohesive topping.
    8. Place the baking dish in the preheated oven and bake for about 40 minutes, or until the topping is golden brown and the filling bubbles around the edges.
    9. Remove the peach crisp from the oven and let it cool slightly for about 10 minutes; the juices will thicken a bit and the aroma will be irresistible.
    10. Serve the warm peach crisp with a scoop of vanilla ice cream or a dollop of whipped cream, if desired, to add extra richness.

    Notes

    For extra flavor, toast the oats lightly before adding them to the topping. Make sure the butter is cold for a flakier streusel. This dessert pairs beautifully with cold dairy or a drizzle of honey.

    This peach crisp is a celebration of seasonal bounty, perfect for those fleeting summer days when peaches are at their peak. It also lends itself beautifully to casual gatherings, where the aroma alone can draw everyone to the table.

    Whether served warm with a scoop of vanilla ice cream or on its own, it’s a reminder of how simple ingredients can come together for a truly heartfelt dessert. No matter the occasion, this dish brings a touch of nostalgic joy and sweet satisfaction.

  • Spooky Delights: Crafting Perfect Halloween Ghost Brownies

    Spooky Delights: Crafting Perfect Halloween Ghost Brownies

    Every October, I dive into a sea of pumpkin spice and caramel drizzle, but this year, I wanted something unexpectedly charming and eerie—Enter the Halloween Ghost Brownies. These treats turn a simple chocolate brownie into a ghostly masterpiece with just a few flicks of white icing and the right bits of candy. It’s amazing how a little decoration changes the mood, making your table both spooky and sweet.

    What excites me most about creating these ghosts is the playful chaos involved. They’re as fun to make as they are to eat, especially with kids or at a last-minute costume party. The smell of melting chocolate mixed with vanilla spins a cozy aroma around the house, brewing anticipation before the first bite. And trust me, these ghosts aren’t just adorable—they’re decadently fudgy.

    Halloween Ghost Brownies

    This recipe transforms classic chocolate brownies into spooky ghost decorations using a fudgy, dense brownie base topped with white icing to create ghostly figures. The finished treats have a rich chocolate flavor with a smooth, chewy texture and playful, ghostly appearances with candy details. Perfect for a festive Halloween atmosphere, these brownies combine decadent dessert with fun, decorative fun.
    Prep Time 20 minutes
    Cook Time 25 minutes
    Total Time 45 minutes
    Servings: 12
    Course: Main Course
    Cuisine: American
    Calories: 250

    Ingredients
      

    • 1 box chocolate brownie mix or homemade brownie batter
    • 1/2 cup vegetable oil
    • 2 eggs eggs
    • 1 cup powdered sugar for icing
    • 2 tablespoons milk or water
    • 1 cup white icing store-bought or homemade
    • Small candy eyes or colored candies for decorating ghosts

    Equipment

    • Mixing bowls
    • Whisk
    • Rubber spatula
    • 8×8 inch baking pan
    • Parchment paper
    • Cooling rack
    • Piping bag or plastic sandwich bag
    • Small round tip or scissors for piping

    Method
     

    1. Preheat your oven to 350°F (175°C). Line an 8×8 inch baking pan with parchment paper for easy removal.
    2. In a mixing bowl, combine the brownie mix, eggs, and vegetable oil. Use a whisk or spatula to stir until the batter is smooth and glossy, with no lumps remaining.
    3. Pour the batter into the prepared pan and spread it evenly with a spatula. Tap the pan lightly on the counter to release any air bubbles and create a flat surface.
    4. Bake in the preheated oven for about 25 minutes, or until a toothpick inserted in the center comes out with a few moist crumbs. Let the brownies cool completely on a wire rack.
    5. Once cooled, lift the brownies out of the pan using the parchment paper and cut into rectangles or irregular shapes resembling ghost forms.
    6. Prepare the white icing by mixing powdered sugar with milk or water until smooth and spreadable. Transfer it to a piping bag or plastic sandwich bag with a small cut at the tip.
    7. Pipe a layer of white icing over each brownie, creating a ghostly, flowing shape with uneven, drippy edges for a spooky look.
    8. Add small candy eyes or colored candies to the icing to give each ghost a playful face. Press gently to secure them onto the icing.
    9. Let the decorated brownies sit for about 15 minutes, allowing the icing to set slightly so decorations stay in place.
    10. Serve these fun, spooky Halloween treats at your party or enjoy them as a playful dessert. They combine rich chocolate flavor with adorable, ghostly appearances that delight both kids and adults.

    Notes

    For extra decoration, use colored icing to add additional details like mouths or scarves. Store leftovers in an airtight container for up to 2 days.

    As the night of ghosts and ghouls approaches, these brownie spirits will bring a delightful surprise to your celebration. They combine a beloved classic flavor with a whimsical twist, making them perfect for both kids and adults alike. Plus, their simple assembly invites everyone to join in the spooky fun, no extra fuss needed.

    By the end of the night, I guarantee these Halloween Ghost Brownies will leave a memorable mark—and maybe even inspire a few ghostly giggles. They’re a charming way to celebrate the season, blending creativity with comfort. Here’s to a hauntingly sweet Halloween, filled with treats as charming as they are tasty.

  • Beware the Sweet Poison: Haunted Toffee Apple Delights

    Beware the Sweet Poison: Haunted Toffee Apple Delights

    Every October, my kitchen transforms into a mad scientist’s lab, especially when I anticipate making my infamous Halloween Poison Toffee Apples. These sinister treats aren’t just sweet; they carry a ghostly allure with their glossy, too-perfect crimson coating that seems to lure you in.

    The real twist? I add a dash of chaos—bright edible glitter and a splash of black food coloring to give that forbidden fruit look. The smell of melting caramel melds with the crispness of fresh apples, kicking up a nostalgic yet eerie ambiance. It’s not just about the taste but creating a visual feast that whispers mischief.

    WHY I LOVE THIS RECIPE?

    • It’s a playful twist on the classic, perfect for a spooky party vibe.
    • The color and texture create an irresistible, haunting appeal.
    • Making these often turns into a chaotic, joyful mess—I love the chaos.
    • The sweet, sticky crunch makes every bite a small act of rebellion.
    • They’re surprisingly quick to whip up, even on a busy Halloween night.

    AVOID MY DISASTER (You’re Welcome)

    • FORGOT to grease the baking sheet—sticky toffee everywhere. Use parchment for easy cleanup.
    • DUMPED the hot caramel—scorch marks and burned fingers. Use a sturdy spatula, patience helps.
    • OVER‐TORCHED the caramel—bitter taste. Keep a close eye and stir constantly.
    • FORGOT to attach the sticks—chocolate-covered hands are no fun. Secure the sticks tightly before dipping.

    QUICK FIXES THAT SAVE YOUR DAY

    • When caramel seizes—Splash in a little hot water, stir gently to smooth again.
    • When apples slip—Patch with a thick caramel layer to reattach and stabilize.
    • When caramel is too runny—Shield with a second, thicker coat for a better shell.
    • When toasting sugar—When it emits a caramel aroma and turns amber, remove immediately.
    • When in doubt—Use a microwave-safe bowl for quick control, plus it smells divine when melting.

    These Poison Toffee Apples are more than just treats; they’re a statement. The rich caramel, the glossy finish, and that haunting shade make them the centerpiece of any Halloween table. The slight chaos involved adds a layer of fun that’s hard to resist.

    As the season’s chill creeps in, these sweets evoke childhood memories and a touch of mischief. They’re perfect for carving out moments of joy or chaos, depending on your approach. No matter how they turn out, they remind us of the magic in the unpredictable art of baking.

    Halloween Poison Toffee Apples

    This dessert features fresh apples coated in thick caramel that hardens into a glossy shell, then decorated with edible glitter and black food coloring for a spooky effect. The process involves caramelizing sugar, dipping the apples, and adding colorful embellishments to create a visually striking treat with a crunchy, sticky texture.
    Prep Time 15 minutes
    Cook Time 20 minutes
    Total Time 35 minutes
    Servings: 6
    Course: Main Course
    Cuisine: Halloween
    Calories: 230

    Ingredients
      

    • 6 small fresh apples preferably tart varieties like Granny Smith
    • 2 cups granulated sugar for caramel
    • 1/2 cup water for caramel
    • 1 tablespoon light corn syrup helps prevent crystallization
    • 1 teaspoon vanilla extract for flavor
    • black food coloring black food coloring optional, for tinting caramel
    • edible glitter bright edible glitter for spooky shimmer
    • 4 cups white chocolate melted for decoration
    • optional additional food coloring for colored drips or accents

    Equipment

    • Heavy-bottomed saucepan
    • Wooden spoon or heat-resistant spatula
    • Baking sheet lined with parchment paper
    • Apple sticks or skewers
    • Cooling rack
    • Small bowl for edible glitter

    Method
     

    1. Wash and thoroughly dry the apples, then insert sticks or skewers into the top of each apple, pushing them in firmly.
    2. Combine sugar, water, and corn syrup in a heavy-bottomed saucepan over medium heat. Stir gently until the sugar dissolves completely, then attach a candy thermometer.
    3. Bring the mixture to a boil without stirring, observing as it bubbles and turns golden amber around the edges. Cook until the temperature reaches about 300°F (hard crack stage).
    4. Remove the pan from heat and carefully swirl in a few drops of black food coloring if desired, then add vanilla extract for aroma. Stir gently to incorporate the color and flavor evenly.
    5. Quickly dip each apple into the hot caramel, tilting and rotating to coat it completely. Let any excess drip off before placing the apple on a parchment-lined baking sheet to set.
    6. Allow the caramel-coated apples to cool and harden at room temperature, which takes about 10-15 minutes. The glossy caramel shell should be firm and shiny.
    7. Melt the white chocolate in a microwave or double boiler until smooth. Use a fork or piping bag to drizzle or decorate the cooled apples with ghostly white streaks or spooky designs.
    8. Sprinkle bright edible glitter onto the coated apples for a shimmering, ghostly effect. Use a small brush or sprinkle directly for an even, spooky glow.
    9. Optionally, add colored drips or accents using food coloring mixed with melted chocolate, creating eerie details for a more haunting appearance.
    10. Place the finished Poison Toffee Apples on a platter or a serving dish. Let them sit for a few minutes to ensure the decorations set completely.
    11. Enjoy these sinister, crunchy treats with a gooey caramel shell and a spooky sparkling finish, perfect for Halloween celebrations.

    Notes

    Ensure to work quickly when pouring the hot caramel to prevent it from seizing. Use caution when handling boiling sugar to avoid burns. For extra creepiness, add other decorations like fake cobwebs or plastic spiders.

    Crafting these spooky treats is always an adventure, balancing the thrill of the unknown with the comfort of familiar flavors. Each batch holds the promise of a little mischief and a lot of smiles, especially when everyone bites into that glossy, eerie shell.

    With their striking appearance and mischievous charm, these Poison Toffee Apples become the star of any Halloween gathering. They embody the spirit of the season—fun, slightly spooky, and unforgettable in every crunch. Plus, they’re a reminder that sometimes, chaos makes the best memories.

  • Spooky Sophistication: The Creepiest Brain Jello Mold for Halloween

    Spooky Sophistication: The Creepiest Brain Jello Mold for Halloween

    Every Halloween, I love diving into the chaos and creating something visually startling yet surprisingly simple to make. The Brain Jello Mold feels like a culinary experiment, a playful nod to classic horror movies, but with a twist of nostalgia. Its gelatinous, squishy texture and eerie color make it the perfect centerpiece for a spooky party.

    Brain Jello Mold

    This dish involves dissolving flavored gelatin with hot water, pouring it into a brain-shaped mold, and setting it in the refrigerator until firm. The final product has a translucent, squishy texture and a grotesque, brain-like appearance, making it a spooky centerpiece for Halloween celebrations.
    Prep Time 15 minutes
    Cook Time 4 minutes
    Total Time 4 minutes
    Servings: 8
    Course: Main Course
    Cuisine: Halloween
    Calories: 50

    Ingredients
      

    • 2 cups fruit-flavored gelatin powder such as raspberry or cherry for the eerie color
    • 2 cups hot water
    • 1 cup cold water

    Equipment

    • Brain-shaped gelatin mold
    • Pot
    • Mixing Spoon
    • Measuring Cups
    • Refrigerator

    Method
     

    1. Bring the hot water to a boil in a pot.
    2. Pour the boiling water over the gelatin powder and stir vigorously until completely dissolved and the mixture is smooth, about 2 minutes.
    3. Add cold water to the gelatin mixture and stir well to combine.
    4. Pour the liquid gelatin into the brain-shaped mold, filling it evenly.
    5. Place the mold in the refrigerator and let it set for at least 4 hours or until completely firm and wobbling slightly if nudged.
    6. Once set, carefully invert the mold onto a serving plate and gently press to release the gelatin.
    7. Adjust and arrange the gelatin to resemble a gruesome brain, then serve chilled to enjoy its squishy texture and creepy appearance.

    With just a few ingredients and a splash of creative chaos, your Halloween table will be unforgettable. Whether you’re hosting a small gathering or a big spooky bash, this mold will add that perfect dash of gross-out charm. Happy Halloween, and happy experimenting in your kitchen!

  • Autumn’s Unexpected Treasure: Pumpkin Cheesecake with a Twist

    Autumn’s Unexpected Treasure: Pumpkin Cheesecake with a Twist

    As the leaves start to drift down and the air turns crisper, I find myself craving desserts that resonate with the season’s cozy warmth. This pumpkin cheesecake isn’t just a sweet treat; it’s a nostalgic voyage back to baked afternoons spent with loved ones. But this version has a surprising ingredient that elevates it beyond the usual pumpkin pie fare.

    The secret lies in a hint of smoked cinnamon, which lends a gentle, smoky aroma that surprises the senses. The creamy texture of the cheesecake paired with the robust fall flavors makes every bite a little celebration of harvest magic. It’s an unexpected yet harmonious centerpiece for any autumn gathering.

    Smoked Cinnamon Pumpkin Cheesecake

    This pumpkin cheesecake features a smooth, creamy filling infused with smoky cinnamon, baked until set with a lightly golden top. The dessert has a velvety texture and a rich autumnal flavor profile, combining the sweetness of pumpkin with warm spices and a subtle smoky aroma.
    Prep Time 30 minutes
    Cook Time 1 hour
    Total Time 1 hour 30 minutes
    Servings: 8
    Course: Main Course
    Cuisine: American
    Calories: 450

    Ingredients
      

    • 1 ½ cups graham cracker crumbs for crust
    • cup butter melted
    • 16 oz cream cheese softened
    • 1 cup granulated sugar
    • 1 cup canned pumpkin pure pumpkin puree
    • 3 large eggs
    • 1 ½ teaspoons smoked cinnamon ground
    • 1 teaspoon vanilla extract
    • ¼ teaspoon salt

    Equipment

    • Springform pan
    • Mixing bowls
    • Hand or stand mixer
    • Silicone spatula
    • Baking sheet
    • Oven

    Method
     

    1. Preheat the oven to 350°F (175°C). Mix the graham cracker crumbs with melted butter until evenly coated, then press the mixture into the bottom of a springform pan to form a crust. Bake for 10 minutes to set the crust, then remove and let cool slightly.
    2. In a large mixing bowl, beat the softened cream cheese with a hand or stand mixer until smooth and creamy, about 2-3 minutes. Add granulated sugar and continue beating until well combined and fluffy.
    3. Incorporate the canned pumpkin and vanilla extract into the cream cheese mixture, mixing on low speed until fully blended and smooth. The mixture should have a pumpkin-orange hue and a silky texture.
    4. Add eggs one at a time, beating on low after each addition, until fully incorporated. The batter will become richer and slightly thicker.
    5. Stir in the smoked cinnamon and salt, folding gently with a spatula to evenly disperse the aromatic spice throughout the mixture.
    6. Pour the batter over the cooled crust in the springform pan, spreading it out smoothly with a spatula for an even top.
    7. Place the springform pan on a baking sheet and bake in the preheated oven for 60 minutes, or until the edges are set but the center still slightly jiggles when shook gently.
    8. Once baked, turn off the oven and crack the door open slightly. Let the cheesecake cool inside for about an hour to prevent cracking and to develop a gentle crack-free surface.
    9. Transfer the cheesecake to the refrigerator and chill for at least 4 hours or overnight until fully set and firm.
    10. Gently run a knife around the edges of the springform before unlatching it. Remove the sides carefully to reveal the smooth, pumpkin-colored surface of the cheesecake.
    11. Slice the cheesecake with a sharp knife, serve with a sprinkle of smoked cinnamon or whipped cream if desired. Enjoy the rich, creamy texture with its deep fall flavors.

    Notes

    For best flavor, prepare the cheesecake a day ahead to allow the spices to fully meld.

    This cheesecake combines simple ingredients with an unexpected smoky undertone that makes it special. It’s perfect for those cooler evenings when a warming dessert feels just right. Sharing this dessert will turn an ordinary meal into a memorable celebration of fall’s bounty.

    Every spoonful unleashes rich, mellow flavors that echo the season’s charm. Whether it’s an intimate family dinner or a casual get-together, this pumpkin cheesecake will remind everyone how comforting and versatile good flavors can be. It’s a gentle reminder that sometimes, the most surprising tweaks can bring new joy to familiar treats.

  • The Secret to an Irresistible Apple Cake That Tells a Story

    The Secret to an Irresistible Apple Cake That Tells a Story

    When I first stumbled upon this apple cake recipe, I was craving more than just a sweet treat. I wanted a dessert that carried a whisper of memories and a touch of chaos in the kitchen. The secret ingredient became a symbol of my imperfect baking adventures, transforming simple apples into a nostalgic masterpiece.

    This cake isn’t just about flavor—it’s about the journey. Its golden crust, studded with cinnamon and caramelized apple bits, fills the air with an irresistible aroma that instantly pulls people into the kitchen. Every bite is a celebration of the unexpected turns in baking, making it perfect for lazy weekends or spontaneous gatherings.

    WHY I LOVE THIS RECIPE?

    • Because it brings back childhood memories of grandma’s kitchen amid a cloud of cinnamon.
    • It’s beautifully forgiving—perfect for those who prefer a little chaos in their baking.
    • The smell alone sparks joy and gathers everyone around the oven.
    • I take pride in how quickly it comes together, yet tastes like a special occasion.
    • It’s a heartfelt reminder that simple ingredients can produce the most comforting desserts.

    AVOID MY DISASTER (You’re Welcome)

    • FORGOT to preheat the oven? Cake sank in the middle. Restart with a hot oven and good cheer.
    • DUMPED too much apple? The crumb got soggy. Balance fruit and batter next time.
    • OVER‑TORCHED the top? Burnt spots hide a perfect texture. Cover with foil and keep baking.
    • FORGOT sugar? The cake lacked sweetness. Add a touch more during mixing.

    QUICK FIXES THAT SAVE YOUR DAY

    • When batter is too thick, gently splash in a splash of milk to loosen it.
    • Patch a cracked crust with a sprinkle of sugar and a few crumbs for charm.
    • Shield from over-browning by tenting with foil halfway through baking.
    • When the apple flavor is subdued, stir a dash of cinnamon into the batter.
    • Smell the oven — the crackling of sugar on top is your cue for perfection.

    This apple cake is a snapshot of seasonal comfort, perfect for chilly mornings or crisp afternoons. Its straightforward charm means you can whip it up at a moment’s notice, filling your home with warmth and the scent of baked apples. It’s one of those recipes that makes the everyday a little more special.

    Even after the last crumb disappears, I find myself reminiscing about the swirl of cinnamon in each bite. This cake reminds me that good, honest baking doesn’t have to be perfect—just heartfelt. And sometimes, that’s all a recipe really needs to become a part of your story.

    Apple Cinnamon Cake

    This apple cinnamon cake is a moist, tender dessert featuring sliced apples folded into a cinnamon-spiced batter. Baked until golden with a caramelized crust and tender apple pieces inside, it combines simple ingredients with comforting textures and inviting aromas.
    Prep Time 15 minutes
    Cook Time 40 minutes
    Total Time 55 minutes
    Servings: 8
    Course: Main Course
    Cuisine: Comfort Food
    Calories: 290

    Ingredients
      

    • 2 cups all-purpose flour
    • 1 cup granulated sugar
    • 1/2 cup unsalted butter melted
    • 2 large eggs
    • 1 teaspoon vanilla extract
    • 1 teaspoon ground cinnamon
    • 1/2 teaspoon baking powder
    • 1/4 teaspoon salt
    • 3 medium apples peeled and sliced

    Equipment

    • Mixing bowl
    • Whisk
    • Loaf Pan or Cake Tin
    • Mixing Spoon
    • Peeler or Knife
    • Oven

    Method
     

    1. Preheat your oven to 350°F (175°C) and grease your baking pan to prevent sticking.
    2. Peel, core, and thinly slice the apples, then set them aside to display their beautiful, caramelized edges as they bake.
    3. In a large mixing bowl, whisk together the eggs, granulated sugar, and vanilla extract until the mixture is smooth and slightly frothy.
    4. Pour in the melted butter and continue whisking until well combined, giving the batter a shiny, smooth appearance.
    5. In a separate bowl, sift together the flour, cinnamon, baking powder, and salt to evenly distribute the spices and leavening agents.
    6. Gradually fold the dry ingredients into the wet mixture using a spatula or spoon, stirring just until the batter is smooth and uniform.
    7. Gently fold the sliced apples into the batter, ensuring they are evenly coated and incorporated without deflating the mixture.
    8. Pour the batter into your prepared baking pan, spreading it out evenly with the back of a spoon or spatula.
    9. Bake in the preheated oven for about 40 minutes, or until the top is golden brown and a toothpick inserted into the center comes out clean.
    10. Remove the cake from the oven and let it cool slightly; the aroma of cinnamon and baked apples will fill your kitchen, inviting you to indulge.
    11. Slice the cake and serve warm or at room temperature, enjoying the tender crumb, caramelized apples, and warm cinnamon flavor.

    Notes

    For extra richness, serve with a dollop of whipped cream or a drizzle of caramel sauce.

    Sharing this apple cake feels like passing down a simple joy. Its scent and flavors seem to whisper stories of cozy kitchens and seasonal harvests, reminding us to slow down and savor these moments.

    As the years go by, this recipe remains a favorite for spontaneous get-togethers or quiet mornings. Its humble beauty lies in the imperfect, warm, and nostalgic feeling it leaves behind with every slice.

  • Spooky Sweetness: A Creepy Delight with Halloween Graveyard Pudding Cups

    Spooky Sweetness: A Creepy Delight with Halloween Graveyard Pudding Cups

    Halloween crafting reaches a new level of fun with these Graveyard Pudding Cups. They turn a simple dessert into a miniature spooky graveyard, perfect for kids and nostalgic adults alike. The eerie look is what captures everyone’s attention, but the irresistible taste keeps them coming back for more.

    Using everyday ingredients, you can create a haunting scene at your table. The combination of chocolate, cookies, and marshmallows offers a rich, creamy bite with crunchy surprises. It’s a playful and slightly chaotic project that transforms your kitchen into a spooky mini-world.

    Halloween Graveyard Pudding Cups

    This dessert features layered chocolate pudding topped with crumbled cookies and marshmallow tombstones, arranged to resemble a spooky graveyard. The creamy pudding provides a smooth base, while crunchy cookie crumbles and marshmallows add texture and visual interest, resulting in a playful, eerie presentation.
    Prep Time 15 minutes
    Cook Time 10 minutes
    Total Time 25 minutes
    Servings: 4
    Course: Main Course
    Cuisine: Halloween
    Calories: 250

    Ingredients
      

    • 1 pack chocolate pudding mix prepare according to package instructions
    • 1 1/2 cups cold milk
    • 1 cup cookie crumbles optional: store-bought or homemade
    • 1 cup mini marshmallows for tombstones
    • 4 tombstone-shaped cookies or candies to resemble grave markers

    Equipment

    • Mixing bowls
    • Whisk
    • Pudding cups or small glasses
    • Spoon
    • Cookie crumbles (prepared or homemade)
    • Mini marshmallows
    • Decorative tombstone-shaped cookies or candies

    Method
     

    1. Whisk the chocolate pudding mix with cold milk until smooth and slightly thickened, about 2 minutes. Chill in the refrigerator for 5-10 minutes to allow it to firm up.
    2. Spoon the prepared pudding evenly into each serving cup or glass, filling them about three-quarters full. Tap gently to level the surface and remove air bubbles.
    3. Sprinkle a generous layer of cookie crumbles over the pudding, creating a textured, earthy layer that mimics soil or graveyard surface.
    4. Place mini marshmallows upright on the cookie crumbles to resemble tombstones standing in the graveyard. Arrange some randomly for a spooky, chaotic look.
    5. Insert the tombstone-shaped cookies or candies into the marshmallows to clearly mark each grave, giving a final eerie touch to your scene.
    6. Once assembled, serve immediately or refrigerate until ready to display. The pudding will remain creamy, and the decorations will hold their shape for several hours.

    Notes

    For extra spooky effects, add gummy worms or edible eyeballs among the decorations.
    This Halloween treat is more than just a dessert; it’s a conversation starter and a mini adventure for your taste buds. As you assemble these graveyard cups, you bring a little spooky magic into your home, perfect for the spooky season.

    Enjoy sharing this dessert at your party or family dinner. Watching everyone’s delight as they uncover the little edible gravestones is a simple joy that makes the chaos of Halloween preparations worth it. Let this be your little spooky masterpiece to end the night with a smile.

  • Peach Crumble: A Summer Serenade for Your Taste Buds

    Peach Crumble: A Summer Serenade for Your Taste Buds

    Imagine a warm summer evening, the air filled with the sweet aroma of ripe peaches just off the vine. This peach crumble transforms simple stone fruits into a nostalgic dessert with a crunchy topping that crackles with every bite. It’s not just dessert; it’s a celebration of seasonality and fleeting sunshine.

    As I was tinkering with this recipe, I realized the magic lies in embracing the imperfect ripeness of peaches. Juicy, slightly soft, with a hint of tartness, they melt into a juicy filling that pairs beautifully with the toasted oats and butter topping. It’s a humble yet luxurious way to preserve a burst of summer.

    **WHY I LOVE THIS RECIPE?**

    Peach Crumble

    Peach crumble is a warm dessert featuring a juicy peach filling topped with a crisp, toasted oat mixture. The dish combines baked, softened fruit with a crunchy topping that crackles upon serving, showcasing seasonal peaches in a comforting presentation.
    Prep Time 15 minutes
    Cook Time 35 minutes
    Total Time 50 minutes
    Servings: 4
    Course: Main Course
    Cuisine: American
    Calories: 280

    Ingredients
      

    • 4 cups ripe peaches, sliced pitted and peeled if desired
    • 1/4 cup granulated sugar
    • 1 tablespoon lemon juice optional, enhances flavor
    • 1 cup rolled oats preferably old-fashioned
    • 1/2 cup all-purpose flour
    • 1/2 cup brown sugar packed
    • 1/2 cup unsalted butter, chilled and diced
    • 1/2 teaspoon ground cinnamon optional but adds warmth

    Equipment

    • Mixing bowls
    • Baking dish
    • Measuring Cups and Spoons
    • Oven

    Method
     

    1. Preheat your oven to 350°F (175°C). In a large bowl, gently toss the sliced peaches with granulated sugar and lemon juice until evenly coated. Transfer the mixture into a baking dish, spreading it out into an even layer.
    2. In a separate bowl, combine rolled oats, all-purpose flour, brown sugar, and cinnamon if using. Mix well to distribute the ingredients evenly.
    3. Add the chilled, diced butter to the dry ingredients. Using your fingertips or a pastry cutter, work the butter into the mixture until it resembles coarse crumbs, with some pea-sized pieces for texture.
    4. Sprinkle the crumble topping evenly over the peach filling in the baking dish. Gently press down some parts of the topping to ensure good contact with the fruit and even baking.
    5. Bake in the preheated oven for about 35 minutes, or until the topping is golden brown and the filling is bubbling around the edges. You may want to check at the 30-minute mark to prevent over-browning.
    6. Remove from the oven and let cool slightly for about 10 minutes. The crumble will thicken and become even more fragrant as it cools. Serve warm, ideally with a scoop of vanilla ice cream or a dollop of whipped cream.
    This peach crumble feels like a warm hug on a lazy weekend, inviting you to linger a little longer. It captures the essence of late summer, making each bite a fleeting reminder of lazy, sun-drenched days.

    Whether served warm with a scoop of vanilla or cool with a dollop of whipped cream, it’s a simple way to make moments sweeter. Holding a forkful, I’m reminded how food connects us to seasons, memories, and each other. No matter the day, this crumble brings a comforting touch to any table.