Category: Desserts

  • Enchant Your Halloween with Spooky Witch Finger Cookies!

    Enchant Your Halloween with Spooky Witch Finger Cookies!

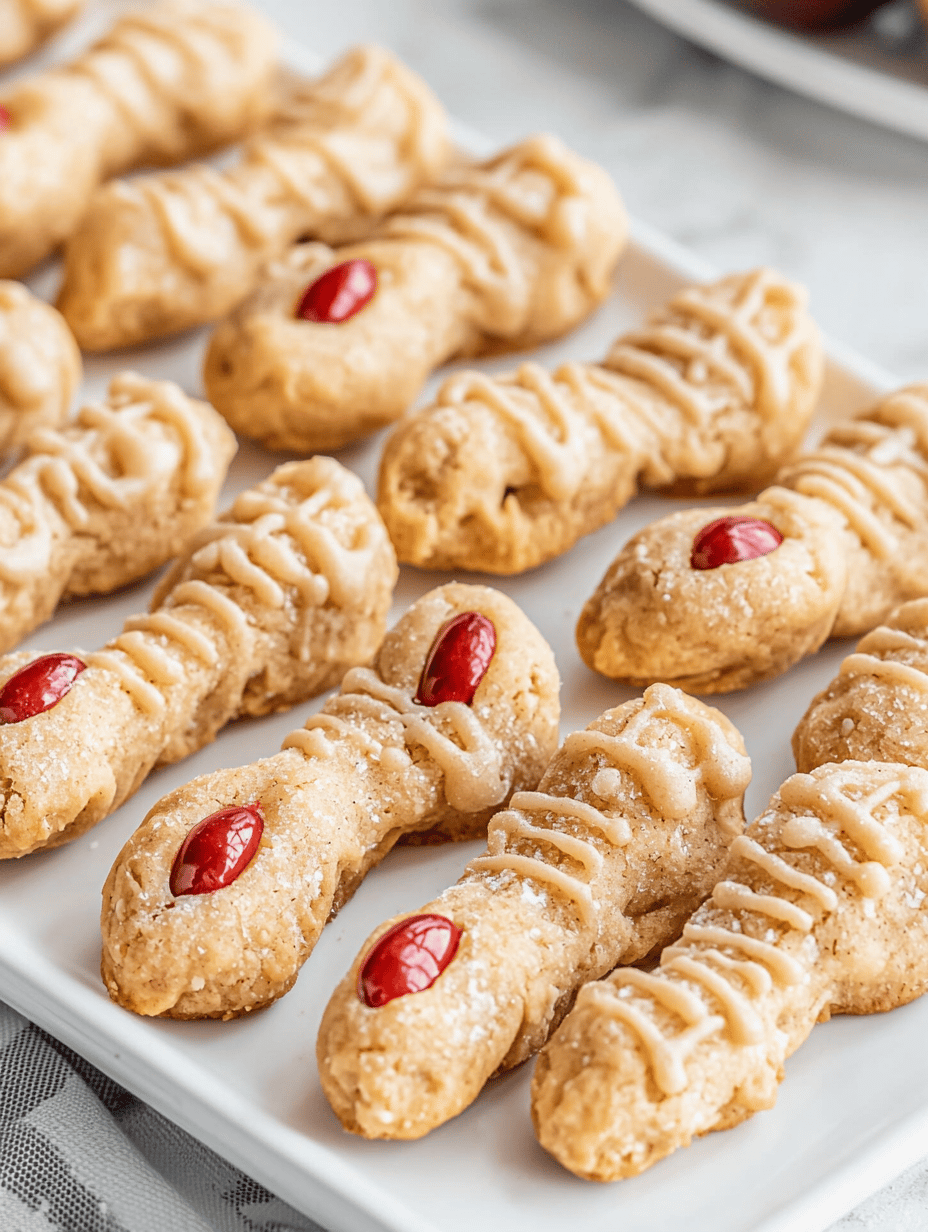
    Ever wondered how to turn simple sugar cookie dough into a chilling Halloween treat that sparks both delight and mild chaos? These Witch Finger Cookies are your answer. Their cracked, gnarled appearance makes them perfect for adding a dash of creepy fun to your spooky festivities.

    This year, I decided to embrace the eerie elegance of homemade treats. The process might seem straightforward, but the creepy details and unsettling details are what make these cookies unforgettable. Plus, they smell like sweet almonds and vanilla, creating a hauntingly aromatic experience.

    Witch Finger Cookies

    Witch Finger Cookies are crafted from a simple sugar cookie dough, shaped into elongated, irregular fingers, and baked until they crack and resemble gnarled, creepy fingers. The final cookies have a firm, crumbly texture with cracked surfaces and are often decorated with almond nails and dusted with edible dust to enhance their eerie appearance.
    Prep Time 20 minutes
    Cook Time 15 minutes
    Total Time 35 minutes
    Servings: 12
    Course: Main Course
    Cuisine: Halloween
    Calories: 150

    Ingredients
      

    • 1 cup unsalted butter softened
    • 1 cup granulated sugar
    • 1 large egg
    • 1 teaspoon vanilla extract
    • 2 3/4 cups all-purpose flour
    • 1/2 teaspoon baking powder
    • 1/4 teaspoon salt
    • 1 cup blanched almonds for nails
    • optional edible dust or powdered sugar for dusting

    Equipment

    • Mixing bowl
    • Baking sheet

    Method
     

    1. In a mixing bowl, beat the softened butter and granulated sugar until creamy and pale, about 2-3 minutes.
    2. Add the egg and vanilla extract, then beat again until well combined and smooth.
    3. In a separate bowl, whisk together the flour, baking powder, and salt.
    4. Gradually add the dry ingredients to the wet mixture, mixing on low speed until the dough comes together and is slightly sticky but manageable.
    5. Chill the dough in the refrigerator for about 30 minutes to make it easier to shape.
    6. Preheat the oven to 350°F (175°C) and line a baking sheet with parchment paper.
    7. Remove the dough from the fridge and divide it into 12 equal portions. Roll each portion into a long, thin finger shape, about 4-5 inches long, tapering at one end to resemble a fingernail.
    8. Place the shaped fingers on the prepared baking sheet, spacing them out to allow for cracking and spreading.
    9. Bake in the preheated oven for 15 minutes, or until the cookies are golden brown and cracking appears on the surface.
    10. While the cookies are still warm, gently press a blanched almond into the top of each finger as a fingernail, and if desired, dust with edible dust or powdered sugar for a ghostly effect.
    11. Allow the cookies to cool completely on a wire rack before serving. The finished cookies are crunchy with a cracked, gnarled appearance and spooky almond fingernails.

    Notes

    For extra creepy effect, use red food coloring to tint the almonds or add a dab of red icing to simulate blood around the fingernails.
    As the night falls and the haunted house gets livelier, your Witch Finger Cookies will cast their spell on young and old alike. Watching friends and family crack open these sugar-streaked fingers is almost as satisfying as biting into one.

    Whether you’re hosting a party or just craving a little playful scare, these cookies serve as a perfect edible centerpiece. Keep a few extra intact – they’re fun to break apart when the moment feels right, revealing their spooky secrets.

  • Spooky Delight: Halloween Monster Eyeball Cake Pops

    Spooky Delight: Halloween Monster Eyeball Cake Pops

    Forget typical Halloween treats — these Monster Eyeball Cake Pops are a chaotic splash of fun and spookiness. The moment you dip them in eerie red and green glazes, they come alive with creepy charm. I love how these little monsters turn a simple cake pop into a mini horror show with just a few gory details.

    They’re perfect for adding a whimsical, creepy vibe to any spooky gathering. Plus, even if you’re not a master baker, the simple steps make this a manageable project. The best part? Watching everyone’s eyes widen when they see the detailed eyeballs staring back.

    Monster Eyeball Cake Pops

    Monster Eyeball Cake Pops are bite-sized confections made from cake crumbs and frosting, shaped into small spheres, then coated with colorful glazes and decorated to resemble creepy eyeballs. Their final appearance is playful yet eerie, with a smooth outer shell and detailed eyeball features. The texture combines moist cake with a candy-like coating that is slightly firm on the outside and soft inside.
    Prep Time 30 minutes
    Cook Time 20 minutes
    Total Time 50 minutes
    Servings: 12
    Course: Main Course
    Cuisine: Halloween
    Calories: 150

    Ingredients
      

    • 2 cups vanilla cake crumbs store-bought or homemade, crumbled finely
    • 0.5 cup frosting vanilla or neutral flavor, to bind the cake crumbs
    • 2 cups white chocolate coating melted for dipping
    • 1 cup red glaze for the veins and gory effects
    • 1 cup green glaze for the outer skin
    • 12 small eyeball candies or mini marbles for the eyeballs
    • 1 tbsp shortening to help melt chocolate smoothly

    Equipment

    • Mixing bowls
    • Candy thermometer

    Method
     

    1. Mix the cake crumbs with frosting in a large bowl until well combined and holds together when pressed.
    2. Shape the mixture into 1-inch balls and place them on a baking sheet lined with parchment paper; chill in the refrigerator for 15 minutes to firm up.
    3. Melt the white chocolate with the shortening in a microwave-safe bowl in 30-second intervals, stirring until smooth and glossy.
    4. Dip each chilled cake ball into the melted white chocolate, using a fork to fully coat and gently tap off excess; set aside to dry.
    5. Once the coating is set, use a small brush or spoon to add drizzles of red glaze over the white chocolate to mimic veins and bloody effects.
    6. Use the green glaze to coat the remaining visible parts of each cake pop, creating a creepy, eyeball-like appearance.
    7. Place an eyeball candy or mini marble on top of each cake pop to resemble the eyeball, pressing gently into the glaze.
    8. Allow the cake pops to set completely at room temperature or refrigerate for faster setting before serving.
    9. Arrange the Monster Eyeball Cake Pops on a spooky platter, ready to surprise and delight your Halloween guests.

    Notes

    For added creepiness, use edible markers to draw small bloodshot veins or iris details on the eyeballs.

    These eyeball cake pops are more than just a treat—they’re a conversation starter at any Halloween party. Their mix of humor and fright makes them memorable. And let’s be honest, there’s a strange joy in creating edible monsters that look delightfully gross.

    As the season of costumes and candy rolls in, this recipe offers a fun break from traditional treats. It’s a little chaotic, a little messy, but always worth the effort when everyone laughs and marvels at your spooky creations.

  • Spooky Elegance: How to Make a Mesmerizing Halloween Spider Web Cake

    Spooky Elegance: How to Make a Mesmerizing Halloween Spider Web Cake

    Every October, I find myself craving a show-stopping dessert that combines both art and flavor. This Halloween, I decided to craft a spider web cake that looks like it belongs in a gothic fairytale. The process is almost meditative, layering fears and sweetness into one magical creation.

    What excites me most about this recipe isn’t just its haunting beauty but how it transforms simple ingredients into a piece of edible decor. It’s the perfect centerpiece for any spooky party or a fun baking project for the whole family. Plus, it’s surprisingly easier to make than it looks!

    Spider Web Cake

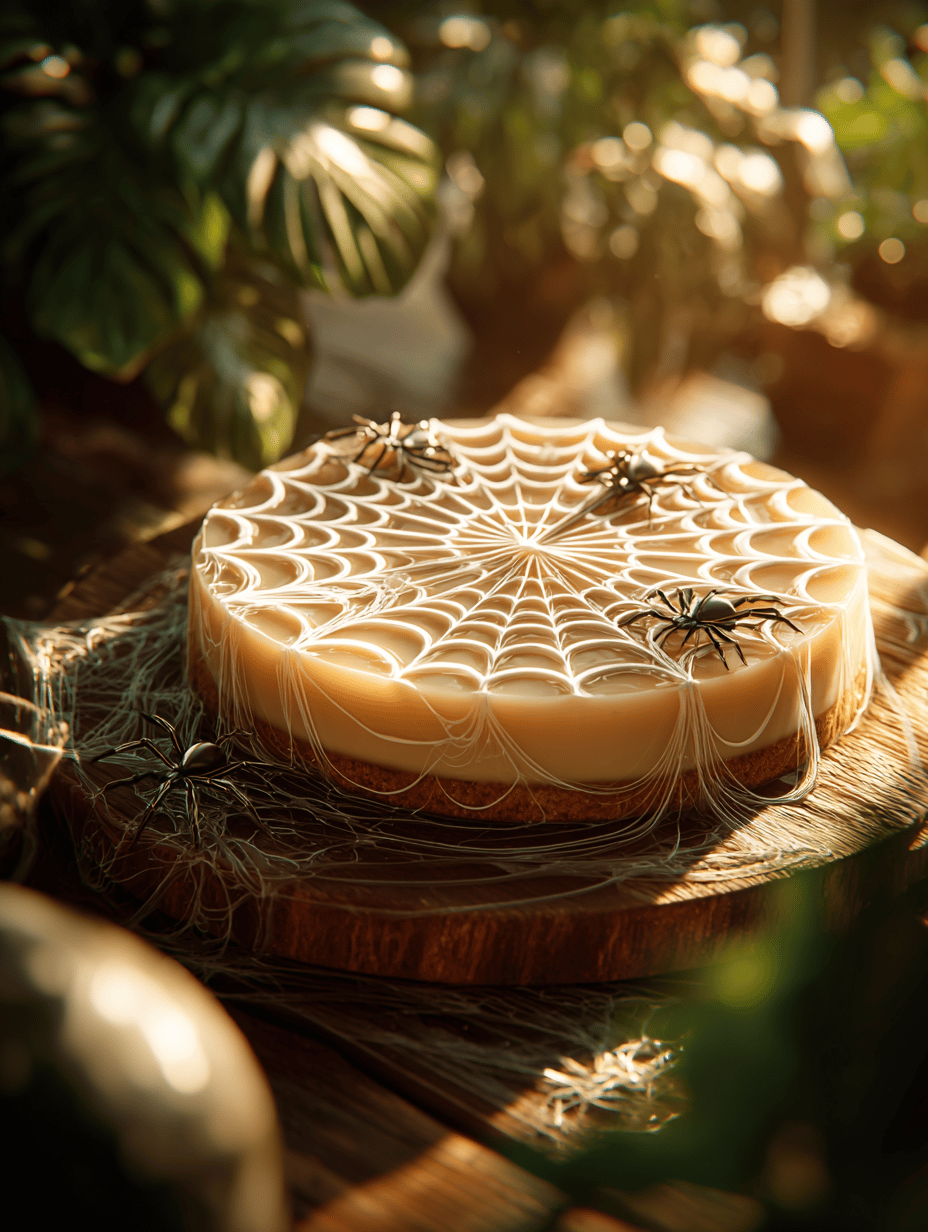
    A layered cake featuring dark chocolate sponge layers topped with rich frosting and decorated with intricate white icing to resemble a spider web. The final appearance is a glossy, dark landscape of cake with a striking web pattern on top. This dessert combines baking, frosting, and decorative piping to create a visually stunning centerpiece.
    Prep Time 30 minutes
    Cook Time 35 minutes
    Total Time 1 hour 5 minutes
    Servings: 8
    Course: Main Course
    Cuisine: American
    Calories: 450

    Ingredients
      

    • 1 3/4 cups all-purpose flour
    • 2 cups granulated sugar
    • 3/4 cup unsweetened cocoa powder
    • 1 1/2 teaspoons baking powder
    • 1/2 teaspoon baking soda
    • 1/2 teaspoon salt
    • 2 large eggs room temperature
    • 1 cup buttermilk room temperature
    • 1/2 cup vegetable oil
    • 2 teaspoons vanilla extract
    • 1 cup hot water
    • 2 cups powdered sugar for frosting
    • 1/2 cup unsalted butter softened
    • 1/4 cup milk
    • White icing gel or royal icing for web piping pre-colored if possible

    Equipment

    • Mixing bowls
    • Electric mixer
    • Round cake pans
    • Cooling rack
    • Piping bag
    • Nozzle for piping web pattern

    Method
     

    1. Preheat your oven to 350°F (175°C). Grease and flour two 8-inch round cake pans, setting them aside.
    2. In a large mixing bowl, whisk together the flour, cocoa powder, baking powder, baking soda, salt, and sugar until evenly combined.
    3. Add eggs, buttermilk, vegetable oil, and vanilla extract to the dry ingredients. Mix with an electric mixer on medium speed until smooth and well combined.
    4. Carefully pour in the hot water and mix on low speed until the batter is thin and glossy. This creates a moist, tender crumb.
    5. Divide the batter evenly between the prepared cake pans and smooth the tops with a spatula.
    6. Bake for about 35 minutes, or until a toothpick inserted into the center comes out clean. Let the cakes cool in the pans for 10 minutes, then transfer to a wire rack to cool completely.
    7. While the cakes cool, prepare the frosting by beating softened butter and powdered sugar together until fluffy. Gradually add milk and continue beating until smooth and spreadable.
    8. Once cooled, layer the cakes and spread a generous amount of frosting on top of the first layer. Place the second cake on top and apply a thin crumb coat all over. Chill for 20 minutes to set the crumb coat.
    9. Apply a final even layer of frosting over the entire cake, smoothing the surface with a spatula.
    10. Fill a piping bag fitted with a Nozzle for web pattern with white icing gel or royal icing. Pipe concentric circles over the top of the cake, then draw spokes from the center to create a spider web effect.
    11. Finish by adding small spiders or other decorations if desired, then serve and enjoy your spooky, web-adorned cake.
    As the candlelight dances over the webbed surface, you realize this cake isn’t just dessert — it’s a spectacle. Guests will marvel at its detailed design while being delighted by its rich, chocolatey core. It’s a reminder that baking can be both creative and a bit mischievous.

    This cake captures the spirit of Halloween perfectly: eerie, a little chaotic, but undeniably delightful. It’s the kind of dish that sparks conversations and keeps little hands busy. Now, every Halloween feels a little more magical, all thanks to a simple, spooky cake.

  • Hidden Spice Secret: The Pumpkin Muffin Revival

    Hidden Spice Secret: The Pumpkin Muffin Revival

    For years, pumpkin muffins have been a fall staple, but I decided to take a different angle this season. Instead of the usual cinnamon and nutmeg overload, I experimented with a pinch of smoked paprika. It gives each bite a subtle smoky undertone that surprises the senses and elevates the humble muffin into something memorable.

    This approach was born from a desire to marry cozy fall flavors with a hint of unexpected depth. The aroma that filled my kitchen as these muffins baked was a tantalizing blend of sweet pumpkin and smoky allure, enchanting anyone who caught a whiff. This recipe feels like a small rebellion against the ordinary, perfect for those craving new autumn traditions.

    Now, let’s dive into what makes this muffin truly special. The moist crumb, combined with that whisper of spice, creates a balanced bite that’s both comforting and intriguing.

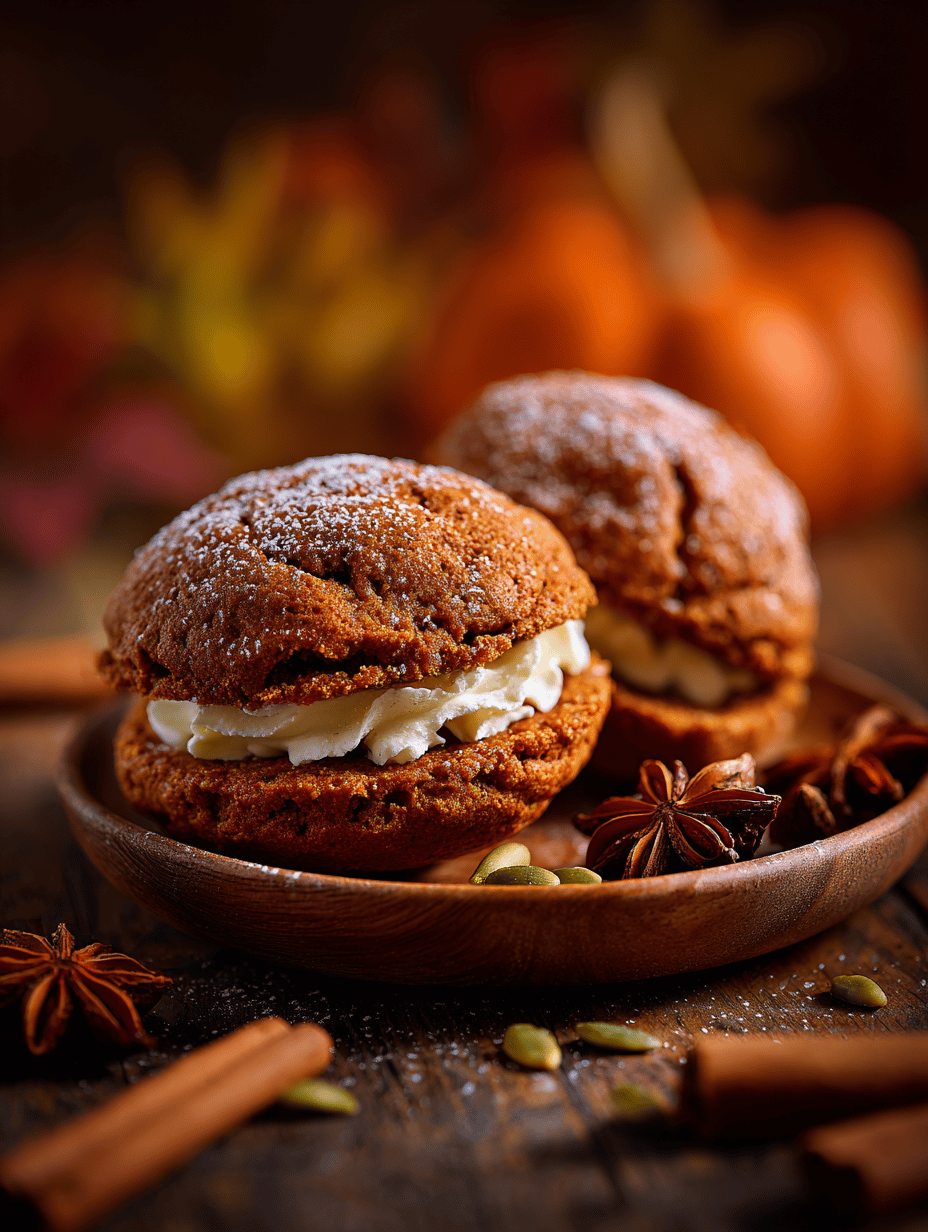
    Smoky Pumpkin Muffins

    These pumpkin muffins are baked until moist and tender, with a crumbly exterior and a light, fluffy interior. The addition of smoked paprika introduces a subtle smoky flavor that complements the natural sweetness of pumpkin, resulting in a visually appealing muffin with a golden crust and a soft, domed top.
    Prep Time 15 minutes
    Cook Time 20 minutes
    Total Time 35 minutes
    Servings: 12
    Course: Main Course
    Cuisine: American
    Calories: 210

    Ingredients
      

    • 1 1/2 cups all-purpose flour
    • 1 cup granulated sugar
    • 1/2 teaspoon baking soda
    • 1/2 teaspoon baking powder
    • 1/2 teaspoon smoked paprika adds smoky depth
    • 1/2 teaspoon salt
    • 1 cup pure pumpkin puree
    • 1/2 cup vegetable oil
    • 2 large eggs
    • 1 teaspoon vanilla extract

    Equipment

    • Mixing bowls
    • Whisk
    • Muffin tin
    • Paper muffin cups or grease

    Method
     

    1. Preheat your oven to 375°F (190°C) and line a muffin tin with paper cups or lightly grease it to prevent sticking.
    2. Combine the dry ingredients in a large mixing bowl: flour, sugar, baking soda, baking powder, smoked paprika, and salt. Whisk them together until evenly distributed.
    3. In a separate bowl, whisk together the pumpkin puree, vegetable oil, eggs, and vanilla extract until smooth and well blended. This creates a vibrant, slightly thick mixture.
    4. Pour the wet mixture into the bowl with the dry ingredients, then gently fold them together using a spatula or spoon. Be careful not to overmix; stop once the batter is just combined and slightly lumpy.
    5. Spoon the batter into the prepared muffin cups, filling each about two-thirds full. The batter should be scoopable but not runny, with a slightly textured surface.
    6. Place the muffin tin in the oven and bake for 18-20 minutes, or until the muffins are golden brown on top and a toothpick inserted into the center comes out clean.
    7. Remove the muffins from the oven and allow them to cool in the tin for a few minutes. Then transfer to a wire rack to cool completely—they’ll be moist and tender inside with a slightly crispy exterior.
    8. Once cooled, enjoy these muffins as is or with a pat of butter for an extra touch of richness. The smoky paprika subtly infuses each bite with a warm, earthy flavor that complements the pumpkin beautifully.

    Notes

    For a richer flavor, you can sprinkle a little extra smoked paprika on top before baking. These muffins are best enjoyed fresh but keep well stored in an airtight container for 1-2 days.

    These pumpkin muffins are more than a seasonal treat — they’re an invitation to experiment in your own kitchen. The smoky twist adds a layer of complexity that keeps everyone guessing and tasting again.

    As the cooler days settle in, I find myself reaching for these muffins alongside a mug of black coffee. They offer a cozy, unexpected boost that makes fall feel even more flavorful. Sometimes, all it takes is one small change to turn a familiar favorite into something new and exciting.

  • Spooky & Sweet: The Hidden Magic of Pumpkin Cheesecake Bars

    Spooky & Sweet: The Hidden Magic of Pumpkin Cheesecake Bars

    Every October, I find myself craving something more than just pumpkin spice lattes and hearty stews. I want a treat that blends autumn’s warm hues with a touch of chaos, something wildly festive yet surprisingly comforting. That’s when I discovered these Halloween Pumpkin Cheesecake Bars—an unexpected twist that turns pie traditions upside down.

    Crafting these bars feels like a treasure hunt. The crust’s buttery crunch, topped with a velvety pumpkin cheesecake that hints at cinnamon and ginger, creates a hauntingly delicious experience. They’re perfect for midnight kitchen escapades or a spirited party table that screams fall in every bite.

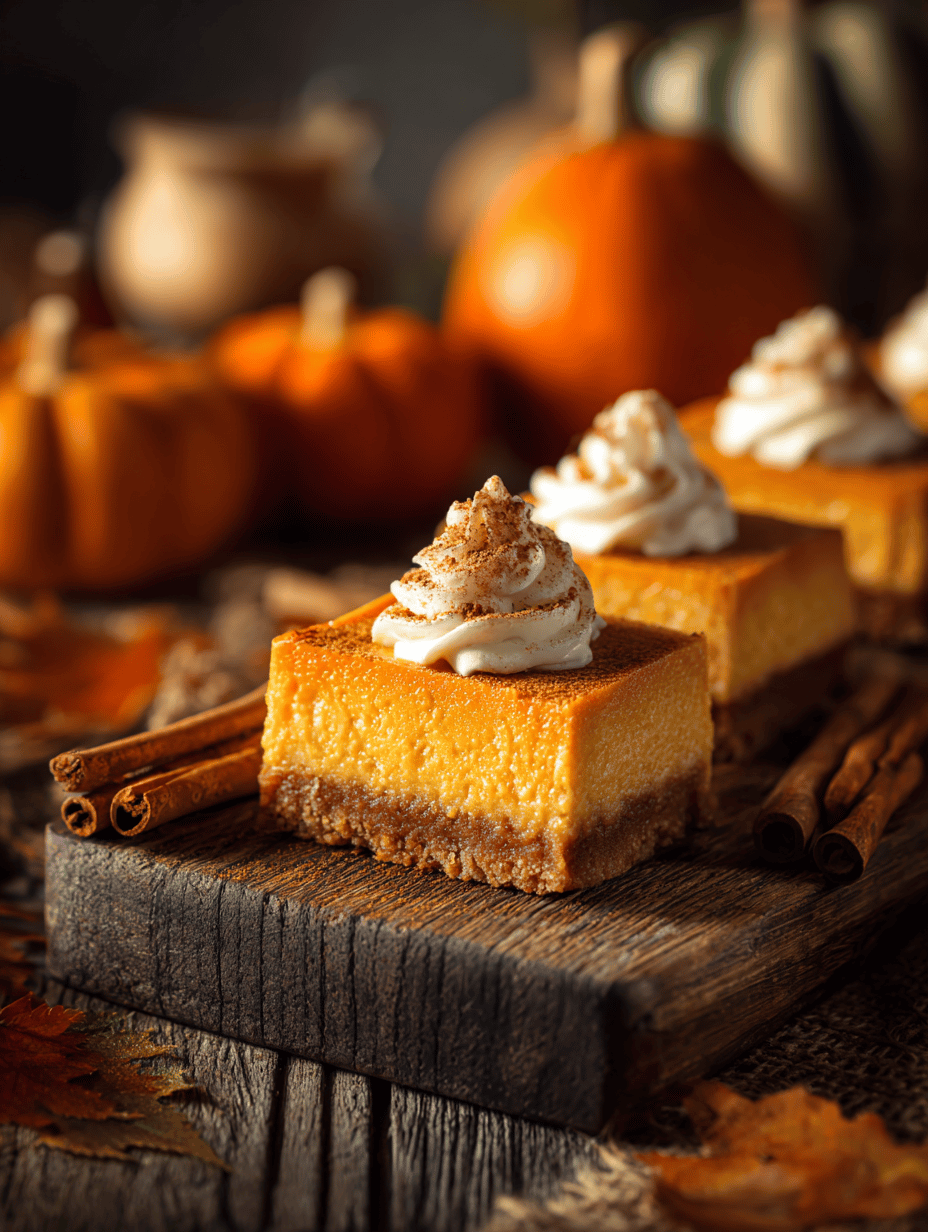
    Halloween Pumpkin Cheesecake Bars

    These pumpkin cheesecake bars feature a buttery crust topped with a velvety pumpkin filling seasoned with cinnamon and ginger. The bars are baked until set, resulting in a creamy yet firm texture with a festive appearance, perfect for autumn celebrations.
    Prep Time 20 minutes
    Cook Time 40 minutes
    Total Time 1 hour
    Servings: 12
    Course: Main Course
    Cuisine: American
    Calories: 320

    Ingredients
      

    • 1 1/2 cups graham cracker crumbs for crust
    • 1/2 cup unsalted butter melted, for crust
    • 16 oz cream cheese softened
    • 1 cup granulated sugar
    • 1 cup canned pumpkin puree
    • 3 large eggs
    • 1 1/2 teaspoons ground cinnamon
    • 1/2 teaspoon ground ginger
    • 1/4 teaspoon ground nutmeg
    • 1/4 teaspoon salt

    Equipment

    • 9×13-inch baking pan
    • Mixing bowls
    • Electric mixer or whisk
    • Measuring Cups and Spoons
    • Spatula
    • Parchment paper

    Method
     

    1. Preheat your oven to 350°F (175°C) and line a 9×13-inch baking pan with parchment paper for easy removal.
    2. Combine the graham cracker crumbs and melted butter in a mixing bowl, stirring until the crumbs are evenly coated and resemble wet sand.
    3. Press the crumb mixture firmly into the bottom of the prepared pan, creating an even layer that covers the base.
    4. Bake the crust for about 10 minutes until it is lightly golden, then set aside to cool slightly.
    5. In a large mixing bowl, beat the softened cream cheese with an electric mixer or whisk until smooth and creamy.
    6. Add sugar to the cream cheese and continue beating until well combined and fluffy.
    7. Stir in the pumpkin puree along with cinnamon, ginger, nutmeg, and salt, mixing until the filling is smooth and fragrant.
    8. One at a time, beat in the eggs until incorporated, ensuring the filling is well combined and slightly fluffy.
    9. Pour the pumpkin cheesecake filling over the cooled crust, spreading it evenly with a spatula for a smooth surface.
    10. Bake the assembled bars for 35-40 minutes, or until the edges are set and the center slightly jiggles when gently shaken.
    11. Remove from oven and let the bars cool completely in the pan on a wire rack, allowing the filling to set fully.
    12. Once cooled, cut into squares and serve. These bars can be chilled further for a firmer texture or enjoyed at room temperature for a softer, creamier bite.

    These pumpkin cheesecake bars aren’t just dessert; they’re a celebration of autumn’s wild charm. Each bite offers a burst of spice and creaminess that makes the season extra special. Sharing them feels like spreading a little fall magic among friends and family.

    As the nights grow longer and the air turns crisp, I keep coming back to this recipe. It’s a reminder that baking can be both playful and nostalgic—especially when paired with a good laugh and a cozy blanket. Happy fall, and may your kitchen always echo with laughter and delicious discoveries.

  • Spooky Crunch: Halloween Pumpkin Rice Krispie Treats That Amaze

    Spooky Crunch: Halloween Pumpkin Rice Krispie Treats That Amaze

    Every October, I get obsessed with turning simple ingredients into something unexpectedly festive. This year, I dared to craft Rice Krispie treats that look like miniature pumpkins, but with a twist — they hide a secret pop of cinnamon and a dash of edible glitter. It’s a fun way to celebrate fall’s cozy vibes and add a little chaos to your candy haul.

    The process is surprisingly quick, making it perfect for last-minute parties or a kids’ baking session that turns into a delightful mess. The smell of melted marshmallows mingling with warm pumpkin spice instantly brings back childhood Halloweens, but with a grown-up sparkle. These treats aren’t just tasty—they are a visual delight at any spooky gathering.

    Pumpkin Spice Rice Krispie Treats with Edible Glitter

    This recipe combines classic Rice Krispie treats with pumpkin spice flavors, shaped into miniature pumpkins. The treats have a crispy, sticky texture with a festive appearance, enhanced by a sprinkle of edible glitter for a sparkling finish. The process involves melting marshmallows with butter and mixing in spices and cereal, then shaping and decorating for a fun fall dessert.
    Prep Time 15 minutes
    Cook Time 10 minutes
    Total Time 25 minutes
    Servings: 10
    Course: Main Course
    Cuisine: American
    Calories: 150

    Ingredients
      

    • 10 cups miniature marshmallows
    • 6 tbsp unsalted butter
    • 1 tsp ground cinnamon
    • 1/2 tsp ground ginger
    • 1/4 tsp ground nutmeg
    • 6 cups rice cereal (e.g., Rice Krispies)
    • Optional edible glitter for decoration

    Equipment

    • Large Mixing Bowl
    • Saucepan
    • Rubber spatula
    • Pumpkin-shaped silicone mold or freehand shaping tools
    • Baking sheet or plate
    • Measuring Cups and Spoons
    • Wax paper or parchment paper

    Method
     

    1. Grease your pumpkin-shaped mold or prepare a surface with wax paper for shaping the treats into pumpkins.
    2. In a large saucepan, melt the butter over low heat until it begins to foam and smells nutty.
    3. Add the mini marshmallows to the melted butter, stirring constantly until fully melted and smooth, with a bubbly, gooey consistency.
    4. Remove the pan from heat and quickly stir in the ground cinnamon, ginger, and nutmeg until evenly combined and fragrant.
    5. Pour the rice cereal into the marshmallow mixture, folding gently with a spatula until the cereal is fully coated and the mixture is well combined.
    6. Transfer the hot mixture to your prepared mold or surface, using a spatula or lightly greased hands to press and pack the mixture into small pumpkin shapes, smoothing the surface.
    7. Allow the shaped treats to cool and set for about 15 minutes until firm and slightly sticky.
    8. Once cooled, decorate the pumpkins with a light dusting of edible glitter to add a sparkling, festive finish.
    9. Gently remove the pumpkin-shaped treats from the mold or carefully lift them from the surface, ready to serve and enjoy!

    Creating these Pumpkin Rice Krispie Treats adds a playful touch to your Halloween table. They combine the nostalgic crunch of classic treats with the spirit of autumn’s vibrant flavors. Plus, they are easy to customize with your favorite decorations or colors to match the season’s whimsy.

    As the season shifts and pumpkin patches spread across every corner, these treats remind us that festive baking doesn’t need to be complicated. They’re perfect for cheerful chaos or quiet nights making sweet memories. Enjoy the magic of these crunchy little pumpkins, crafted with love and just a hint of mischief.

  • Spooky Fun: Halloween Dirt Cake with Gummy Worms

    Spooky Fun: Halloween Dirt Cake with Gummy Worms

    Sometimes, Halloween desserts are all about the theatrics. But this Dirt Cake takes a different route—it’s a playful surprise that taps into childhood memories of digging for hidden treasures. The moment you scoop into it, the rich chocolate layers and squishy gummy worms evoke a sense of chaos and joy that’s perfect for the holiday.

    What I love most is how easily this recipe becomes a centerpiece, even amidst all the costumes and candy. It’s simple enough to prepare ahead, yet whimsical enough to steal the show. Plus, the dirt-like appearance makes it an instant conversation starter among guests of all ages.

    Halloween Dirt Cake

    Dirt Cake is a layered dessert featuring creamy pudding and crushed cookies topped with gummy worms to resemble soil and underground treasures. The dessert has a thick, crumbly texture with playful gummy accents, and its appearance mimics dirty earth with worm-like garnishes.
    Prep Time 20 minutes
    Total Time 20 minutes
    Servings: 8
    Course: Main Course
    Cuisine: American
    Calories: 350

    Ingredients
      

    • 1 package chocolate sandwich cookies for crushing into crumbs
    • 3 cups instant chocolate pudding powder or make as directed with milk
    • 4 cups milk for pudding preparation
    • 8 oz cream cheese softened
    • 1 cup powdered sugar for sweetness
    • 1 tsp vanilla extract
    • 2 cups whipped topping such as Cool Whip, thawed
    • to taste gummy worms for decoration

    Equipment

    • Mixing bowls
    • Electric mixer or whisk
    • Serving dish or trifle bowl
    • Spatula
    • Food processor or plastic bag and rolling pin

    Method
     

    1. Place the chocolate cookies in a food processor or inside a plastic bag and crush them into fine crumbs using a rolling pin or a heavy object.
    2. In a mixing bowl, whisk together the instant chocolate pudding powder and milk until the pudding begins to thicken, about 2 minutes.
    3. In another bowl, beat the softened cream cheese, powdered sugar, and vanilla extract together until smooth and creamy.
    4. Fold the cream cheese mixture into the pudding until fully combined and smooth.
    5. Gently fold in the whipped topping to lighten the mixture and add air, resulting in a fluffy consistency.
    6. Add half of the crushed cookie crumbs into the mixture and stir until evenly incorporated, creating a chocolatey, dirt-like color.
    7. Pour the mixture into a serving dish or trifle bowl, smoothing the top with a spatula.
    8. Sprinkle the remaining crushed cookie crumbs evenly over the top to resemble soil.
    9. Decorate the surface with gummy worms by burying some into the crumbs and placing others on top to resemble worms underground.
    10. Refrigerate the dirt cake for at least 2 hours or until set, allowing flavors to meld and the texture to firm up.
    11. Serve chilled, with additional gummy worms if desired, for a whimsical Halloween dessert.

    As the night winds down, this cake remains a delightful reminder of Halloween’s messy, colorful spirit. It pairs beautifully with a mug of warm apple cider or that last handful of candy corn. Sharing this dessert brings a burst of fun and nostalgia to any spooky gathering, making it a treat no one forgets.

    Whether you’re hosting a big party or a quiet family night, this Dirt Cake with Gummy Worms adds a nostalgic twist to Halloween classics. It’s a simple joy—messy, whimsical, and very, very tasty. Sometimes, the best Halloween memories come from unexpected little bites like this one.

  • Autumn’s Secret: A Cozy & Unusual Pumpkin Bread

    Autumn’s Secret: A Cozy & Unusual Pumpkin Bread

    This recipe is more than just a treat; it’s a nostalgic nod to childhood falls and cozy weekends. It’s ideal for sharing, whether at a brunch, a casual picnic, or just a quiet moment with a hot cup of cider. Baking it feels like a simple act of kindness that makes any day feel a little more special.

    Apple Cinnamon Crumble

    This apple cinnamon crumble features tender baked apple slices topped with a buttery, crunchy streusel. The dish is assembled with a layering of spiced apples and a crumbly topping, resulting in a warm dessert with a crispy surface and soft interior.
    Prep Time 15 minutes
    Cook Time 40 minutes
    Total Time 55 minutes
    Servings: 6
    Course: Main Course
    Cuisine: American
    Calories: 250

    Ingredients
      

    • 4 large apples e.g., Granny Smith or Fuji
    • 1 teaspoon ground cinnamon
    • 1/4 cup granulated sugar
    • 1 tablespoon lemon juice
    • 1/2 cup all-purpose flour
    • 1/2 cup old-fashioned rolled oats
    • 1/3 cup brown sugar
    • 1/2 cup unsalted butter cold and cubed
    • a pinch salt

    Equipment

    • Mixing bowls
    • Baking dish
    • Chef’s knife
    • Peeler

    Method
     

    1. Peel, core, and slice the apples into thin pieces, then place them in a mixing bowl.
    2. Toss the apple slices with lemon juice, cinnamon, and granulated sugar until evenly coated. This helps prevent browning and infuses flavor.
    3. Transfer the seasoned apples into a buttered baking dish, spreading them in an even layer.
    4. In a separate mixing bowl, combine the flour, oats, brown sugar, and salt. Mix briefly to distribute evenly.
    5. Add the cold, cubed butter to the dry mixture. Using a pastry cutter or your fingers, work the butter into the mixture until it resembles coarse crumbs.
    6. Spoon the crumbly topping evenly over the apples in the baking dish, covering the surface completely.
    7. Place the baking dish in an oven preheated to 350°F (175°C) and bake for about 40 minutes, until bubbling around the edges and the topping is golden brown.
    8. Remove from the oven and let cool slightly before serving. The crumble will be warm, with tender apples underneath a crisp topping.
    Whether it’s for a cozy morning or a festive gathering, this bread delivers nostalgia and comfort with every slice. The combination of deep pumpkin flavor and spices makes it a seasonally perfect treat that’s hard to forget. Enjoy a moment of mindfulness with each bite, feeling the cozy spirit of fall in your home.

  • Pumpkin Cookies with a Twist: A Cozy Fall Secret

    Pumpkin Cookies with a Twist: A Cozy Fall Secret

    As the leaves turn fiery orange and the air grows crisp, I find myself craving baked goodies that whisper fall in every bite. These pumpkin cookies aren’t your typical treat; they carry a hint of spice that sparks childhood memories of cozy kitchens and crackling fires. Baking them feels like wrapping yourself in a warm blanket on a chilly afternoon.

    But what truly makes these cookies stand out is their surprise ingredient—maple syrup. It adds a subtle sweetness that deepens with each chew, making every cookie a little moment of autumn magic. The smell alone, of cinnamon, nutmeg, and sweet pumpkin, fills the house with the scent of fall festivities and quiet Sundays.

    Transforming simple pantry ingredients into something both comforting and delightfully unexpected, these cookies are perfect for sharing or savoring solo with a mug of hot cider. They’re quick to whip up, but their warm aroma and tender crumb leave a lasting impression.

    Pumpkin Maple Spice Cookies

    These pumpkin cookies combine pureed pumpkin with warm spices like cinnamon and nutmeg, resulting in a tender, crumbly texture. Incorporating maple syrup adds a subtle sweetness, and the cookies develop a lightly golden appearance as they bake, with a cozy, fall-inspired aroma filling the air.
    Prep Time 15 minutes
    Cook Time 12 minutes
    Total Time 27 minutes
    Servings: 12
    Course: Main Course
    Cuisine: American
    Calories: 150

    Ingredients
      

    • 1 cup all-purpose flour
    • 1 cup pumpkin puree unsweetened
    • 1/2 cup maple syrup
    • 1/4 cup unsalted butter melted
    • 1 tsp ground cinnamon
    • 1/2 tsp ground nutmeg
    • 1/2 tsp baking soda
    • 1/2 tsp salt

    Equipment

    • Mixing bowl
    • Baking sheet

    Method
     

    1. Preheat your oven to 350°F (175°C) and line a baking sheet with parchment paper to prevent sticking.
    2. In a large mixing bowl, whisk together the flour, cinnamon, nutmeg, baking soda, and salt until evenly combined. This ensures the spices and leavening are evenly distributed.
    3. In a separate bowl, blend the melted butter, pumpkin puree, and maple syrup until smooth and fragrant, about 1-2 minutes. The mixture should be creamy and slightly thick.
    4. Pour the wet mixture into the bowl with the dry ingredients, then gently fold everything together using a spatula until just combined. The dough will be soft and slightly sticky but holding together.
    5. Use a spoon or cookie scoop to drop rounded tablespoons of dough onto the prepared baking sheet, spacing them about 2 inches apart to allow for spreading.
    6. Gently flatten each cookie with the back of a spoon or your fingers to encourage even baking and a uniform appearance.
    7. Bake in the preheated oven for about 12 minutes, or until the edges are golden and the cookies feel firm when gently pressed.
    8. Remove the cookies from the oven and let them cool on the baking sheet for 5 minutes to set their shape, then transfer to a wire rack to cool completely.
    9. Once cooled, the cookies will have a tender crumb with a slight crispness around the edges, and a warm pumpkin aroma filling the room.
    In the end, baking these pumpkin cookies feels like capturing a fleeting moment of fall—a gentle pause in the busy season. Their aroma and flavor serve as a reminder to slow down and enjoy the simple pleasures.

    Whether paired with a warm drink or enjoyed on their own, these cookies bring a cozy charm to any day. I love how a little spice and pumpkin can turn ordinary ingredients into something that warms the soul. Just baking them is enough to make the season feel truly special.

  • Spooky Sweetness: Halloween Candy Corn Parfaits That Spark Nostalgia

    Spooky Sweetness: Halloween Candy Corn Parfaits That Spark Nostalgia

    As the leaves turn and the air feels brisk, I find myself craving something both playful and nostalgic. These Halloween Candy Corn Parfaits are a nostalgic nod to childhood, but reimagined with a twist. Layered with vibrant colors and creamy textures, they turn simple ingredients into a festive treat that sparks joy and chaos in the best way.

    Imagine the crunch of graham crackers, the smoothness of vanilla pudding, and the iconic orange, yellow, and white candy corn melting into a sweet mosaic. Perfect for parties or a quiet night in, these parfaits bring a burst of seasonal cheer. And yes, they look as adorable as they are unexpectedly delightful.

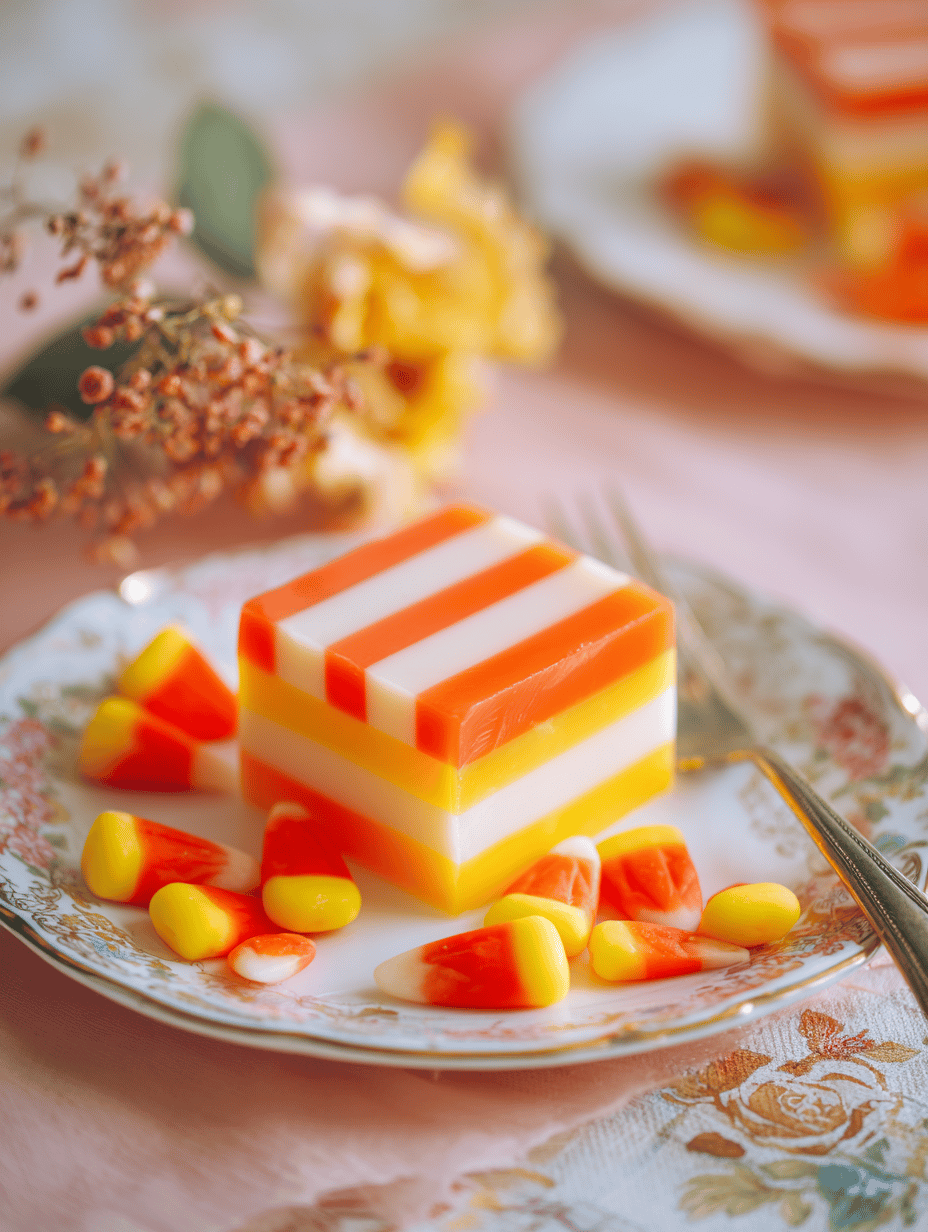
    Halloween Candy Corn Parfaits

    These Candy Corn Parfaits are layered desserts featuring crushed graham crackers, creamy vanilla pudding, and colorful candy corn arranged to resemble the iconic Halloween treat. They achieve a visually striking, multi-layered appearance with contrasting textures of crunchy, smooth, and chewy elements, served in individual glasses for a festive presentation.
    Prep Time 15 minutes
    Cook Time 10 minutes
    Total Time 25 minutes
    Servings: 4
    Course: Main Course
    Cuisine: American
    Calories: 250

    Ingredients
      

    • 200 grams graham crackers crushed into fine crumbs
    • 3 cups milk whole or 2%
    • 1.5 pouches vanilla pudding mix instant style
    • 1 cup candy corn assorted colors and sizes
    • additional for layering and garnish

    Equipment

    • Mixing bowls
    • Whisk
    • Measuring Cups and Spoons
    • Parfaits glasses or clear jars
    • Spoon

    Method
     

    1. Begin by crushing the graham crackers into fine crumbs using a zip-top bag and a rolling pin or with a food processor for quicker results.
    2. In a large mixing bowl, whisk together the milk and vanilla pudding mix until the mixture is smooth and starts to thicken, about 2-3 minutes.
    3. Set out your parfait glasses or clear jars. Spoon a layer of crushed graham crackers into the bottom of each glass, creating a crunchy crust base.
    4. Top the graham cracker layer with a generous layer of the vanilla pudding, smoothing it out to fill the glass about halfway.
    5. Dot the pudding layer with colorful candy corn, arranging them so some peek above the surface for a vibrant look.
    6. Add another layer of crushed graham crackers on top of the candy corn, then finish with a final layer of pudding to fill the glass.
    7. Decorate the top with more candy corn, arranging them decoratively for a colorful, festive finish.
    8. Chill the parfaits in the refrigerator for at least 15 minutes before serving, allowing the layers to set and flavors to meld.

    Notes

    For a richer flavor, fold whipped cream into the pudding before layering. Adjust candy corn quantity for more vibrant decorations.

    This recipe captures the playful spirit of Halloween, reminding us that dessert can be as fun as it is delicious. It’s easy to assemble, visually stunning, and a sweet way to celebrate the season’s quirkiest holiday. Plus, the mix of textures keeps each bite interesting and refreshing.

    Whether you share these at a gathering or keep them all to yourself, they add a touch of whimsy and sweetness to any October evening. Sometimes, the most simple ideas turn into the most memorable moments—these parfaits are proof of that. Here’s to enjoying the little things and creating sweet memories with every spoonful.