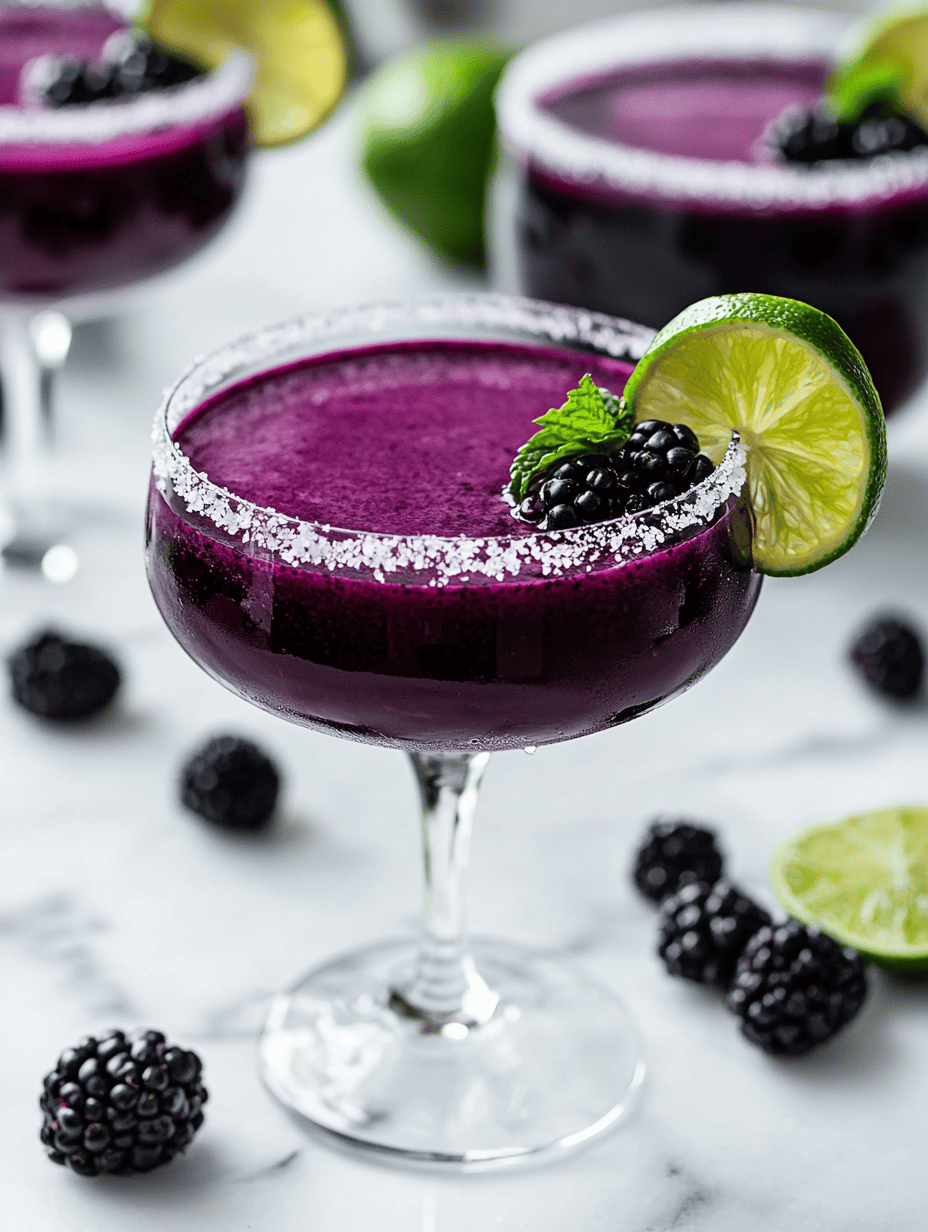
Category: Beverages

  • The Enchanting Blue Raspberry Slushie: A Nostalgic Cold Treat

    The Enchanting Blue Raspberry Slushie: A Nostalgic Cold Treat

    Imagine biting into a childhood memory captured in a icy glass. The blue raspberry slushie isn’t just a drink; it’s a portal to lazy summer afternoons and fairground adventures. Its swirling, vibrant hue is more than just eye-catching—it’s a moment of joy waiting to be savored.

    Crafting this frozen delight from scratch lets me indulge in a little chaos of mixing and tasting. It’s surprisingly simple, yet every sip sparks a rush of sweet-tart nostalgia and cool refreshment. Perfect for those warm days when your sweet tooth demands a fun freeze.

    Blue Raspberry Slushie

    A blue raspberry slushie is a frozen beverage made by blending ice with blue raspberry-flavored syrup or juice, creating a vibrant, icy drink with a smooth, slushy texture. The process involves crushing ice, mixing ingredients, and blending until the mixture is finely textured and chilled, resulting in a colorful, refreshing treat resembling a childhood favorite.
    Prep Time 10 minutes
    Total Time 10 minutes
    Servings: 2
    Course: Main Course
    Cuisine: beverage
    Calories: 150

    Ingredients
      

    • 3 cups ice cubes crushed or whole
    • 1/2 cup blue raspberry syrup or blue raspberry-flavored juice
    • 1/2 cup cold water

    Equipment

    • Blender
    • Measuring Cups and Spoons

    Method
     

    1. Measure out the ice cubes, blue raspberry syrup, and cold water, setting them aside for blending.
    2. Add the ice cubes into the blender, creating a base for the slushie.
    3. Pour the blue raspberry syrup over the ice, giving it a vibrant color and sweet flavor.
    4. Pour in the cold water to help the blending process and achieve a smoother texture.
    5. Blend the mixture on high speed until the ice is finely crushed and the mixture is smooth and slushy, about 30-45 seconds.
    6. Stop the blender and check the texture; it should be thick, icy, and evenly colored.
    7. Pour the slushie into glasses, ensuring a generous amount of icy goodness with a vibrant blue hue.
    8. Serve immediately with straws or spoons to enjoy the cold, refreshing treat.

    Notes

    For extra flavor, add a splash of lemon juice or garnish with fresh fruit slices.
    As the sun dips lower and the air stays warm, this blue raspberry slushie feels like a small rebellion against the heat. It’s a vibrant splash of flavor that brightens any day, whether you’re lounging home or sharing with friends.

    This recipe offers a perfect way to bring a splash of fun into everyday life. The bright blue color and zesty flavor make every sip a tiny celebration. Sometimes, simple pleasures are all we need to refresh and delight our senses.

  • The Hidden Charm of Cherry Slushies: A Cool Nostalgic Escape

    The Hidden Charm of Cherry Slushies: A Cool Nostalgic Escape

    Cherry slushies evoke childhood memories, swirling bright red hues into icy refreshment. But have you ever thought about adding a zesty twist that awakens your senses? I love turning simple treats into unexpected flavor bombs, especially in the quiet weeks of spring when cherries start to whisper their arrival.

    This recipe isn’t just about cool relief; it’s about capturing a fleeting moment of summer’s promise. The vivid color and tart-sweet punch make it perfect for sunny afternoons or a spontaneous get-together. Let’s explore how a classic favorite can become a nostalgic yet surprising new ritual.

    Cherry Slushies

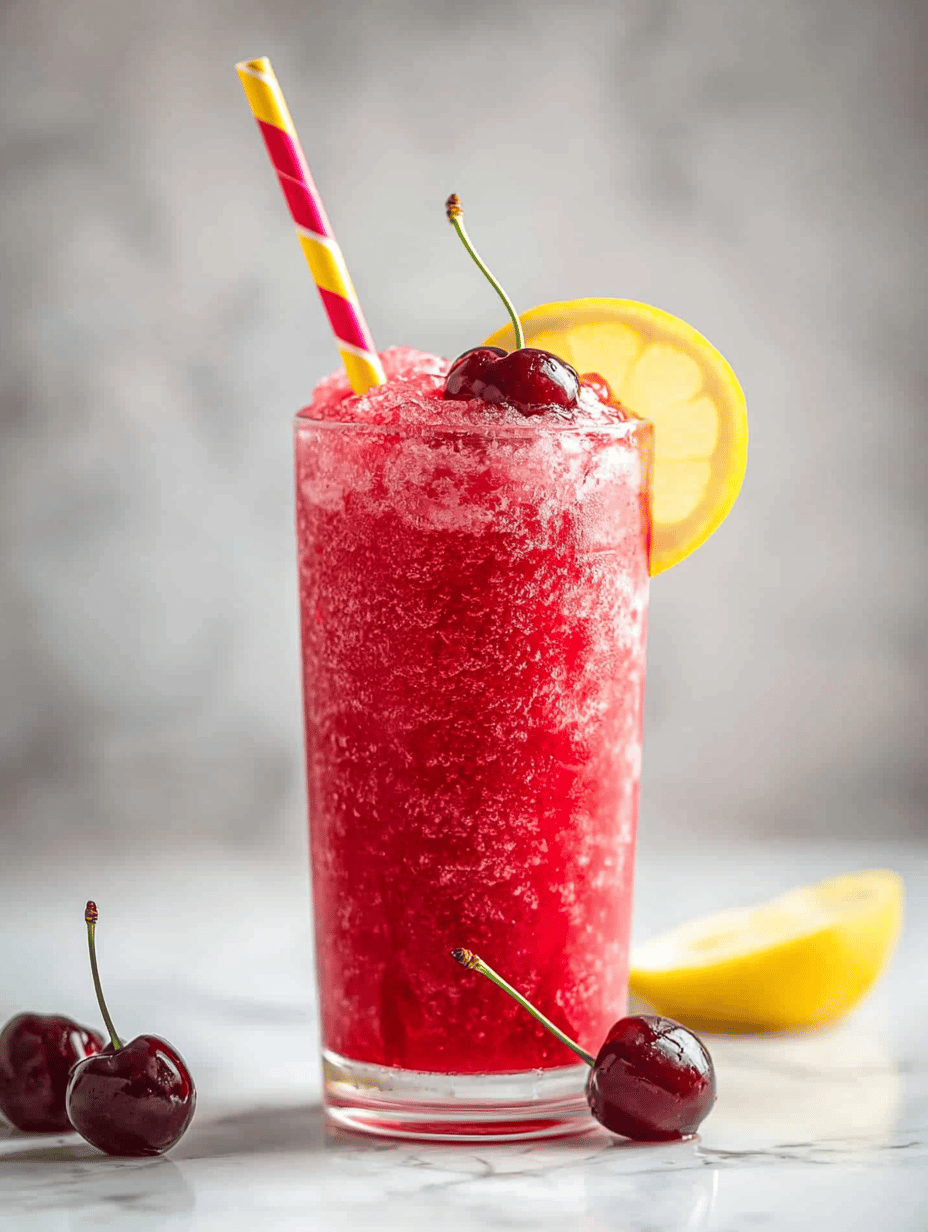
    Cherry slushies are icy beverages made by blending fresh or frozen cherries with sweeteners and liquid until smooth. The mixture is then poured into glasses, resulting in a vibrant, tart-sweet frozen treat with a slushy, semi-compact texture and a bright red appearance.
    Prep Time 10 minutes
    Total Time 10 minutes
    Servings: 4
    Course: Main Course
    Cuisine: American
    Calories: 80

    Ingredients
      

    • 2 cups fresh or frozen cherries pitted if fresh
    • 2 tablespoons sugar or honey adjust to taste
    • 1 cup cold water or fruit juice for blending

    Equipment

    • Blender
    • Measuring Cups and Spoons

    Method
     

    1. Combine the cherries, sweetener, and water (or juice) in a blender.
    2. Blend on high speed until the mixture is smooth and the cherries are fully pureed, with a vibrant red color and frothy texture.
    3. Pour the cherry puree into glasses, filling them about three-quarters full.
    4. If desired, briefly freeze the glasses for a firmer slush or serve immediately for a softer, more scoopable texture.
    5. Enjoy the refreshing, tart-sweet cherry slushie, perfect for hot days or as a colorful treat.

    Next time you crave something icy and vibrant, reach for cherries at their peak—those tiny gems pack so much flavor. This slushie is a quick, joyful way to enjoy a burst of summer whenever you need it.

    Sometimes, a simple ingredient like cherries can make you pause and appreciate the season’s fleeting treasures. Mix it up, enjoy the chaos of inventing your own twist, and let the coolness sweep away any day’s worries.

  • Spooky Blood-Red Vampire Punch: A Halloween Must-Try

    Spooky Blood-Red Vampire Punch: A Halloween Must-Try

    Every Halloween, I love digging into recipes that turn the ordinary into something eerily mesmerizing. This Vampire Punch with vibrant red juice feels like diving into a cauldron of sinister delight, perfect for conjuring a chilling vibe. Its deep crimson hue is as dramatic as a moonlit night, promising a splash of chaos at any gathering.

    But beyond the spooky aesthetics, this punch actually has a surprisingly simple spell—just mix, chill, and serve icy cold. The sweet-tart flavor dances on the tongue, reminding me of childhood costume parties filled with mischief and mystery. It’s a potion that sparks conversations and ignites the party spirit.

    Vampire Punch

    Vampire Punch is a vibrant red beverage made with fruit juices and a splash of sparkling soda, resulting in a sweet-tart drink with a bright crimson color. The preparation involves mixing the ingredients and chilling the mixture until cold, producing an icy, refreshing drink with a smooth, liquid consistency. Its striking appearance and lively flavor make it perfect for festive occasions like Halloween gatherings.
    Prep Time 10 minutes
    Total Time 10 minutes
    Servings: 8
    Course: Main Course
    Cuisine: Halloween
    Calories: 120

    Ingredients
      

    • 4 cups cranberry juice preferably chilled
    • 2 cups pineapple juice
    • 1 cup lemon-lime soda for fizz and sparkle
    • to taste ice cubes for chilling

    Equipment

    • Large pitcher
    • Measuring Cups and Spoons

    Method
     

    1. Pour the chilled cranberry juice into a large pitcher, creating a deep crimson base for the punch.
    2. Add the pineapple juice to the pitcher, blending its golden hue with the red to create a vibrant, spooky color.
    3. Gently stir the mixture with a long spoon until the two juices are well combined and the color is consistent throughout.
    4. Drop in plenty of ice cubes to chill the punch and give it a frosty appearance.
    5. Pour the lemon-lime soda into the pitcher, lightly folding to incorporate the bubbles without losing too much fizz.
    6. Once mixed, place the pitcher in the refrigerator for about 10 minutes to ensure the punch is icy cold and refreshing.
    7. Serve the Vampire Punch in glasses with additional ice if desired, garnished with slices of citrus or spooky decorations for added effect.

    Notes

    For an extra dramatic effect, rim glasses with red sugar or add floating gummy worms.

    Sharing this vampire punch feels like passing around a secret spell—it’s fun, a little chaotic, and irresistibly festive. As the night grows darker, the punch’s vivid color keeps everyone guessing about what’s inside, adding to the Halloween magic. It’s a reason to gather around, sip, and swap stories under flickering orange lights.

    In the end, this recipe captures the essence of Halloween—super simple yet stunning, familiar yet a little wicked. It turns a simple gathering into an event that screams spooky fun. Maybe next year, you’ll be the one stirring up something wildly memorable, all with just a splash of red juice.

  • Chill Out with a Tropical Twist: The Unexpected Art of Pi Colada Slushie

    Chill Out with a Tropical Twist: The Unexpected Art of Pi Colada Slushie

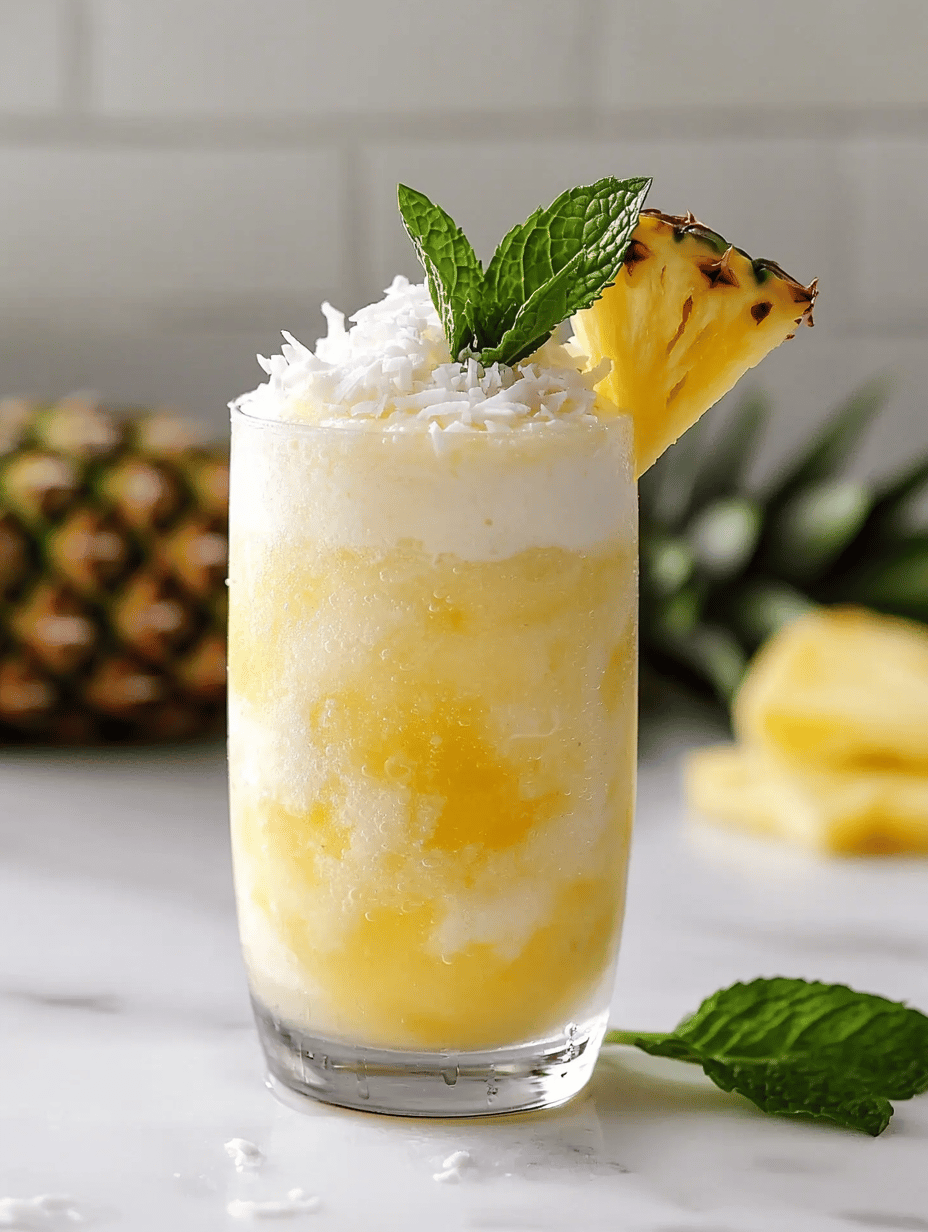
    Imagine turning your freezer into a mini tropical paradise. The secret? A blend of ripe pineapples, creamy coconut milk, and just enough ice to mimic a beachside breeze. This pi slushie is your new best friend on hot afternoons or when you need a mental escape.

    Layering flavors and textures, this recipe invites an exotic escape in every sip. Perfect for parties or lazy weekends, it transforms simple ingredients into a nostalgic, cheerful treat. Forget the bar; your freezer is now your favorite tropical barista.

    Tropical Pineapple Coconut Slushie

    This frozen beverage combines ripe pineapple chunks, creamy coconut milk, and ice to create a smooth, icy drink with a vibrant tropical flavor. The ingredients are blended until frosty and well-mixed, resulting in a thick, slush-like texture with a refreshing appearance. It’s perfect for hot weather or as a cheerful, vacation-inspired treat.
    Prep Time 10 minutes
    Total Time 10 minutes
    Servings: 4
    Course: Main Course
    Cuisine: Tropical
    Calories: 150

    Ingredients
      

    • 3 cups frozen pineapple chunks preferably frozen for best texture
    • 1 cup coconut milk full-fat for creaminess
    • 1 cup ice crushed or cubed

    Equipment

    • Blender
    • Measuring Cups and Spoons

    Method
     

    1. Combine the frozen pineapple chunks, coconut milk, and ice in the blender.
    2. Secure the lid and blend on high speed until the mixture is smooth and frosty, about 30-40 seconds. You should see a thick, icy consistency with no large chunks remaining.
    3. Stop the blender and check the texture. If it’s too thick, add a splash more coconut milk; if too thin, add a few more ice cubes and blend briefly again.
    4. Once the slushie is velvety and well-blended, pour it into glasses or cups.
    5. Garnish with small pineapple pieces or a sprinkle of shredded coconut if desired for a festive presentation.
    6. Serve immediately with a straw or spoon and enjoy the cool, tropical flavors.
    This pi slushie is a reminder that a little creativity turns everyday ingredients into a vacation. It’s both a playful project and a blissful treat, especially when tropical vibes are what you crave.

    Enjoy experimenting with different fruits or adding a splash of rum for an adult twist. Either way, this drink whisks you away to sandy shores and sun-drenched afternoons without leaving your kitchen.

  • Chill Out with the Unexpectedly Fancy Frozen Margarita Slushie

    Chill Out with the Unexpectedly Fancy Frozen Margarita Slushie

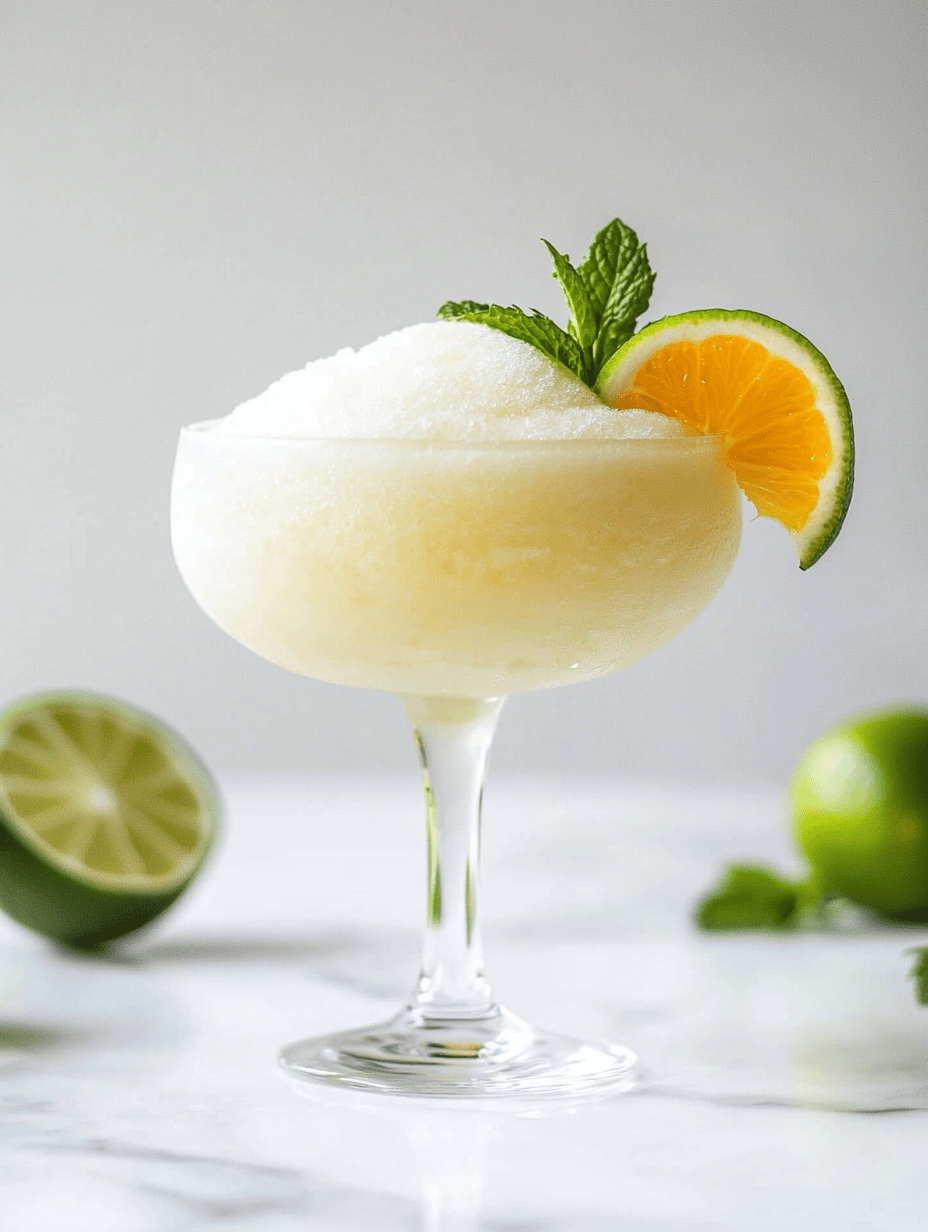
    Last summer, I stumbled upon a secret weapon against the relentless heat: a frozen margarita slushie with a twist. It’s not just your typical frozen drink; it’s a symphony of citrus zest, a splash of tequila, and a hint of salty lime that wakes up every sip.

    What makes this recipe extraordinary is the way it combines simplicity with a dash of elegance. Perfect for spontaneous gatherings or solo beaches days, it transforms simple ingredients into a frozen carnival of flavors. The best part? It’s so easy, you’ll want to make it all season long.

    WHY I LOVE THIS RECIPE?

    • It instantly transports me to summer nights filled with laughter and salty ocean air.
    • The blend of cold, citrus, and a hint of booze is both thrilling and soothing.
    • It’s a no-fuss recipe that’s ready in minutes, perfect for last-minute plans.
    • The vibrant color and fresh aroma boost my mood immediately.
    • I love how adaptable it is—throw in your favorite berries or a dash of hot sauce for a spicy kick.

    Frozen Margarita Slushie with a Twist

    This frozen beverage combines citrus zest, tequila, and a hint of salty lime into a smooth, icy slushie. Blended until icy and creamy, it features vibrant color and a refreshing, tangy flavor profile with a slight alcoholic kick. The final texture is thick, slushy, and perfect for sipping on a hot day.
    Prep Time 10 minutes
    Total Time 10 minutes
    Servings: 4
    Course: Main Course
    Cuisine: fusion
    Calories: 150

    Ingredients
      

    • 1 cup fresh lime juice preferably freshly squeezed
    • 0.5 cup orange liqueur such as triple sec or Cointreau
    • 0.75 cup tequila silver or blanco tequila preferred
    • 2 tablespoons granulated sugar adjust to taste
    • 1 inch zest of one lime use a microplane for fine zest
    • 2 cups ice cubes preferably small or crushed
    • Pinch salt a salty lime flavor enhances the drink

    Equipment

    • Blender
    • Measuring Cups and Spoons

    Method
     

    1. Add lime juice, orange liqueur, tequila, sugar, lime zest, and salt into the blender.
    2. Pulse the blender lightly to combine the liquids and dissolve the sugar slightly.
    3. Add the ice cubes to the blender and secure the lid tightly.
    4. Blend on high until the mixture becomes thick, icy, and smooth, about 30-40 seconds. You’ll hear a blender sound change as the ice breaks down.
    5. Stop the blender and check the consistency; if it’s too thick, add a splash of lime juice or tequila and blend briefly again.
    6. Pour the frozen slushie into chilled glasses, garnishing with extra lime zest or a wedge if desired.

    Notes

    For a fruitier twist, blend in berries or chopped mango before puréeing. Serve immediately for the best icy texture.

    This frozen margarita slushie feels like a secret escape, even on the busiest days. Its vibrant flavors and icy texture make it a standout in the world of frozen drinks, especially during the heat of summer or with friends gathered around. It’s simple, yet it carries a punch of joy in every sip.

    In a season obsessed with cold refreshments and shortcuts, this recipe offers a moment of pure, chilled happiness. Pour it into your favorite glass, garnish with a slice of lime, and let the cool rush wash over you. Sometimes, a simple frozen drink is all you need to make the moment special.

  • Tropical Twists: The Unexpected Charm of Pineapple Slushie

    Tropical Twists: The Unexpected Charm of Pineapple Slushie

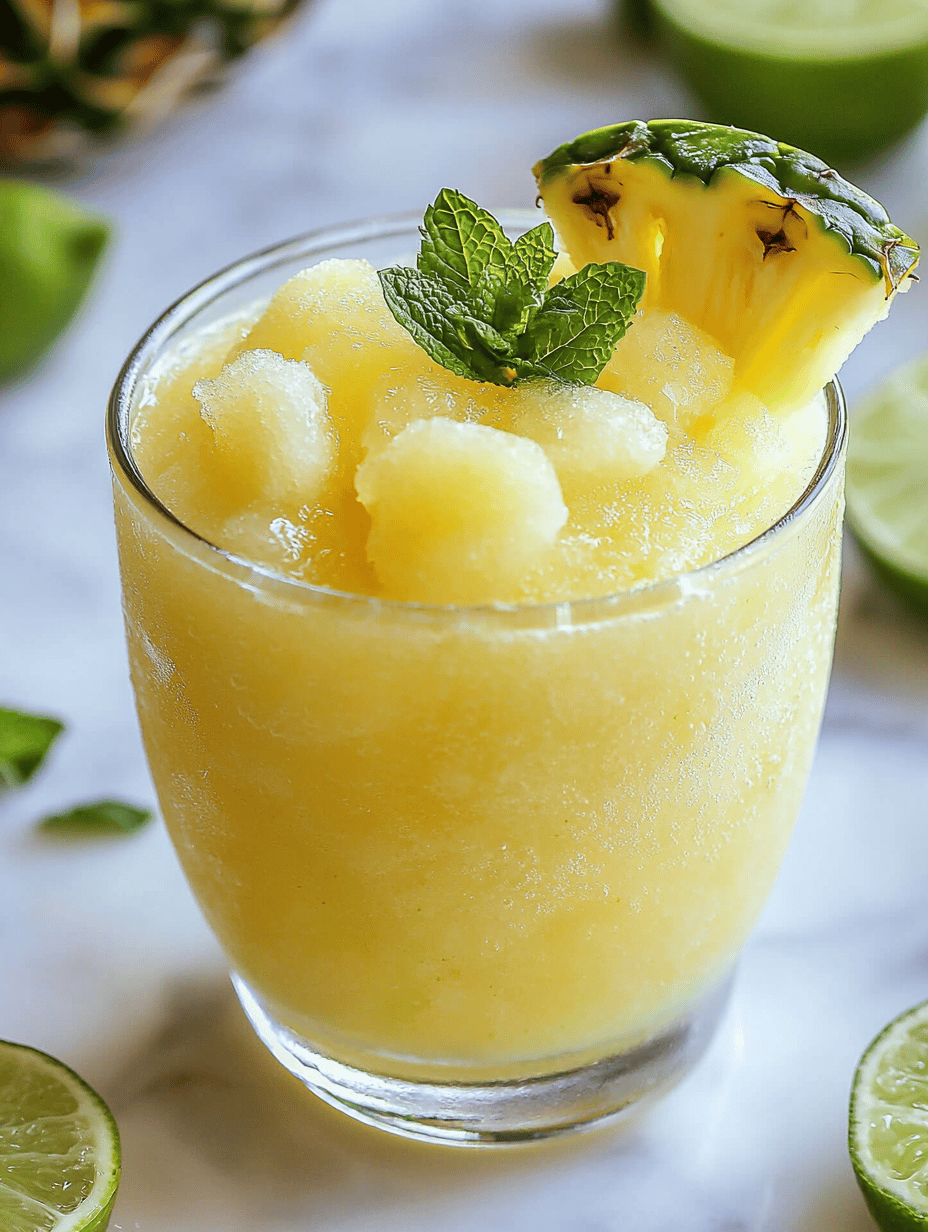
    Most people think of pineapple as a tropical snack or a pizza topping, but I like to push its role into a new realm: frozen drinks that awaken your senses. When I first tried blending fresh pineapple with a splash of lime and a hint of mint, I was transported to a beachside escape, even in the middle of winter. This drink isn’t just a thirst quencher; it’s a small adventure in a glass.

    My obsession with this pineapple slushie grew from curiosity about how the fruit’s natural sweetness could stand up to the icy chill. The process of blending frozen pineapple chunks yields a texture that’s both velvety and invigorating. It’s become my go-to for surprise visits from friends or just brightening a dull afternoon at home.

    WHY I LOVE THIS RECIPE?

    • The bright, fresh aroma of pineapple mixed with zesty lime is pure joy.
    • It takes just five minutes to whip up—perfect for spontaneous cravings.
    • Serving it over crushed ice makes the texture ultra-refreshing.
    • It’s a vegan, dairy-free delight everyone can enjoy.
    • The vibrant color instantly lifts any mood.

    Frozen Pineapple Lime Slushie

    This pineapple lime slushie is a refreshing cold beverage made by blending frozen pineapple chunks with lime juice and mint. The mixture results in a velvety, icy drink with a vibrant color and bright aroma, perfect for hot days or a quick tropical treat.
    Prep Time 5 minutes
    Total Time 5 minutes
    Servings: 2
    Course: Main Course
    Cuisine: Tropical
    Calories: 150

    Ingredients
      

    • 2 cups frozen pineapple chunks preferably fresh and thoroughly frozen
    • 1 lime lime juiced, about 2-3 tablespoons
    • 8 fresh mint leaves mint leaves for a fresh flavor
    • 2 tablespoons honey optional, to sweeten

    Equipment

    • Blender
    • Measuring Cups and Spoons

    Method
     

    1. Add the frozen pineapple chunks to your blender, ensuring they’re evenly distributed for smooth blending.
    2. Squeeze the lime juice directly over the pineapple, adding a bright citrus aroma to the mixture.
    3. Toss in the fresh mint leaves to infuse a subtle herbal note throughout the slushie.
    4. If you like a touch of sweetness, drizzle in the honey for extra flavor, then secure the lid on the blender.
    5. Blend everything on high speed for about 30 seconds until the mixture is velvety, with a slightly icy texture that’s smooth to the touch.
    6. Once blended, give the slushie a quick taste and adjust lime or honey if desired for extra brightness or sweetness.
    7. Pour the icy pineapple lime mixture into glasses, carefully giving it a gentle stir to distribute the flavors evenly.
    8. Garnish with a few fresh mint leaves or a lime wedge for presentation and a burst of aroma.
    9. Serve immediately with a straw or spoon to enjoy the velvety, icy texture and refreshing flavors.

    Notes

    For an even thicker texture, add more frozen pineapple. Adjust sweetness and tartness with honey and lime to your taste. Enjoy immediately for the best icy experience.

    This pineapple slushie is more than a cooling beverage; it’s a small celebration of summer’s vibrant flavors. Sharing it with friends conjures sunny memories, even during cooler months. There’s something about the bright aroma and icy texture that feels like a mini vacation in every sip.

    In a world that often feels chaotic, these simple, fresh moments of tropical escape remind us of the joy in everyday ingredients. It’s a drink that fits effortlessly into your mood—whether you need a quick pick-me-up or a chilled treat to slow down. Sometimes, all it takes is a blender and a handful of pineapple to transform the day.

  • Mango Slushie Magic: A Cool Escape from Ordinary

    Mango Slushie Magic: A Cool Escape from Ordinary

    One lazy afternoon, I decided to turn my overripe mangoes into a frozen escape. Thereno fancy equipment needed, just a blender and some common ingredients, yet the result was unexpectedly delightful. As the mango pulp transformed into a silky, icy drink, I felt a surge of unexpected joy amid a heatwave.

    This recipe is my little rebellion against bland summer drinks. It captures the essence of ripe mangoes in every sip—bright, sweet, and sharply refreshing. Perfect for spontaneous gatherings or a solo treat that breaks the routine.

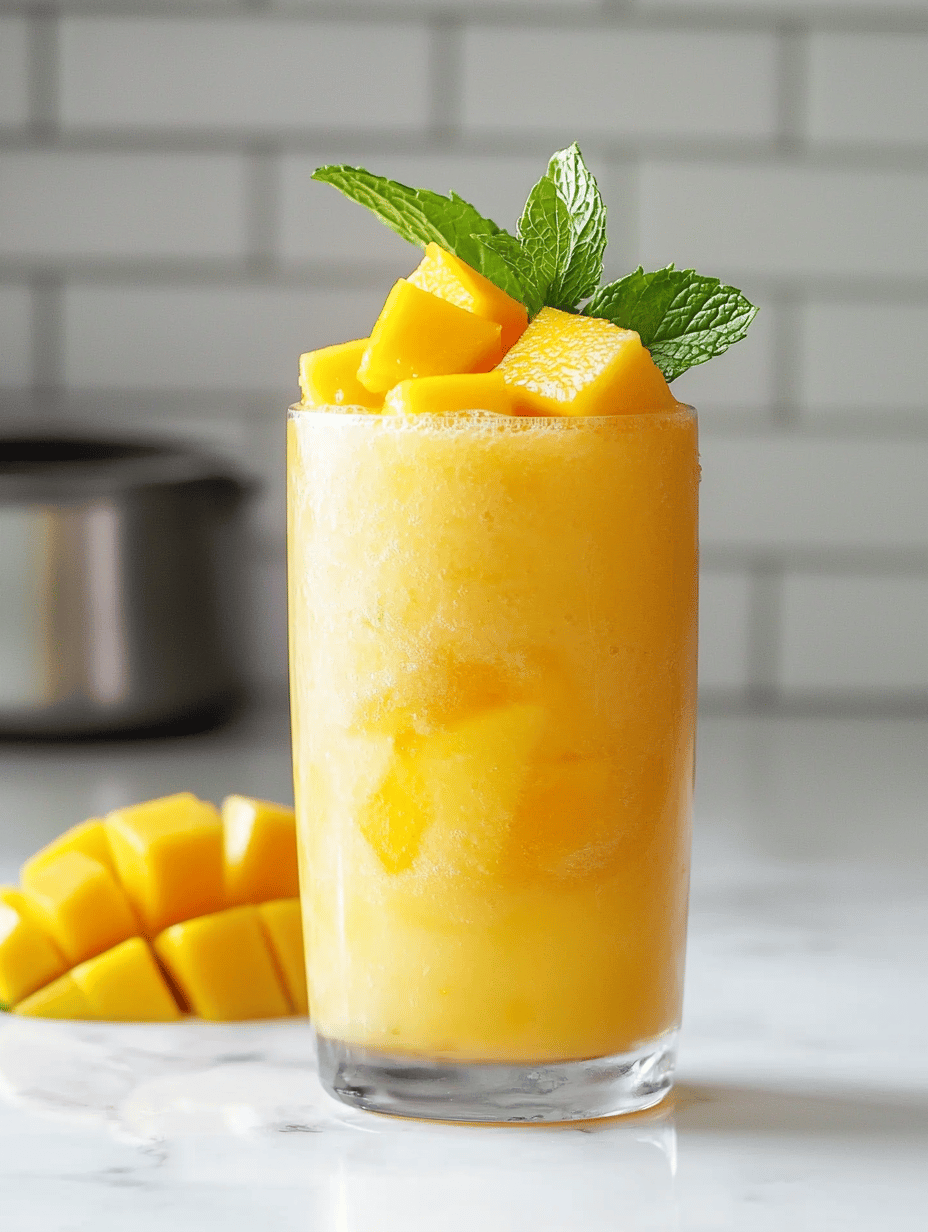
    Mango Frozen Drink

    This mango frozen drink is made by blending ripe mango pulp with sweeteners and ice until smooth and icy, resulting in a vibrant and refreshing treat with a velvety texture. The final appearance is a bright orange, slushy beverage that’s perfect for hot days or spontaneous desserts.
    Prep Time 10 minutes
    Total Time 10 minutes
    Servings: 2
    Course: Main Course
    Cuisine: Tropical
    Calories: 150

    Ingredients
      

    • 2 cups ripe mango pulp fresh or frozen
    • 2 tablespoons honey or sugar to taste
    • 1 cup ice cubes
    • 1/2 cup water or coconut water

    Equipment

    • Blender
    • Measuring Cups and Spoons

    Method
     

    1. Add the mango pulp, honey or sugar, water or coconut water, and ice cubes to the blender.
    2. Blend on high until the mixture is completely smooth and icy, about 30-40 seconds. You should hear a rhythmic whirling and see a velvety texture forming.
    3. Check the consistency; if it’s too thick, add a splash of water or coconut water and blend briefly to loosen it slightly.
    4. Pour the frozen mango mixture into glasses, filling them close to the top to showcase the bright orange color.
    5. Serve immediately with a straw or spoon, enjoying the cool, slushy texture and vibrant aroma.

    In a world swirling with complex cocktails and elaborate desserts, sometimes simplicity is the ultimate luxury. This mango slushie brings a burst of tropical vibrancy to any day, no matter how hectic. It’s a small reminder that quick, simple pleasures still hold the most charm.

    So next time you find yourself craving something cool and satisfying, remember the magic lies in blending ripe mangoes with a hint of lime. This drink isnt just a recipe; its a sprinkle of sunshine in a glass, ready to brighten even the cloudiest days.

  • Enchant Your Night: The Spooky Charm of Black Magic Margarita

    Enchant Your Night: The Spooky Charm of Black Magic Margarita

    As October’s darkness deepens, I find myself craving more than just a typical cocktail. I want a drink that whispers of mystique and a touch of chaos, something that captures the essence of a haunted evening. The Black Magic Margarita does just that—its deep, swirling hue promises enchantment in each sip.

    Crafting this potion involves more than just mixing tequila and black food coloring; it’s about embracing the thrill of the unexpected. The aroma of fresh lime and a hint of smoky char invites sensory adventure. When glass shimmers like obsidian under dim lights, you know your Halloween game is about to get spirited.

    Black Magic Margarita

    The Black Magic Margarita is a vibrant cocktail featuring tequila infused with black food coloring and a splash of smoky flavor, creating a dark, swirling appearance. It combines fresh lime juice and a salty rim, with a smooth, icy texture that looks striking in a glamourous glass. The final drink is deep black with a shimmering surface, perfect for spooky or elegant occasions.
    Prep Time 5 minutes
    Total Time 5 minutes
    Servings: 1
    Course: Main Course
    Cuisine: Contemporary
    Calories: 180

    Ingredients
      

    • 2 ounces tequila preferably blanco
    • 1 ounce fresh lime juice about one lime
    • 0.5 teaspoon black food coloring adds depth and mystique
    • 0.5 ounce triple sec for sweetness and balance
    • Salt for rimming salt preferably coarse sea salt
    • Ice as needed ice cubes for shaking and serving

    Equipment

    • Cocktail shaker
    • Rimming dish
    • Strainer
    • Rimming glass

    Method
     

    1. Start by preparing your rimming glass: spread salt onto a small dish. Moisten the rim of your glass with a lime wedge and dip it into the salt to create a salty border.
    2. Fill a cocktail shaker halfway with ice cubes; this helps chill your drink evenly.
    3. Add tequila, fresh lime juice, triple sec, and black food coloring to the shaker.
    4. Secure the lid and shake vigorously for about 15-20 seconds until the mixture is well chilled and the color swirls into a deep, opaque black.
    5. Remove the shaker lid and strain the cocktail into your prepared glass, which now has a salted rim.
    6. Garnish with a lime wedge or twist if desired, and serve immediately to enjoy the chilling, striking appearance of your Black Magic Margarita.

    Notes

    For an extra smoky effect, you can add a splash of mezcal instead of triple sec. Adjust the amount of black food coloring to achieve your preferred darkness.
    This recipe is a perfect centerpiece for your spooky celebration or an eerie night in. It’s simple enough to whip up in minutes but bold enough to steal the scene. Pour it into a salted rim glass, garnish with a lime twist—and watch your guests marvel at the magic.

    Enjoy the mysterious allure of the Black Magic Margarita. Its dark elegance brings a touch of theatrical mystique to any gathering, making your Halloween memorable for those little moments of chaos and charm.

  • Chilling Out with a Boozy Milkshake Slushie

    Chilling Out with a Boozy Milkshake Slushie

    Imagine this: it’s a hot summer day, the kind where the air hangs heavy and you crave something icy and decadent. I recently discovered a secret weapon for such moments—an unconventional milkshake slushie, infused with a splash of bourbon or rum. It’s like a grown-up snow cone, blending childhood nostalgia with adult indulgence in every sip.

    This recipe isn’t just about cooling down; it’s about transforming a simple treat into a quick, boozy escape. I love how the creamy texture mingles with the kick of alcohol, creating a layered sensation that dances on your taste buds. Perfect for lazy weekends or spontaneous gatherings with friends.

    Bourbon Milkshake Slushie

    This frozen treat combines creamy milk, ice, and a splash of bourbon or rum blended until smooth, resulting in a thick, icy texture with a boozy kick. The mixture resembles a grown-up snow cone with a luxurious, velvety consistency and a chilled, frosty appearance.
    Prep Time 10 minutes
    Total Time 10 minutes
    Servings: 2
    Course: Main Course
    Cuisine: American
    Calories: 250

    Ingredients
      

    • 2 cups vanilla ice cream preferably slightly softened
    • 1 cup milk whole or 2%
    • 0.5 cup ice cubes for extra chill
    • 2 shots bourbon or rum adjust to taste

    Equipment

    • Blender
    • Measuring Cups and Spoons

    Method
     

    1. Measure out the vanilla ice cream, milk, ice cubes, and bourbon or rum.
    2. Add the ice cream, milk, ice cubes, and alcohol into the blender.
    3. Secure the lid on the blender and blend on high speed until the mixture is smooth and frosty, about 30-45 seconds. You should see it turn into a thick, icy slurry with a creamy texture.
    4. Stop the blender and check the consistency. If it’s too thick, add a splash of milk and pulse a few times; if too thin, add a few more ice cubes and blend again.
    5. Once the mixture is thick, creamy, and frozen-looking with tiny ice crystals, pour it into chilled glasses.
    6. Garnish with a small sprig of mint or a slice of citrus if desired, and serve immediately with a straw or spoon for scooping.

    Notes

    For a richer flavor, try adding a dash of vanilla extract or top with whipped cream and a cherry for presentation.

    Next time the heat gets unbearable and you want something with a little flair, this milkshake slushie comes to mind. It’s incredibly easy to customize with your favorite spirits or toppings, making it uniquely yours each time. Plus, the process fills your kitchen with the sweet scents of vanilla, ice, and a hint of booze—pure comfort during the endless summer days.

    As the ice shatters into tiny crystals and your spoon scoops up velvety cream, you’ll feel the cool rush of relief. Sometimes, it’s the simplest pleasures that turn the day around, and this drink is no exception. Cheers to making everyday moments a little more special with just a blender and a splash of courage.

  • The Hidden Charm of Vanilla Slushies: A Nostalgic Ice-Cream Escape

    The Hidden Charm of Vanilla Slushies: A Nostalgic Ice-Cream Escape

    Today, I want to celebrate this humble yet marvelous concoction from an unexpected angle—how vanilla slushies can evoke emotional nostalgia while fitting into modern palate trends. Whether you’re cooling down after a long day or seeking a quick breezy dessert, this recipe transforms simple ingredients into a soothing experience. It’s a reminder that happiness can be found in the simplest of flavors.

    Vanilla Slushie

    This vanilla slushie is a frozen beverage made by blending vanilla-flavored ingredients with ice to create a smooth, icy texture. The mixture results in a refreshing, pale drink with a creamy appearance that evokes nostalgic comfort. It’s perfect for cooling down on warm days or enjoying as a simple dessert.
    Prep Time 5 minutes
    Total Time 5 minutes
    Servings: 2
    Course: Main Course
    Cuisine: Modern
    Calories: 250

    Ingredients
      

    • 2 cups frozen vanilla ice cream or vanilla frozen yogurt
    • 1 cup milk any type you prefer
    • 1 tablespoon vanilla extract
    • 1 cup ice cubes for blending

    Equipment

    • Blender
    • Measuring spoons

    Method
     

    1. Add the frozen vanilla ice cream, milk, vanilla extract, and ice cubes into the blender.
    2. Secure the lid and blend on high speed until the mixture is smooth, thick, and frosty, about 30-40 seconds. You should see a creamy, slushy consistency emerge.
    3. Pause the blender briefly to check the texture; if it’s too thick, you can add a splash more milk and blend again for a few seconds.
    4. Once blended to your desired smooth and icy texture, turn off the blender.
    5. Pour the vanilla slushie into glasses, spooning any remaining mixture for those who love extra creamy bits.
    6. Serve immediately with a straw or a garnish if desired, and enjoy the refreshing, smooth texture of this simple vanilla treat.
    This vanilla slushie is a gentle reminder that sometimes, the most uncomplicated desserts anchor us in the present while whispering tales of the past. It’s perfect for hot afternoons or last-minute gatherings, offering a refreshing respite with minimal fuss. Embrace this chilly delight and keep a batch ready—you’ll find yourself reaching for it more often than you’d expect.