Author: LilyHayes

  • Spooktacularly Cute Halloween Ghost Veggie Platter

    Spooktacularly Cute Halloween Ghost Veggie Platter

    Growing up, I was obsessed with the idea of turning healthy snacks into fun art. This Halloween Ghost Veggie Platter is a playful way to get kids (and adults) excited about crunching into carrots and cucumbers. The combination of bright color and spooky shapes adds magic to any festive table.

    The best part? It’s surprisingly easy to assemble and customizable with your favorite veggies. Whether you’re hosting a spooky gathering or need a quick veggie fix, this platter brings a bit of ghostly charm to your spread. Plus, it offers a sneaky way to sneak more greens into your trick-or-treat sugar overload.

    Halloween Ghost Veggie Platter

    The Halloween Ghost Veggie Platter features assorted raw vegetables, primarily carrots and cucumbers, cut into spooky ghost shapes. The vegetables are shaped and arranged to resemble ghosts with facial features, creating a playful and colorful display with a crunchy texture.
    Prep Time 15 minutes
    Total Time 15 minutes
    Servings: 8
    Course: Main Course
    Cuisine: American
    Calories: 40

    Ingredients
      

    • 2 large carrots preferably organic or fresh carrots
    • 2 large cucumbers English or regular cucumbers
    • small optional black olives for eyes
    • 1 small baby carrots

    Equipment

    • Sharp Paring Knife
    • Cutting board
    • Small Spoon or Toothpick

    Method
     

    1. Peel the carrots and cucumbers thoroughly to remove any skin or wax coating.
    2. Using a sharp paring knife, cut the carrots into small, rounded ghost shapes with a slightly flattened bottom for stability.
    3. Repeat the same process with the cucumbers, slicing them into similar ghost shapes that match the size of the carrot pieces.
    4. Arrange the cut vegetables on a serving platter, positioning each ghost-shaped piece with space in between for decorations.
    5. Use small pieces of black olives or slices of baby carrots to create eyes for each ghost, placing them near the top of each vegetable shape with a tiny spoon or toothpick.
    6. Optionally, add additional facial features or mouths using small bits of vegetables or different-colored foods for extra character.
    7. Serve immediately for maximum crunchiness and a playful, spooky presentation that delights kids and adults alike.

    Notes

    For easier shaping, slightly freeze the vegetables for 15-20 minutes before cutting. This firms them up and makes shaping easier.
    As the party winds down, I love how this veggie platter doubles as a conversation starter. It’s proof that healthy food can be fun, even on Halloween night. Plus, maybe it’ll inspire someone to keep that veggie habit all year round.

    Creating this spooky platter reminded me how little details make a difference—from the squeaky crunch of fresh carrots to the goofy ghost expressions. It’s these small things that transform an ordinary snack into a memorable moment. Happy haunting and snacking!

  • Spooky Bats & Creepy Green Guac: A Halloween Snack Adventure

    Spooky Bats & Creepy Green Guac: A Halloween Snack Adventure

    Halloween transforms the mundane into the marvelous, especially in the kitchen. This year, I wanted to create a snack that not only whispers spooky but also sparks joy with every bite. Enter the Bat-Shaped Tortilla Chips paired with a vibrant, eerie green guacamole that looks almost supernatural.

    The secret lies in a simple trick: turning ordinary chips into flying creatures and making the guacamole glow with a trick of natural dyes. It’s chaos, it’s colors, and it makes the tradition of snacking a little more wild. Perfect for those who love to combine fun with flavor, this dish stands out on any spooky table.

    **WHY I LOVE THIS RECIPE?**

    • Because it mixes childhood nostalgia with a spooky twist.
    • The chaos of decorating chips keeps everyone entertained.
    • The vibrant green color makes the food feel alive.
    • It’s quick, fun, and perfect for last-minute parties.
    • Brings a giggle before the first crunchy bite.

    Bat-Shaped Tortilla Chips with Green Guacamole

    This dish features homemade tortilla chips cut into bat shapes, paired with a bright green guacamole that is naturally dyed to look eerie. The chips are crisp and golden, while the guacamole is creamy with a vibrant, neon-green hue, making it visually striking and fun to eat.
    Prep Time 15 minutes
    Cook Time 10 minutes
    Total Time 25 minutes
    Servings: 4
    Course: Main Course
    Cuisine: fusion
    Calories: 250

    Ingredients
      

    • 8 small corn tortillas 6-inch diameter
    • 2 avocados ripe avocados pitted and peeled
    • 1/4 cup cilantro roughly chopped, optional
    • 2 tbsp lime juice freshly squeezed
    • 1/2 teaspoon salt
    • 1 small cucumber peeled and chopped, for natural dye
    • 2 cloves garlic minced
    • 1 tbsp olive oil

    Equipment

    • Rolling pin
    • Baking sheet
    • Sharp cookie cutters or knife
    • Mixing bowl
    • Fork or potato masher
    • Food processor or blender

    Method
     

    1. Preheat your oven to 375°F (190°C) and line a baking sheet with parchment paper.
    2. Stack the corn tortillas and use a sharp cookie cutter or knife to cut out bat-shaped figures from each tortilla.
    3. Arrange the bat-shaped tortillas in a single layer on the prepared baking sheet and lightly spray or brush them with olive oil.
    4. Bake in the oven for about 8-10 minutes, until golden and crispy. Keep an eye on them to prevent burning.
    5. While the chips are baking, prepare the guacamole by mashing the ripe avocados in a bowl until smooth.
    6. Add minced garlic, lime juice, chopped cilantro, and salt to the mashed avocados. Mix well to combine.
    7. Blend the peeled cucumber with a small amount of water in a food processor or blender until smooth to create a vibrant green dye.
    8. Stir a few teaspoons of the cucumber juice into the guacamole until it turns an eerie, vivid green hue. Adjust the amount for your desired color.
    9. Once the chips are cool enough to handle, transfer them to a serving platter.
    10. Spoon the vibrant green guacamole into a bowl and place it alongside the bat-shaped chips.
    11. Serve immediately to enjoy the crispy chips and colorful, creamy guacamole while fresh.

    Notes

    For extra fun, use black or purple food coloring in the guacamole and add small edible decorations like tiny candy bats or eyeballs.

    Halloween is about creating memories as much as it is about dressing up and candy. This guacamole and chips combo makes grazing effortless and playful. Watching the kids carve silly smiles into their chips or the glow of the green dip at sunset is pure holiday magic.

    So, here’s to embracing the chaos, loving the little imperfections, and sharing spooky bites with those who matter. After all, the best part of Halloween is the stories and laughter gathered around a table full of ghoulish treats.

  • Unexpected Warmth: Vegan Pumpkin Soup With a Twist

    Unexpected Warmth: Vegan Pumpkin Soup With a Twist

    Every autumn, I find myself craving a soup that not only warms my hands but also sparks childhood memories. This vegan pumpkin soup is my secret weapon for those chilly days, but with a twist that surprises even the most seasoned taste buds. I love incorporating a hint of smoky paprika and a splash of coconut milk for richness.

    Slowly roasting the pumpkin brings out a caramelized aroma that fills my kitchen with fall magic. Once blended, the velvety texture glides over the palate, with a subtle kick of ginger cutting through the sweetness. It’s a comforting bowl that holds a lot of stories—of cozy mornings and sunset walks.

    Vegan Pumpkin Soup with Smoky Paprika and Coconut Milk

    This vegan pumpkin soup is made by roasting fresh pumpkin until caramelized, then blending it with aromatics, smoky paprika, and coconut milk to create a smooth, velvety texture. The soup showcases a rich orange hue with a slight sheen and a creamy consistency, accented by a hint of ginger for warmth.
    Prep Time 15 minutes
    Cook Time 45 minutes
    Total Time 1 hour
    Servings: 4
    Course: Main Course
    Cuisine: Vegan
    Calories: 220

    Ingredients
      

    • 1 kg fresh pumpkin peeled, seeded, cut into chunks
    • 2 tbsp olive oil for roasting
    • 1 inch ginger peeled and minced
    • 1 tsp smoked paprika
    • 1 cup coconut milk full-fat for richness
    • 4 cups vegetable broth
    • to taste salt and pepper

    Equipment

    • Baking sheet
    • Blender
    • Large pot
    • Stirring spoon
    • Knife
    • Cutting board

    Method
     

    1. Preheat your oven to 400°F (200°C). Spread the pumpkin chunks on a baking sheet, drizzle with olive oil, and toss to coat evenly.
    2. Roast the pumpkin in the oven for about 30-35 minutes, or until the edges are golden and caramelized. The aroma should be sweet and inviting as it bakes.
    3. While the pumpkin roasts, heat a bit of oil in a large pot over medium heat. Add the minced ginger and cook for 1-2 minutes until fragrant, making your kitchen smell cozy.
    4. Add the smoked paprika to the ginger and stir for about 30 seconds to release its smoky aroma.
    5. Once the pumpkin is roasted and cool enough to handle, transfer it to the pot with the aromatic ginger and paprika.
    6. Pour in the vegetable broth and bring the mixture to a gentle simmer. Let it cook for about 10 minutes to allow flavors to meld and pumpkin to soften further.
    7. Use an immersion blender or regular blender to carefully blend the soup until completely smooth and velvety. Be cautious when blending hot liquids.
    8. Stir in the coconut milk and season with salt and pepper to taste. Continue to heat the soup gently until it’s hot throughout, about 2-3 minutes.
    9. Taste the soup and adjust seasoning if needed. The soup should be creamy, warming, and with a slight smoky kick from the paprika.
    10. Serve hot, garnished with a splash of coconut milk or fresh herbs if desired, and enjoy the cozy flavors of this autumn-inspired soup.

    Pairing this soup with crusty bread or a sprinkle of toasted seeds elevates it from simple to soul-satisfying. The versatility of this dish makes it a go-to for weekly meal prep or an impromptu dinner party. It’s a reminder that often, the simplest ingredients create the most memorable meals.

    As the season changes, so do our dinners. Sharing this warming bowl offers a quiet moment of gratitude for the bounty of fall. It’s a humble dish, yet it carries the weight of cozy evenings and the promise of new seasonal flavors.

  • Fizzing Nostalgia: The Art of the Perfect Coke Slushie

    Fizzing Nostalgia: The Art of the Perfect Coke Slushie

    Imagine biting into a summery treat that instantly snaps you back to childhood afternoons. A Coke slushie is more than just a cold drink; it’s a portal to lazy weekends, warm laughter, and the simple joy of icy refreshment. This recipe takes that nostalgia and elevates it, turning a basic soda into a swirling symphony of cold, sweet, and fizzy.

    Crafting the perfect Coke slushie isn’t just about freezing and blending. It’s about balancing the sweetness with just enough icy crunch to make each sip a burst of flavor. The magic lies in the technique, the chilling patience, and that moment when the first spoonful hits your tongue. It’s a small celebration of summer in every glass.

    Classic Coke Slushie

    A Coke slushie is a frozen beverage made by chilling and blending carbonated cola with ice to create a smooth, icy drink with a sweet, fizzy flavor. The final texture is thick, slushy, and scoopable, reminiscent of childhood summer treats. The preparation involves freezing and blending to achieve a refreshing, cold consistency.
    Prep Time 10 minutes
    Total Time 10 minutes
    Servings: 2
    Course: Main Course
    Cuisine: American
    Calories: 180

    Ingredients
      

    • 4 cups cola soda chilled
    • 2 cups ice cubes
    • 2 tablespoons sugar syrup optional, for extra sweetness

    Equipment

    • Freezer
    • Blender

    Method
     

    1. Pour the chilled cola soda into a shallow dish or ice cube tray and place in the freezer until thoroughly frozen, about 2-3 hours.
    2. Once frozen solid, break the cola into smaller chunks or remove from the freezer in chunks for easier blending.
    3. Add the frozen cola chunks, ice cubes, and optional sugar syrup into the blender.
    4. Blend on high speed until the mixture is thick, slushy, and smooth, with a texture similar to soft serve ice cream.
    5. Stop the blender and check the consistency; add a bit more ice if needed for a thicker texture and blend briefly again.
    6. Scoop the frozen Coke slushie into glasses and garnish with a straw or a slice of lemon if desired.

    Notes

    For a more intense flavor, you can add a splash of vanilla extract or a dash of lime juice before blending.
    This Coke slushie recipe is a spontaneous ode to those sun-drenched days of youth and carefree afternoons. It’s super quick to whip up, yet delivers a refreshing punch that’s hard to beat when the heat rises.

    Dip into this icy delight whenever you need a cheerful escape or a nostalgic treat. It’s perfect for casual get-togethers or a quiet moment alone with a cold drink and your favorite playlist. Sometimes, the simplest pleasures make the brightest memories.

  • Unconventional Taco Soup: A Cozy Twist with a Secret Ingredient

    Unconventional Taco Soup: A Cozy Twist with a Secret Ingredient

    Imagine a bowl of taco soup that combines the familiar fiery spices with an unexpected ingredient that elevates it to a new level. This recipe is not your average comfort food; it’s a playful reinvention that brings a surprise element to your palate. Perfect for cozy nights or when you need a hearty dish that sparkles with a touch of culinary mischief.

    What makes this taco soup truly special is that it marries the rustic charm of traditional Tex-Mex flavors with a dash of innovation. I love experimenting with ingredients that add depth and complexity, and this soup is no exception. It’s a warm, fragrant bowl that invites curiosity with every spoonful.

    Every time I make this, I get a little thrill thinking about how an unusual ingredient can turn a simple meal into something memorable. Whether it’s for a family dinner or a last-minute gathering, this recipe never fails to impress. It’s a testament to how a tiny twist can make all the difference in comforting classic cuisine.

    Hearty Taco Soup with a Smoked Paprika Twist

    This taco soup features a rich broth simmered with ground beef, beans, corn, and traditional Tex-Mex spices, resulting in a hearty and fragrant dish. The addition of smoked paprika gives it a subtle smoky depth, while the surface is topped with melted cheese and fresh cilantro for a colorful, comforting presentation.
    Prep Time 15 minutes
    Cook Time 30 minutes
    Total Time 45 minutes
    Servings: 4
    Course: Main Course
    Cuisine: Mexican
    Calories: 350

    Ingredients
      

    • 1 lb ground beef or ground turkey
    • 1 cup diced onion finely chopped
    • 3 cloves garlic minced
    • 1 can (14 oz) diced tomatoes undrained
    • 1 can (15 oz) kidney beans drained and rinsed
    • 1 cup corn kernels frozen or fresh
    • 4 cups beef or vegetable broth
    • 2 teaspoons chili powder
    • 1 teaspoon cumin
    • 1/2 teaspoon smoked paprika adds smoky flavor
    • to taste salt and pepper for seasoning
    • 1 cup shredded cheese cheddar or Mexican blend, for topping
    • Fresh handful cilantro chopped, for garnish

    Equipment

    • Large pot or Dutch oven
    • Wooden spoon or spatula

    Method
     

    1. Heat the large pot over medium heat and add the ground beef, breaking it apart with a wooden spoon as it cooks until browned and cooked through, about 5-7 minutes.
    2. Add the finely chopped onion and cook until translucent, about 3-4 minutes, until it softens and becomes fragrant.
    3. Stir in the minced garlic and cook for another minute until fragrant, taking care not to burn it.
    4. Sprinkle in the chili powder, cumin, smoked paprika, and a pinch of salt and pepper. Stir well to coat the meat and vegetables with the spices.
    5. Pour in the diced tomatoes with their juices, and stir to combine, allowing the mixture to simmer for 2 minutes.
    6. Add the drained kidney beans, corn, and beef broth, stirring everything together. Bring the soup to a gentle boil.
    7. Reduce the heat to low, cover the pot, and let it simmer gently for about 20 minutes, stirring occasionally to blend the flavors.
    8. Once done, check for seasoning, adding more salt, pepper, or spices if needed.
    9. Serve the hot soup in bowls, topped with shredded cheese and a sprinkle of chopped cilantro for freshness.

    Notes

    For extra flavor, garnish with sliced jalapeños or a dollop of sour cream. Adjust spice levels to taste for milder or spicier versions.

    Pour yourself a bowl of this unconventional taco soup and savor the rich, spicy aromas that fill your kitchen. The melding of flavors creates a comforting experience that feels both familiar and refreshingly new. Perfect for chilly evenings, it’s a dish that warms both body and soul.

    Enjoy the process of creating something that stands out, even from a casual weeknight meal. This recipe reminds me that sometimes, the smallest change can make a big difference. Keep experimenting, keep tasting, and let your culinary creativity lead the way.

  • The Art of the Unexpected: Crafting a Unique Strawberry Slushie Experience

    The Art of the Unexpected: Crafting a Unique Strawberry Slushie Experience

    Imagine turning your frozen strawberries into a symphony of flavor with just a hint of basil and a splash of lime. This isn’t your average summer refreshment; it’s a sensory journey that awakens childhood memories of wandering through strawberry patches, but with a modern twist.

    In this recipe, I explore an unconventional pairing that elevates the simple strawberry slushie into something memorable. It’s perfect for those lazy weekends when you want something chilly, yet complex enough to impress. The bright pink hue and the promise of a cool burst will make every sip an adventure.

    Strawberry Basil Lime Slushie

    This strawberry basil lime slushie is a frozen beverage made by blending strawberries with fresh basil and lime juice until smooth. It has a vibrant pink hue, a refreshing fruity flavor complemented by herbal notes, and a chilled, slushy texture that is perfect for warm weather. The final drink is visually appealing and bursts with bright, natural flavors.
    Prep Time 10 minutes
    Total Time 10 minutes
    Servings: 2
    Course: Main Course
    Cuisine: fusion
    Calories: 80

    Ingredients
      

    • 2 cups frozen strawberries hulled and sliced if not pre-frozen
    • 1/4 cup fresh basil leaves roughly torn
    • 2 tablespoons fresh lime juice about one lime’s worth
    • 1 cup water or sparkling water for blending to desired consistency
    • 2 tablespoons honey or agave syrup optional, adjust to taste

    Equipment

    • Blender
    • Measuring Cups and Spoons

    Method
     

    1. Place the frozen strawberries, torn basil leaves, lime juice, water, and honey into your blender.
    2. Blend on high speed until the mixture is smooth and icy, with no visible chunks, about 30-45 seconds.
    3. Check the texture — it should be thick, slushy, and scoopable. If it’s too thick, add a splash more water and blend briefly.
    4. Taste the slushie and add more honey or lime juice if desired, then give it a quick blend to incorporate.
    5. Pour the chilled strawberry basil lime slushie into glasses, letting the vibrant pink color fill the cups.
    6. Serve immediately with a sprig of basil or a lime wedge for garnish, enjoying the refreshing burst of flavors.
    Next time you crave something cool, remember how a dash of zest and a sprinkle of herbs can transform your typical fruit slushie. This recipe invites you to experiment and make it your own, whether you prefer it extra tangy or extra sweet.

    Enjoy creating a colorful, refreshing treat that not only quenches thirst but also sparks joy in the simple art of blending. It’s an ode to those fleeting summer days you want to hold onto longer. Bring out your blender and let it whisk you away to a blissful, fruity escape.

  • Autumn’s Unexpected Twist: Sweet Potato Turkey Chili

    Autumn’s Unexpected Twist: Sweet Potato Turkey Chili

    As the leaves turn fiery red and golden yellow, I find myself craving more than just pumpkin-spiced everything. This Fall Turkey Chili with Sweet Potatoes is my unconventional ode to the season. It combines hearty, lean turkey with the natural sweetness of roasted sweet potatoes, creating a comforting yet surprising flavor harmony.

    The smell alone is worth making this dish—spiced with cinnamon, cumin, and a hint of smoky paprika, it envelops my kitchen in a warm, inviting scent. I love how simple ingredients come together to create a bowl that feels like a cozy autumn afternoon. It’s perfect for those busy weekdays when you crave something nourishing and full of fall flavors.

    Fall Turkey Chili with Sweet Potatoes

    This chili combines lean ground turkey with roasted sweet potatoes, infused with warm spices like cinnamon, cumin, and smoky paprika. The dish has a hearty, thick texture with tender chunks of sweet potato and savory turkey, topped with a rich, spiced broth. It is cooked on the stovetop until flavors meld and the chili reaches a comforting consistency.
    Prep Time 15 minutes
    Cook Time 40 minutes
    Total Time 55 minutes
    Servings: 4
    Course: Main Course
    Cuisine: American
    Calories: 350

    Ingredients
      

    • 2 large sweet potatoes peeled and cut into chunks
    • 1 tablespoon olive oil for roasting and cooking
    • 1 medium onion diced
    • 3 cloves garlic minced
    • 1 pound lean ground turkey
    • 1 teaspoon ground cumin
    • 1/2 teaspoon ground cinnamon
    • 1/2 teaspoon smoked paprika
    • 1 can (14 oz) diced tomatoes with juices
    • 1 cup chicken or vegetable broth
    • 1 can (15 oz) kidney beans drained and rinsed
    • to taste Salt and pepper for seasoning

    Equipment

    • Baking sheet
    • Large pot or Dutch oven
    • Wooden spoon or spatula
    • Knife
    • Cutting board

    Method
     

    1. Preheat the oven to 400°F (200°C). Toss the sweet potato chunks with a tablespoon of olive oil, salt, and pepper. Spread them out on a baking sheet and roast for about 25-30 minutes until tender and caramelized around the edges.
    2. While the sweet potatoes roast, dice the onion and mince the garlic. Heat a tablespoon of olive oil in a large pot over medium heat. Sauté the onion until translucent and fragrant, about 5 minutes.
    3. Add the minced garlic to the pot and cook for another minute until fragrant. Then, add the ground turkey, breaking it apart with a wooden spoon. Cook until browned and cooked through, about 8 minutes.
    4. Stir in the cumin, cinnamon, and smoked paprika, cooking for 30 seconds to toast the spices and release their aromas.
    5. Add the diced tomatoes with their juices and the broth to the pot. Stir everything together and bring to a gentle simmer.
    6. Drain and rinse the kidney beans, then stir them into the chili. Continue to simmer uncovered for about 10 minutes, allowing the flavors to meld and the chili to thicken slightly.
    7. Once the roasted sweet potatoes are ready, gently fold them into the chili, being careful not to mash them. Let everything simmer together for another 5 minutes, so the flavors unify.
    8. Taste the chili and adjust seasoning with salt and pepper as needed. The chili should be thick, flavorful, and hearty with tender chunks of turkey and sweet potato.
    9. Serve the chili hot, garnished with your favorite toppings like fresh herbs or a dollop of sour cream if desired. Enjoy the warm, spiced flavors of fall in every spoonful.
    This chili has become my go-to for chilly evenings, blending the nostalgic warmth of fall with the ease of a quick weeknight meal. The sweet potatoes add a gentle earthiness that balances the savory ground turkey perfectly.

    No matter how chaotic your day has been, this dish encourages you to slow down and enjoy the rich, layered flavors. It’s a gentle reminder that sometimes, the simplest ingredients can come together to create something truly special—an ode to the fleeting beauty of fall.

  • Monster Burgers for a Spook-tacular Halloween

    Monster Burgers for a Spook-tacular Halloween

    Halloween is the perfect time to unleash your creativity in the kitchen. These Monster Burgers turn an ordinary meal into a playful fright fest, complete with gooey cheese eyes and scary monster mouths. They’re a little chaotic, a lot fun, and guaranteed to get laughs at your spooky gathering.

    Imagine biting into a burger and discovering a face of melted cheese, crispy onions forming wild hair, and ketchup creating bloody wounds. Every detail invites a smile and sparks a sense of nostalgic childhood horror movies. This recipe is a delightful way to embrace the spirit of Halloween with edible art that’s surprisingly easy to make.

    Halloween Monster Burgers

    Monster Burgers are playful sandwiches made with beef patties topped with melted cheese, crispy onions, and various condiments to create fun, scary faces. The dish features a combination of grilled meats, gooey cheese, and crunchy toppings, assembled into a visually striking and flavorful burger with a mix of crispy, melty, and tender textures.
    Prep Time 15 minutes
    Cook Time 20 minutes
    Total Time 35 minutes
    Servings: 4
    Course: Main Course
    Cuisine: American
    Calories: 650

    Ingredients
      

    • 1 lb ground beef for burger patties
    • 4 slices cheddar cheese to melt over the burgers and create eyes
    • 1 cup crispy fried onions for wild hair and textures
    • ½ cup ketchup to create bloody wounds and mouths
    • 4 burger buns hamburger buns for assembling the monsters
    • 1 small onion for creating wild hair
    • to taste salt and pepper for seasoning the beef

    Equipment

    • Grill or stovetop skillet
    • Spatula
    • Oven or microwave (for melting cheese)
    • Knife
    • Cutting board

    Method
     

    1. Preheat your grill or skillet over medium-high heat. Form the ground beef into four equal-sized patties, gently pressing the centers to help them cook evenly. Season each patty generously with salt and pepper.
    2. Place the patties onto the hot grill or skillet. Cook for about 4-5 minutes per side until they develop a nice brown crust and reach your desired level of doneness. During the last minute, lay a slice of cheddar cheese on each patty to melt.
    3. While the patties are cooking, slice the onion very thinly. Use part of the onion to create wild hair by spreading small strips around the top of each burger once assembled.
    4. Toast the burger buns lightly on the grill or in a toaster until golden and crisp. This helps them hold together when assembling the monster faces.
    5. Spread a bit of ketchup inside the top and bottom buns to create gruesome mouths and bloody wounds. Place each cooked burger patty onto the bottom buns.
    6. Use small pieces of cheese to form eyes on each burger, placing them on the melted cheese on top of the patties. Add crispy fried onions around the cheese eyes to resemble wild hair or creature’s features.
    7. Position additional pieces of crispy fried onions and sliced onions around the faces to give the appearance of wild hair or scary textures. Add extra ketchup or condiments as needed for blood effects.
    8. Cap each burger with the top bun and gently press down to secure all the toppings. Use a little ketchup or additional cheese for finishing touches if desired.
    9. Serve the Monster Burgers immediately, allowing everyone to enjoy the playful, scary faces and delicious flavors. Perfect for a fun Halloween gathering or themed party.
    As the night rolls on, these Monster Burgers will keep everyone talking and munching happily. Their playful presentation makes them perfect for party tables or an eerie family dinner. Plus, the simple ingredients mean you can whip them up even on a quick Halloween prep.

    In the end, Halloween is about fun, little surprises, and making memories. These burgers aren’t just food—they’re part of the celebration’s magic. So, get your imaginative hat on and enjoy creating a little edible chaos in your kitchen.

  • Chill Out with an Unconventional Lemonade Slushie Twist

    Chill Out with an Unconventional Lemonade Slushie Twist

    Imagine a summer day when the usual lemonade just doesn’t cut it anymore. Instead, envision freezing zest and juice into a frosty delight that surprises your taste buds. This lemonade slushie isn’t your ordinary frozen drink; it’s a playful escape for heatwave moments and lazy afternoons.

    What makes this recipe really stand out is the way it captures the tangy brightness of lemons in a slushy, icy form. Each sip carries a burst of citrus that’s both refreshing and unexpectedly complex, thanks to a dash of herbs or a splash of soda. It’s the kind of treat that feels like a mini-vacation in every glass.

    Lemonade Slushie

    This lemonade slushie combines freshly squeezed lemon juice and zest with simple syrup, then freezes it into a smooth, icy treat. The mixture is blended until frosty and garnished for a vibrant, refreshing appearance, perfect for hot days. Its texture is crisp and slushy, with a tangy citrus flavor in every spoonful.
    Prep Time 10 minutes
    Total Time 10 minutes
    Servings: 4
    Course: Main Course
    Cuisine: American
    Calories: 100

    Ingredients
      

    • 1 cup fresh lemon juice preferably strained
    • 1 tablespoon lemon zest finely grated
    • 0.5 cup simple syrup adjust sweetness to taste
    • 1 cup water
    • Ice cubes ice cubes enough to fill blender

    Equipment

    • Juicer or citrus press
    • Measuring Cups and Spoons
    • Freezer-safe container
    • Blender

    Method
     

    1. Juice the lemons using a juicer or citrus press until you have about one cup of lemon juice, then strain out any seeds or pulp.
    2. Add the lemon zest to the juice, then whisk in the simple syrup until well combined and the zest is evenly distributed.
    3. Pour in the water and stir thoroughly to create a balanced citrus mixture.
    4. Transfer the mixture to a freezer-safe container and freeze for about 2 hours or until icy but scoopable.
    5. Once frozen, break the mixture into chunks and place it into a blender along with enough ice cubes to fill the blender halfway.
    6. Blend until smooth and frosty, with an icy, slushy texture. Stop blender to scrape down sides if needed.
    7. Pour the slushie into glasses and garnish with additional lemon zest or a slice of lemon if desired.

    Notes

    For a more vibrant color, add a splash of food coloring or fresh herbs like mint.
    This lemonade slushie is more than just a frozen beverage—it’s a celebration of summer’s best flavors in a single, icy scoop. Perfect for spontaneous picnics or quiet evenings on the porch, its versatility makes it a staple in my seasonal repertoire.

    As the days grow warmer and the sun blazes brighter, I find myself reaching for this chilled concoction more often. It’s a simple reminder that sometimes, the most delightful moments come from blending fresh ingredients into a cooling, joyful sip.

  • Autumn’s Unexpected Treasure: Pumpkin Cheesecake with a Twist

    Autumn’s Unexpected Treasure: Pumpkin Cheesecake with a Twist

    As the leaves start to drift down and the air turns crisper, I find myself craving desserts that resonate with the season’s cozy warmth. This pumpkin cheesecake isn’t just a sweet treat; it’s a nostalgic voyage back to baked afternoons spent with loved ones. But this version has a surprising ingredient that elevates it beyond the usual pumpkin pie fare.

    The secret lies in a hint of smoked cinnamon, which lends a gentle, smoky aroma that surprises the senses. The creamy texture of the cheesecake paired with the robust fall flavors makes every bite a little celebration of harvest magic. It’s an unexpected yet harmonious centerpiece for any autumn gathering.

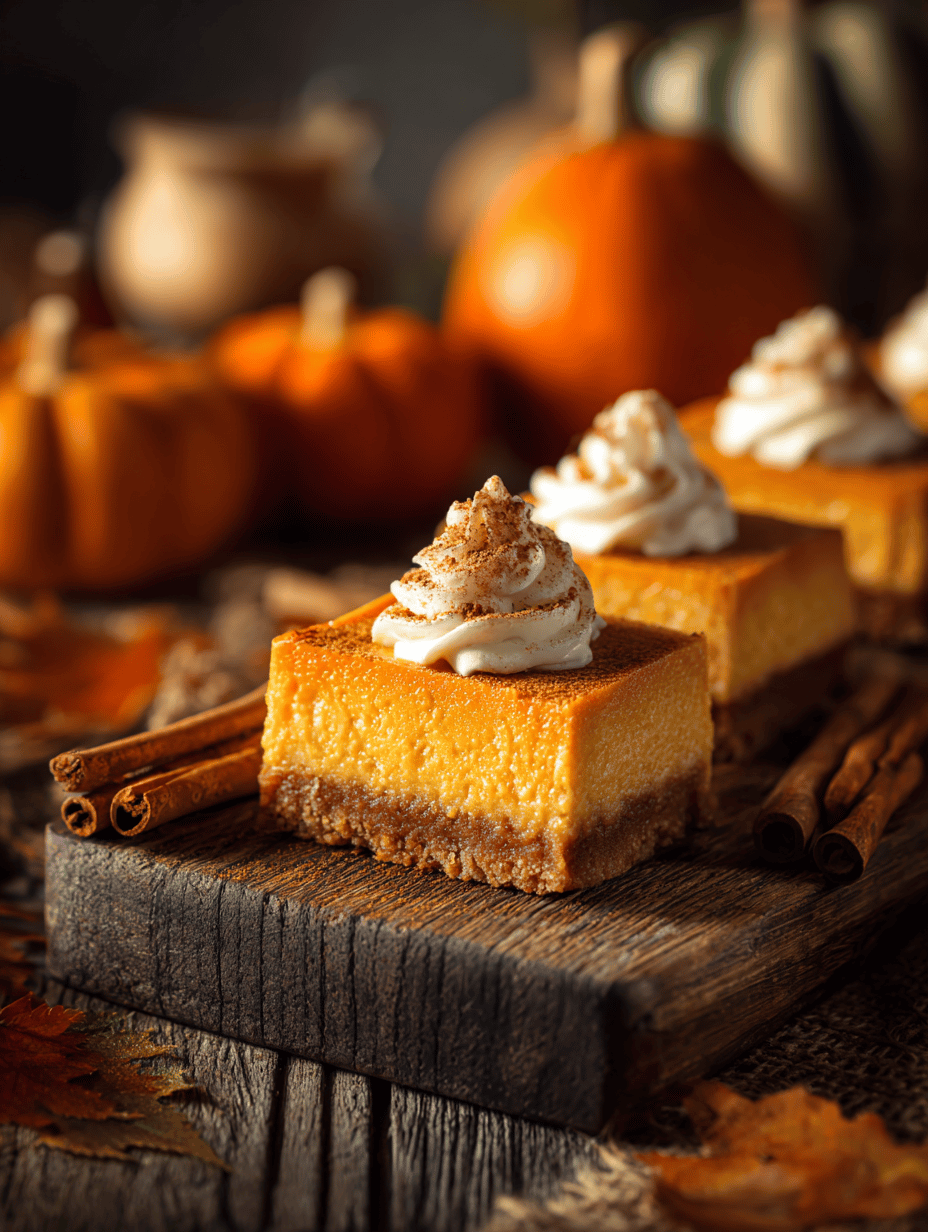
    Smoked Cinnamon Pumpkin Cheesecake

    This pumpkin cheesecake features a smooth, creamy filling infused with smoky cinnamon, baked until set with a lightly golden top. The dessert has a velvety texture and a rich autumnal flavor profile, combining the sweetness of pumpkin with warm spices and a subtle smoky aroma.
    Prep Time 30 minutes
    Cook Time 1 hour
    Total Time 1 hour 30 minutes
    Servings: 8
    Course: Main Course
    Cuisine: American
    Calories: 450

    Ingredients
      

    • 1 ½ cups graham cracker crumbs for crust
    • cup butter melted
    • 16 oz cream cheese softened
    • 1 cup granulated sugar
    • 1 cup canned pumpkin pure pumpkin puree
    • 3 large eggs
    • 1 ½ teaspoons smoked cinnamon ground
    • 1 teaspoon vanilla extract
    • ¼ teaspoon salt

    Equipment

    • Springform pan
    • Mixing bowls
    • Hand or stand mixer
    • Silicone spatula
    • Baking sheet
    • Oven

    Method
     

    1. Preheat the oven to 350°F (175°C). Mix the graham cracker crumbs with melted butter until evenly coated, then press the mixture into the bottom of a springform pan to form a crust. Bake for 10 minutes to set the crust, then remove and let cool slightly.
    2. In a large mixing bowl, beat the softened cream cheese with a hand or stand mixer until smooth and creamy, about 2-3 minutes. Add granulated sugar and continue beating until well combined and fluffy.
    3. Incorporate the canned pumpkin and vanilla extract into the cream cheese mixture, mixing on low speed until fully blended and smooth. The mixture should have a pumpkin-orange hue and a silky texture.
    4. Add eggs one at a time, beating on low after each addition, until fully incorporated. The batter will become richer and slightly thicker.
    5. Stir in the smoked cinnamon and salt, folding gently with a spatula to evenly disperse the aromatic spice throughout the mixture.
    6. Pour the batter over the cooled crust in the springform pan, spreading it out smoothly with a spatula for an even top.
    7. Place the springform pan on a baking sheet and bake in the preheated oven for 60 minutes, or until the edges are set but the center still slightly jiggles when shook gently.
    8. Once baked, turn off the oven and crack the door open slightly. Let the cheesecake cool inside for about an hour to prevent cracking and to develop a gentle crack-free surface.
    9. Transfer the cheesecake to the refrigerator and chill for at least 4 hours or overnight until fully set and firm.
    10. Gently run a knife around the edges of the springform before unlatching it. Remove the sides carefully to reveal the smooth, pumpkin-colored surface of the cheesecake.
    11. Slice the cheesecake with a sharp knife, serve with a sprinkle of smoked cinnamon or whipped cream if desired. Enjoy the rich, creamy texture with its deep fall flavors.

    Notes

    For best flavor, prepare the cheesecake a day ahead to allow the spices to fully meld.

    This cheesecake combines simple ingredients with an unexpected smoky undertone that makes it special. It’s perfect for those cooler evenings when a warming dessert feels just right. Sharing this dessert will turn an ordinary meal into a memorable celebration of fall’s bounty.

    Every spoonful unleashes rich, mellow flavors that echo the season’s charm. Whether it’s an intimate family dinner or a casual get-together, this pumpkin cheesecake will remind everyone how comforting and versatile good flavors can be. It’s a gentle reminder that sometimes, the most surprising tweaks can bring new joy to familiar treats.