These spooky cupcakes started as an afterthought during last October’s chaos. A mix of leftover chocolate, some candy eyeballs, and a craving for something festive led me here. They’re not perfect, but they’re honest and fun, perfect for kids or anyone who loves a little whimsy with their sweets. Baking these is a reminder that sometimes, the best moments come from improvisation.
Why These Cupcakes Keep Calling Me Back
They’re forgiving in chaos, and the kids love the silly decorations. The smell of chocolate, the crackling of the icing, the messy magic—these moments are rare. Baking them reminds me that creativity often thrives in imperfection.
What’s in These Spooky Cupcakes?
- All-purpose flour: I rely on it for structure, but almond flour works if you want a nutty twist.: Gives the cupcake its soft crumb—substitutions can alter texture.
- Cocoa powder: Adds that dark, moody flavor. Use Dutch-processed for less acidity.: Deepens the chocolate flavor—skip if you’re allergic, try carob powder.
- Butter: I prefer unsalted, for control over salt. Margarine will do in a pinch.: Creates richness and moisture, essential for moist cupcakes.
- Sugar: White granulated keeps it classic, but brown sugar adds a caramel note.: Sweetens and tenderizes—adjust sweetness to taste.
- Eggs: Bind everything together. Flax eggs work vegan, but watch texture.: Add stability and lift—skipping can make cupcakes flat.
- Vanilla extract: For that cozy aroma, use real vanilla if possible.: Enhances all flavors—imitation is okay in a pinch.
- Milk: Use whole milk for richness, or almond milk for dairy-free.: Moistens the batter—can swap with buttermilk for tang.
Tools of the Spooky Trade
- Muffin tin – for shaping your cupcakes.: Provides the perfect structure for even baking.
- Mixing bowls – for dry and wet ingredients.: Keeps ingredients organized and easy to combine.
- Electric mixer or whisk – for creamy batter.: Ensures fluffy, well-incorporated mixture.
- Cooling rack – for cooling cupcakes.: Prevents sogginess and helps set decorations.
- Spatula and piping bags – for decorating.: Gives you control over icing and spooky designs.
Step-by-Step to Spooky Goodness
Step 1: Preheat your oven to 180°C (350°F).
Step 2: Line a muffin tin with spooky-themed cupcake liners.
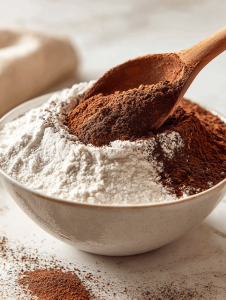
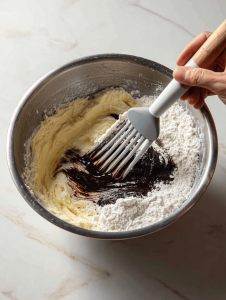
Step 3: Mix dry ingredients: flour, cocoa powder, baking powder, a pinch of salt.
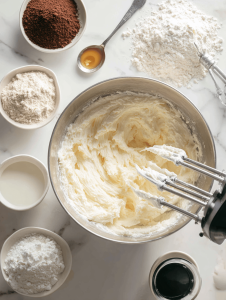
Step 4: Cream butter and sugar until fluffy, about 3 minutes.
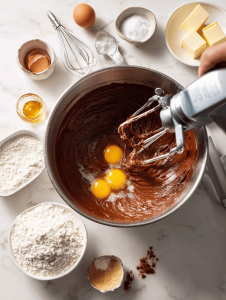
Step 5: Add eggs one at a time, then vanilla extract.
Step 6: Alternate adding milk and dry ingredients, starting and ending with flour.
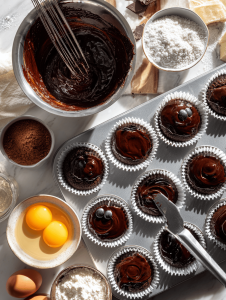
Step 7: Fill cupcake liners about 2/3 full.
Step 8: Bake for 18-20 minutes, or until a toothpick inserted comes out clean.
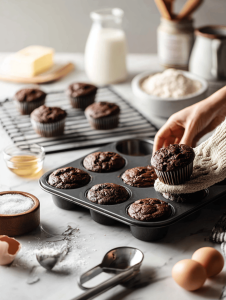
Step 9: Let cupcakes cool in the tin for 10 minutes, then transfer to a wire rack.
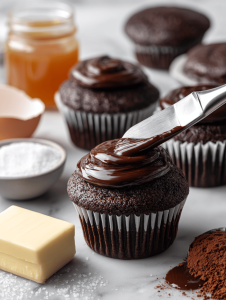
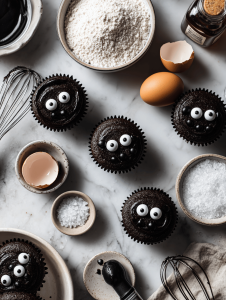
Step 10: Decorate with spooky icing, candies, or edible eyes as you like.
Keep an Eye Out: Key Baking Tips
- Cupcake batter should be smooth and slightly thick, not runny.
- Cupcakes should rise evenly and have a domed top.
- The edges of baked cupcakes should be slightly golden.
- A toothpick inserted in the center should come out clean or with a few moist crumbs.
Troubleshooting Your Spooky Cupcakes
- Over-mixing can develop gluten, making cupcakes rubbery.? OVER-MIXED BATTER – cupcakes turn dense. Fix: Mix just until ingredients are combined.
- Not enough baking time leaves centers gooey.? UNDER-BAKED CENTERS – toothpick comes out wet. Fix: Bake 2-3 minutes longer.
- Oven temp too high or sudden temperature changes.? LOOSE EDGES – cupcakes sinking or cracking. Fix: Check oven temp and avoid opening door early.
- Decorating with warm icing or in warm rooms.? DECORATION MELTING – icing sliding off. Fix: Chill decorated cupcakes before serving.

Spooky Chocolate Cupcakes
Ingredients
Equipment
Method
- Preheat your oven to 180°C (350°F) and line a muffin tin with spooky-themed cupcake liners for a festive vibe.
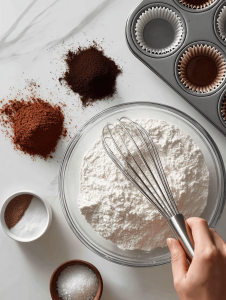
- In a large mixing bowl, sift together the flour, cocoa powder, baking powder, and salt to ensure an even, lump-free batter.
- In another bowl, cream the softened butter and sugar using an electric mixer or whisk until the mixture is light, fluffy, and fragrant, about 3 minutes.
- Add the eggs one at a time to the creamed mixture, beating well after each addition, until the batter is smooth and glossy. Mix in the vanilla extract for a cozy aroma.
- Alternately add the dry ingredients and milk to the wet mixture, starting and ending with the dry ingredients, mixing gently after each addition to keep the batter smooth and moist.

- Using a spoon or scoop, fill each cupcake liner about two-thirds full with batter, ensuring an even distribution and a little room to rise.
- Bake the cupcakes in the preheated oven for 18 to 20 minutes, or until the tops are domed and a toothpick inserted in the center comes out clean.
- Remove the cupcakes from the oven and let them cool in the tin for about 10 minutes, allowing the moisture to settle and the structure to set.
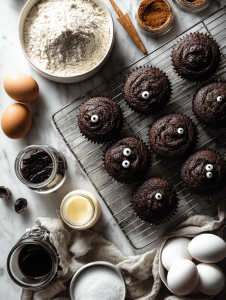
- Transfer the cooled cupcakes to a wire rack and wait until they are completely cool before decorating to prevent melting the icing.
- Decorate the cupcakes with spooky icing, candies, or edible eyes using piping bags or spatulas, adding whimsical details to make each one uniquely spooky and fun.
- Once decorated, chill the cupcakes briefly if needed to set the decorations, then serve and enjoy these playful treats for a festive celebration.

Hi, I’m Lily Hayes, the cook, writer, and heart behind Loving This Process. This blog is built on a simple idea that food is not just about the final dish, but about everything that happens while you’re making it. The thinking, the tasting, the adjusting, the learning, and the quiet moments in between. Food has been a constant presence in my life, not as something flashy or perfect, but as something deeply grounding. Cooking has always felt like a process worth savoring, even when it’s messy, slow, or imperfect.


Leave a Reply