Growing up, vegetable croquettes were my Sunday comfort food, crispy on the outside, soft and warm inside, with that faint smell of toasted breadcrumbs mingling with steaming veggie goodness. It’s funny how something so simple can carry so much nostalgia, especially when I add my secret twist—roasted garlic and sprigs of fresh herbs—that takes them from childhood snack to a dish I want to savor now. Making these at home feels like a cozy act of reclaiming those warm memories, but with a little more finesse.
This recipe is about balancing the humble with a dash of elegance, turning everyday vegetables into something that feels special without fuss. I like to think of it as a way to make the familiar feel new—crunchy, fragrant, and just a little surprising. It’s about the joy of transforming leftovers or humble produce into something that’s both comforting and a little bit celebratory, perfect for sharing or just enjoying on your own quiet evening.
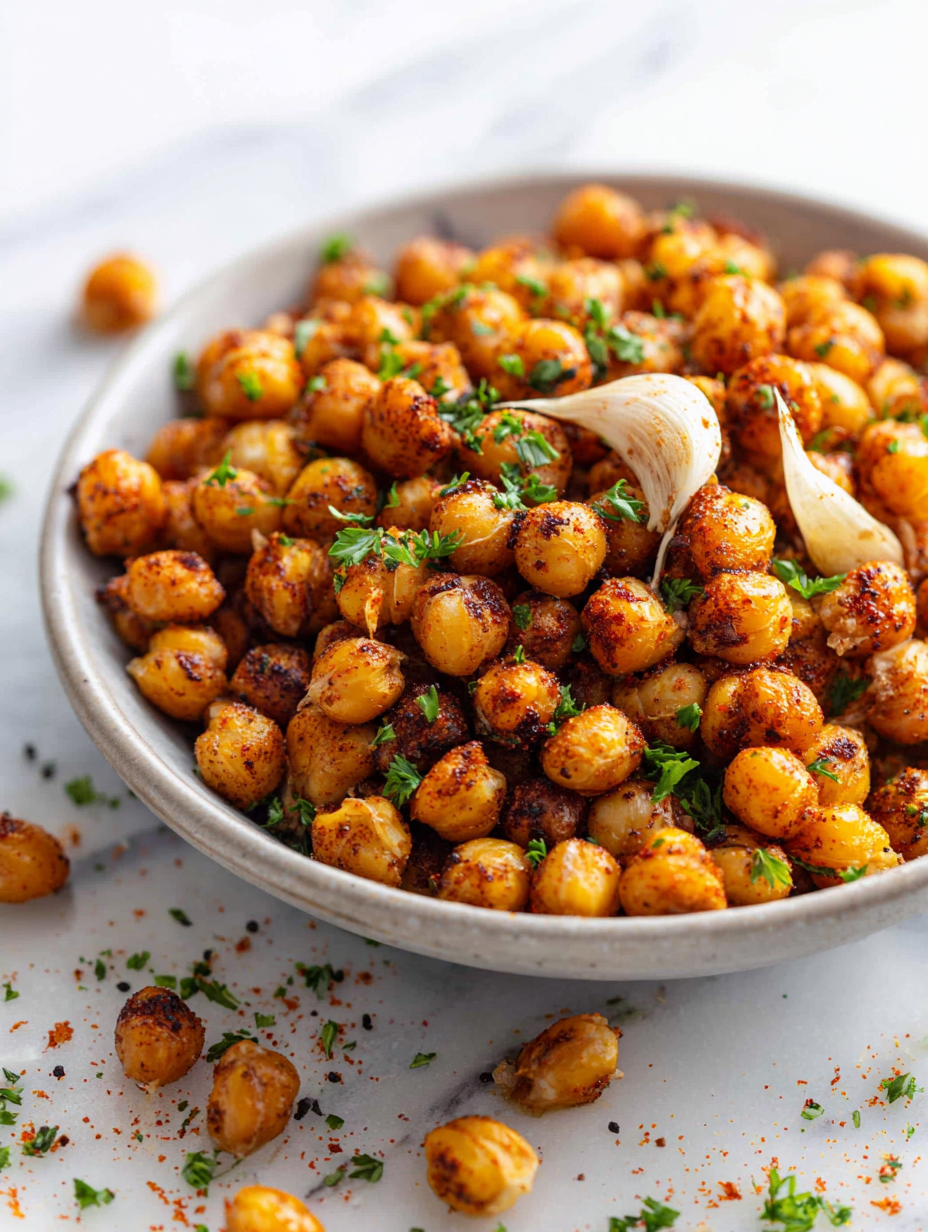
Focusing on the nostalgic comfort of childhood, I add a secret twist—roasted garlic and fresh herbs—to elevate traditional vegetable croquettes, making them feel both familiar and unexpectedly refined.
Rediscovering Childhood Comforts
- These croquettes remind me of lazy Sunday afternoons, crispy edges crunching under my fork, warm veggie filling spilling slightly when I bite in.
- I love how adding roasted garlic makes even the simplest vegetable mash feel like a treat—rich, fragrant, and just a little indulgent.
- There’s a quiet pride in turning leftover cooked vegetables into something so satisfying, especially when they turn out perfectly golden and crunchy.
- Every time I make these, I feel like I’m reclaiming childhood comfort food but with a grown-up twist that makes me smile.
- The smell of herbs and toasted breadcrumbs filling the kitchen as they fry is pure nostalgia, wrapped in a little kitchen chaos.
The inspiration behind these croquettes
- This recipe came from a kitchen chaos moment—leftover roasted vegetables, a tired mind, and a craving for something crispy and warm. I started mashing, mixing, and shaping them into little rounds, and suddenly, croquettes made sense again. It’s funny how something so unplanned can turn into a comfort food with just a bit of patience and a hot pan. Every batch reminds me that even the simplest ingredients, when treated with care, can become something worth sharing.
- Making these feels like reclaiming a messy Sunday afternoon—full of flavor, a little imperfect, but deeply satisfying. I love how the aroma of herbs and toasted breadcrumbs fills the kitchen, turning a humble snack into a moment of quiet joy. It’s my go-to when I want a quick, honest bite that’s honest and full of flavor, no fuss required.
- heading
- story_type
Historical & Cultural Nuggets
- Vegetable croquettes have roots in European peasant kitchens, where stretching humble vegetables with breadcrumbs created hearty bites.
- The concept of turning cooked vegetables into fried patties dates back to medieval times, evolving into various regional forms like the French croquettes and Spanish croquetas.
- In France, croquettes became popular as a way to use leftover cooked vegetables and meats, turning them into crispy, portable snacks.
- The term ‘croquette’ likely comes from the French word ‘croquer’, meaning to crunch or crack, referencing their crispy exterior.
- Modern variations often include secret ingredients like roasted garlic or fresh herbs, giving them a personal, nostalgic twist.
Key ingredients and tips
- Potatoes: I like starchy Russets—they get fluffy and help bind the croquettes. Swap with sweet potatoes for a sweeter, moister bite.
- Carrots: Grated carrots add a subtle sweetness and a pop of color. Use parsnips if you want a more earthy flavor.
- Onion: Finely chopped onion brings a gentle sharpness; sauté until golden to mellow it out. Shallots work well if you want a milder note.
- Herbs: Fresh parsley and thyme brighten up the mix with herbal freshness. Dried herbs can substitute, but use half the amount to avoid overpowering.
- Breadcrumbs: Panko gives a light, crispy coating; regular breadcrumbs work fine, but may be a touch denser. Toast them lightly for extra crunch.
- Eggs: They act as glue, making the croquettes hold together. For a vegan version, try softened tofu or a flaxseed slurry, but expect a different texture.
- Oil: Neutral oil like vegetable or sunflower is best for frying; it crisps without adding flavor. Use clarified butter if you want a richer, nutty aroma.
Spotlight on key ingredients
Potatoes & Carrots:
- Potatoes: I prefer starchy Russets—they become fluffy and help bind the croquettes. Swap with sweet potatoes for a sweeter, moister bite.
- Carrots: Grated carrots add subtle sweetness and vibrant color. Use parsnips as an earthy alternative if you like.
Notes for ingredient swaps
- Dairy-Free: Use vegan cheese or mashed avocado instead of cheese for creaminess, though it will alter the flavor slightly.
- Eggs: Replace with flaxseed slurry (1 tbsp ground flaxseed + 3 tbsp water) for binding, but expect a slightly denser texture.
- Breadcrumbs: Swap panko for crushed cornflakes for extra crunch and a slightly sweeter flavor.
- Vegetables: Use cooked zucchini or squash instead of carrots for a milder, moist bite.
- Herbs: Dried herbs like oregano or basil can replace fresh, but use half the amount to prevent overpowering.
- Oil: Use light flavored olive oil or coconut oil if preferred; note coconut oil will add a slight sweetness and aroma.
- Potatoes: Sweet potatoes can replace regular potatoes for a richer, sweeter flavor, but they make the mixture moister.
Equipment & Tools
- Medium mixing bowl: For combining the ingredients evenly.
- Large frying pan: For frying the croquettes until golden.
- Spatula: To turn and flip the croquettes during frying.
- Slotted spoon: To lift croquettes out of hot oil without excess splatter.
- Plate with paper towels: To drain excess oil and keep croquettes crispy.
Step-by-step guide to vegetable croquettes
- Equipment & Tools: Gather a medium mixing bowl, a large frying pan (about 25cm/10in), a spatula, a slotted spoon, and a plate lined with paper towels. The bowl is for mixing, the pan for frying, and the paper for draining excess oil.
- Prepare the vegetables: If starting with cooked veggies, mash them thoroughly in a bowl. Aim for a smooth, cohesive mash with no large chunks. If raw, grate or finely chop first, then cook in a little oil until tender and slightly caramelized, about 8 minutes.
- Mix the filling: Add grated cheese, chopped herbs, sautéed onion, roasted garlic, and a generous pinch of salt and pepper to the mash. Stir well until fully combined. If the mixture feels too loose, sprinkle in a little more breadcrumbs to help it hold shape.
- Shape the croquettes: Using about 2 tablespoons of mixture per piece, roll into small logs or rounds with your hands. Keep them roughly equal in size for even frying. Place on a tray or plate ready for coating.
- Prepare the coating: Set up two shallow dishes—one with beaten egg (or vegan alternative), another with seasoned panko breadcrumbs. Dip each croquette first into the egg, letting excess drip off, then coat thoroughly with breadcrumbs.
- Heat the oil: Pour enough neutral oil (vegetable or sunflower) into the frying pan to cover about 2cm/1 inch deep. Heat over medium-high heat (around 180°C/356°F). To test, a small piece of bread should sizzle immediately and turn golden in 30 seconds.
- Fry in batches: Carefully place croquettes into the hot oil, about 3-4 at a time. Fry for 3-4 minutes, turning occasionally, until golden brown and crispy. They should crackle gently and smell toasted.
- Drain and rest: Using a slotted spoon, transfer fried croquettes to the paper-lined plate. Rest for 2 minutes to let the crust set. Check for even coloring and crispness.
- Serve: Arrange on a platter, maybe with a squeeze of lemon or a dollop of herb yogurt. The croquettes should be crispy, fragrant, and just warm inside.
Let the croquettes rest on paper towels for a minute. Serve warm with your favorite dip or a squeeze of lemon. They’re best enjoyed immediately but can be kept warm in a low oven for 10 minutes.
How to Know It’s Done
- Croquettes are golden and crispy on the outside.
- They hold their shape without cracking or falling apart.
- Interior feels firm but tender, not runny or overly dense.

Vegetable Croquettes with Roasted Garlic and Herbs
Ingredients
Equipment
Method
- Gather a medium mixing bowl, a large frying pan, a spatula, a slotted spoon, and a paper towel-lined plate. Prepare your cooked mashed potatoes, grated carrots, sautéed onion, roasted garlic, and chopped herbs nearby.
- Add the mashed potatoes and grated carrots into the bowl and mix until well combined and smooth.
- Stir in the sautéed onion, mashed roasted garlic, and chopped herbs, ensuring everything is evenly distributed for a fragrant, colorful mash.
- If the mixture feels loose or too soft, sprinkle in a few tablespoons of panko breadcrumbs and fold until it holds together firmly enough to shape.
- Using about 2 tablespoons of the mixture, gently roll it between your palms to form small rounds or logs, placing each on a tray or plate for shaping.
- Set up two shallow dishes: one with the beaten egg and another with the toasted panko breadcrumbs. Dip each croquette into the egg, allowing excess to drip off, then coat thoroughly in the breadcrumbs.
- Heat enough neutral oil in a large frying pan over medium-high heat until it reaches about 180°C (356°F)—test by dropping a breadcrumb; it should sizzle immediately.
- Carefully place a few croquettes into the hot oil, frying in batches to avoid overcrowding. Cook for 3-4 minutes, turning gently with a spatula, until they are golden, crispy, and bubbling.
- Using a slotted spoon, transfer the fried croquettes onto the paper towel-lined plate to drain excess oil. Rest for a minute to set the crust and keep the croquettes crispy.
- Repeat with remaining croquettes, maintaining the oil temperature, until all are golden and crispy.
- Serve the croquettes warm, garnished with extra herbs if desired, alongside your favorite dip or a squeeze of lemon for added brightness.
Pro tips for perfect croquettes
- Bolded mini-head: Use a gentle touch when shaping croquettes to keep them compact and uniform.
- Bolded mini-head: Chill the mixture for at least 15 minutes—it helps prevent cracking during frying.
- Bolded mini-head: Maintain oil temperature around 180°C/356°F for crispy, not greasy, croquettes.
- Bolded mini-head: Coat croquettes thoroughly with breadcrumbs for a crunchy, golden exterior.
- Bolded mini-head: Turn croquettes gently and consistently to avoid breaking and ensure even browning.
- Bolded mini-head: Rest fried croquettes on paper towels for a minute to set the crust and drain excess oil.
- Bolded mini-head: Serve immediately for maximum crunch, but reheat in a hot oven if needed—crispness returns!
Common mistakes and how to fix them
- FORGOT to check oil temperature → Use a thermometer or test with a breadcrumb for perfect crispness.
- DUMPED mixture too early → Chill mixture for 15 minutes to firm up before shaping.
- OVER-TORCHED croquettes → Reduce heat slightly and turn frequently to prevent burning.
- MISSED resting time → Let fried croquettes sit 1-2 minutes to set the crust and avoid sogginess.
Quick kitchen fixes
- When mixture feels too loose, splash in a little more egg or breadcrumbs to firm it up.
- If croquettes crack during frying, patch with a tiny dab of egg wash and recoat with breadcrumbs.
- Splash a few drops of lemon juice if the croquettes taste flat or dull in flavor.
- Patch burnt spots on the croquettes with a quick sprinkle of fresh herbs or a squeeze of lemon.
- Shield delicate croquettes from splatter by lowering them gently into hot oil, and rescue with a slotted spoon if they stick or burn.
Prep, store, and reheat tips
- Prepare the vegetable mash and shape the croquettes a day in advance; keep covered in the fridge for up to 24 hours. The flavors deepen overnight, and they firm up slightly, making frying easier.
- Store cooked, cooled croquettes in an airtight container in the fridge for up to 2 days. Reheat in a hot oven or air fryer until crispy—listen for the crackle and smell that toasty aroma.
- Fried croquettes freeze well for up to a month. Arrange on a baking sheet, freeze until firm, then transfer to a bag. Reheat directly in a hot oven from frozen, adding a few extra minutes for crispness.
- Reheating can soften the crust temporarily. To restore crunch, broil for a minute or two, watching carefully until they shimmer with a golden sheen and smell toasted.
Top Questions About Vegetable Croquettes
1. Can I use raw vegetables in croquettes?
Use cooked, mashed vegetables like potatoes and carrots for a smooth, cohesive filling. Raw veggies should be cooked first to soften and release moisture.
2. Can I freeze vegetable croquettes?
Yes, you can freeze uncooked croquettes on a tray, then transfer to a bag. Fry directly from frozen, adding a minute or two to cooking time.
3. What breadcrumbs should I use?
Use panko breadcrumbs for a light, crispy crust. Regular breadcrumbs work but may turn out denser and less crunchy.
4. Can I substitute potatoes with sweet potatoes?
Cooked, drained, and mashed potatoes are best. Sweet potatoes add sweetness, but may require a little extra flour or breadcrumbs to bind.
5. How hot should the oil be?
Fry in neutral oil like vegetable or sunflower at about 180°C (356°F). Use a thermometer or test with a breadcrumb for perfect heat.
6. How do I shape croquettes?
Shape croquettes with your hands into small logs or rounds, about 2 tbsp of mixture each, for even frying.
7. How do I know when croquettes are done?
They should be golden, crispy on the outside, and hold together without cracking. The interior should be firm but tender.
8. Can I use dried herbs instead of fresh?
Use fresh herbs like parsley and thyme for bright flavor. Dried herbs can be used but in smaller amounts to avoid overpowering.
9. Why do my croquettes turn soggy?
Overfilling the pan causes uneven cooking. Fry in small batches to maintain oil temperature and crispness.
10. Should the mixture be chilled before frying?
Ensure the mixture is chilled for 15 minutes before shaping. This helps prevent cracking during frying and makes shaping easier.
These vegetable croquettes are a little hug from my childhood, crispy and warm, with that faint aroma of herbs and toasted breadcrumbs lingering long after the plate is empty. They’re honest, imperfect, and deeply satisfying—a reminder that simple ingredients, treated with care, can turn into something memorable.
Whenever I make them, I feel a quiet connection to the past, a small act of creating comfort in the chaos of everyday life. They’re perfect for sharing or just sneaking a few bites on your own, especially when you need a quick, honest bite that brings a little joy.

Hi, I’m Lily Hayes, the cook, writer, and heart behind Loving This Process. This blog is built on a simple idea that food is not just about the final dish, but about everything that happens while you’re making it. The thinking, the tasting, the adjusting, the learning, and the quiet moments in between. Food has been a constant presence in my life, not as something flashy or perfect, but as something deeply grounding. Cooking has always felt like a process worth savoring, even when it’s messy, slow, or imperfect.


Leave a Reply